Copyright 2021
Tidewater Woodworking President: Fran Foster, Vice President: Greg Guertin, Treasurer: Chris Zuchristian, Secretary: Larry Larue
  |
||||
| Web Links | At the Meeting | Last Meeting Notes | Tip of the Month | Editors Notes |
|---|---|---|---|---|
What's In The Newsletter?
|
||||
Presidents Report ...The pandemic we are still experiencing continues to have an impact on organizations such as our guild. For a long time, we, just like other groups, only met virtually. Was this as good as meeting in person and having the ability to see others? No, but it did fill a void that at least allowed us to continue to stay in touch. When we did start coming back in person, we had to also provide a virtual option for those who were not ready to come back. Even though we provided several ways to attend, the number of members that attended, virtually and in person, was considerably lower than the pre-pandemic meetings. Our guild is not alone in seeing an impact on attendance. Most organizations have experienced the same thing. But we are a resilient group and have continued to communicate both in emails and our newsletter. This has at least kept us in touch with each other. We are a group of dedicated woodworkers, frequently called flat boarders, by our friends in the turners. We have not let the pandemic eliminate our love of getting in the shop and making sawdust. We will be able to come back to normal operations sometime in the future and until that time we will have to accept the impact of COVID. This email address is being protected from spambots. You need JavaScript enabled to view it. Fran Foster President TWWWG |
||||
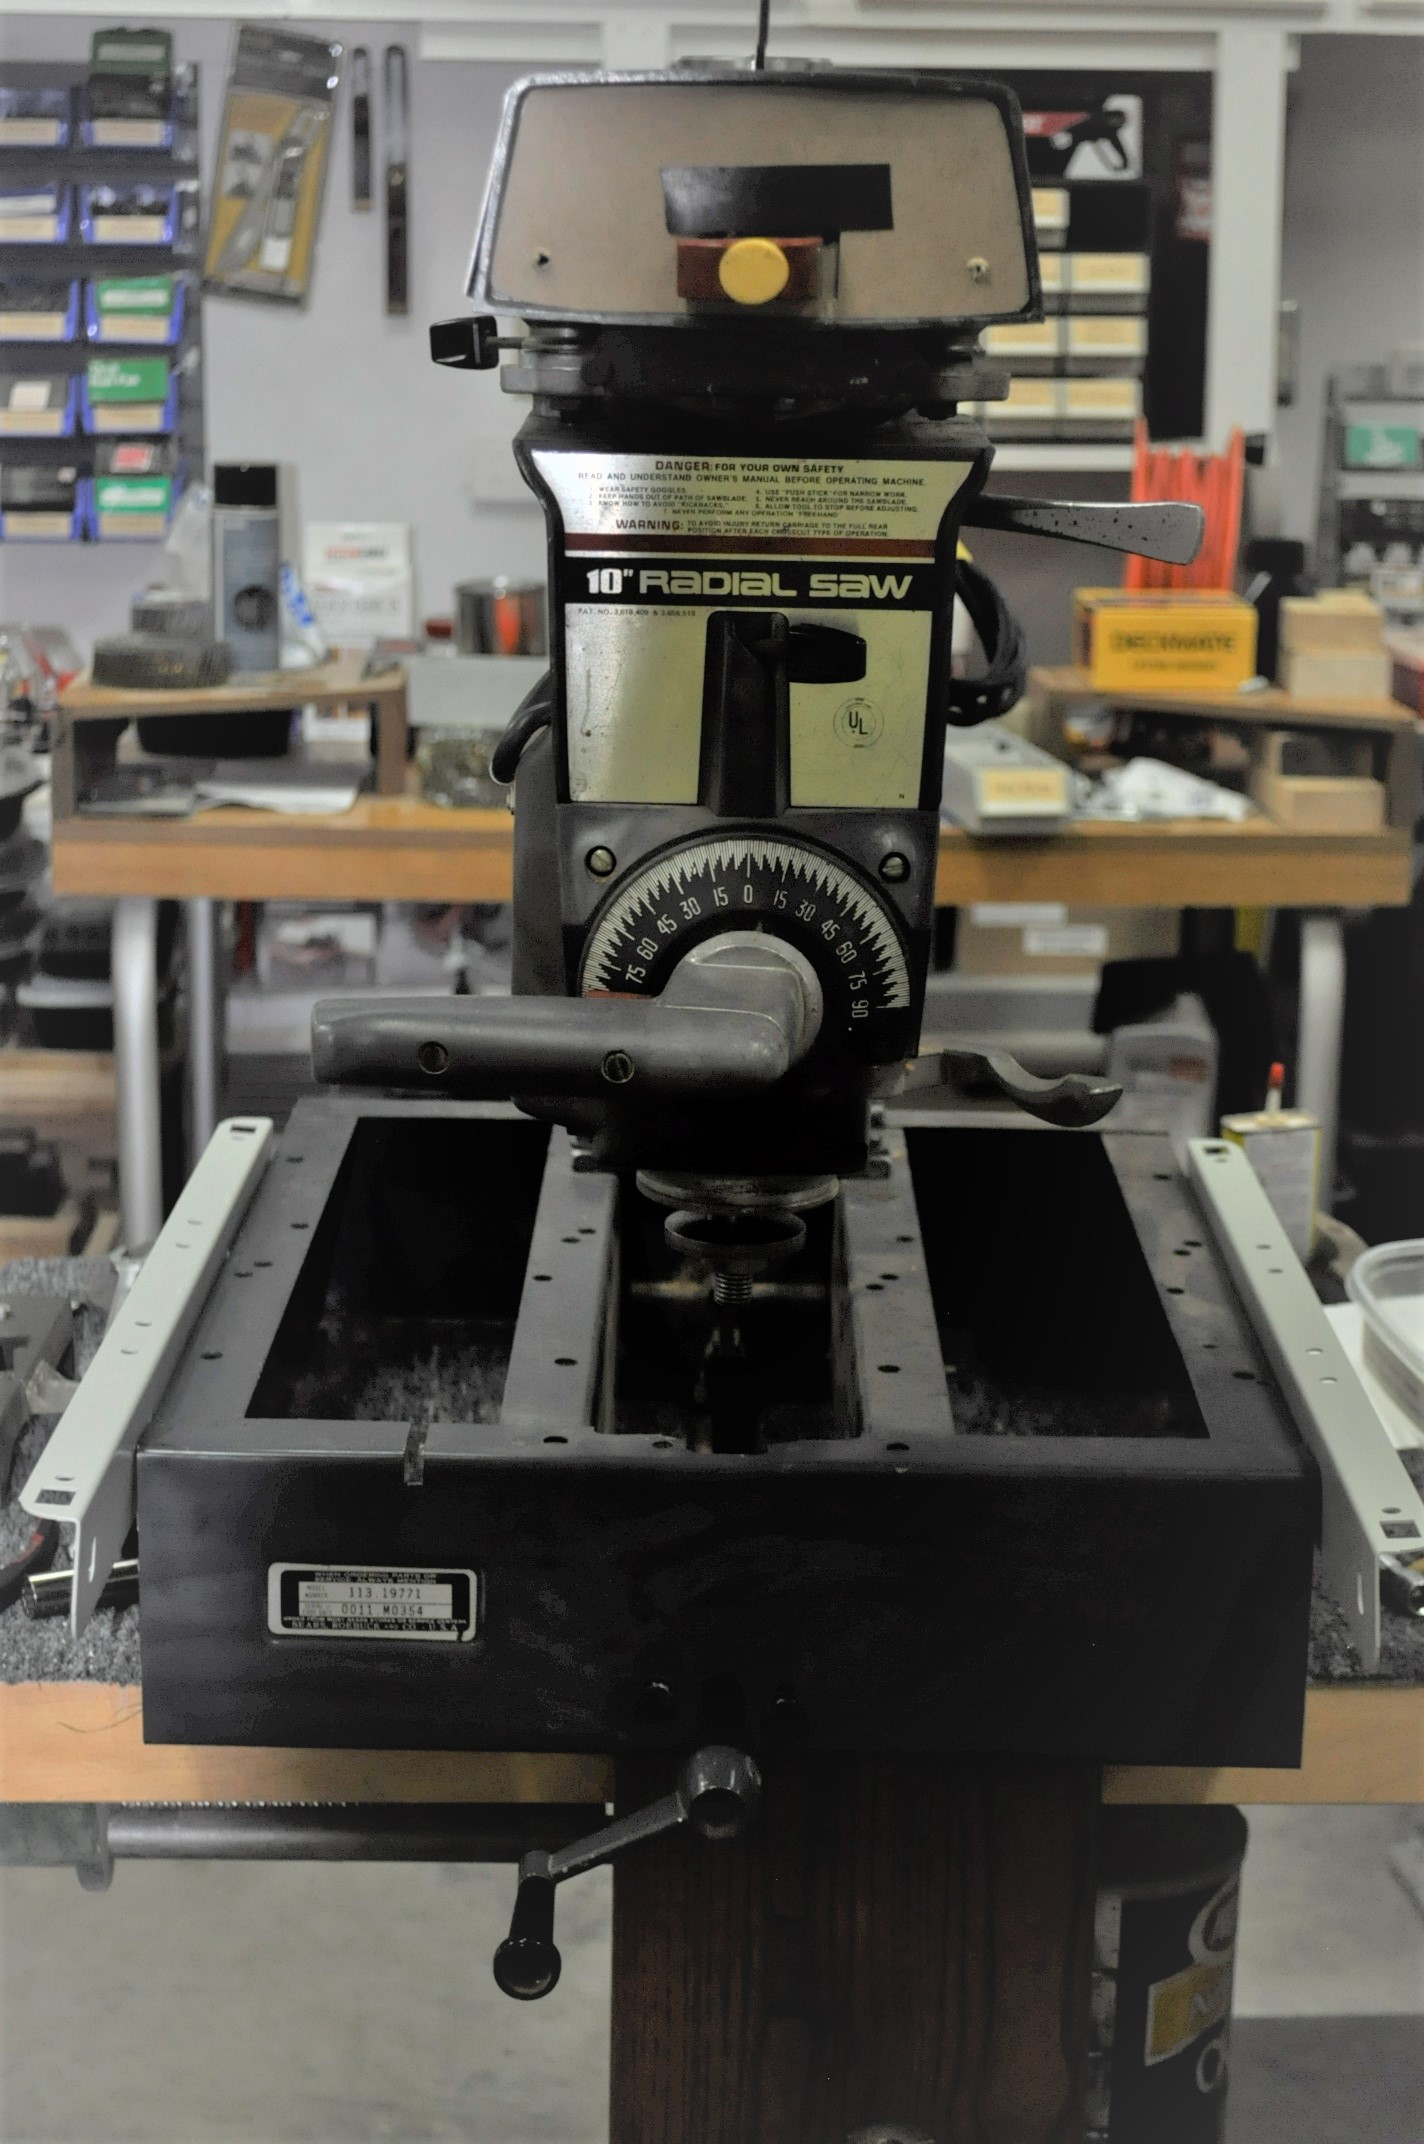
Restoring Old Craftsman Radial Arm SawSomewhere back in either 2010 or 2011 a friend of mine was closing out his shop and he offered me this Craftsman radial arm saw free of charge. It was missing the table top, it was a filthy mess and the blade guard was missing but it did work so I took it. I later found out that there was a federal law suit going on with Sears about the safety requirements on radial arm saws. After doing some checking on the saw I saw it was on the recall list and applied for the safety upgrade. The safety upgrade kit arrived in early November of 2011 but I did not have time to work on the saw so the saw and the safety upgrade kit were relegated to the attic for storage. Not sure how I ever got the saw up the stairs and into the attic as it weighs a ton! They used a lot of steel and cast iron back in the days this saw was manufactured by the Emerson Tool Company of St. Louis.
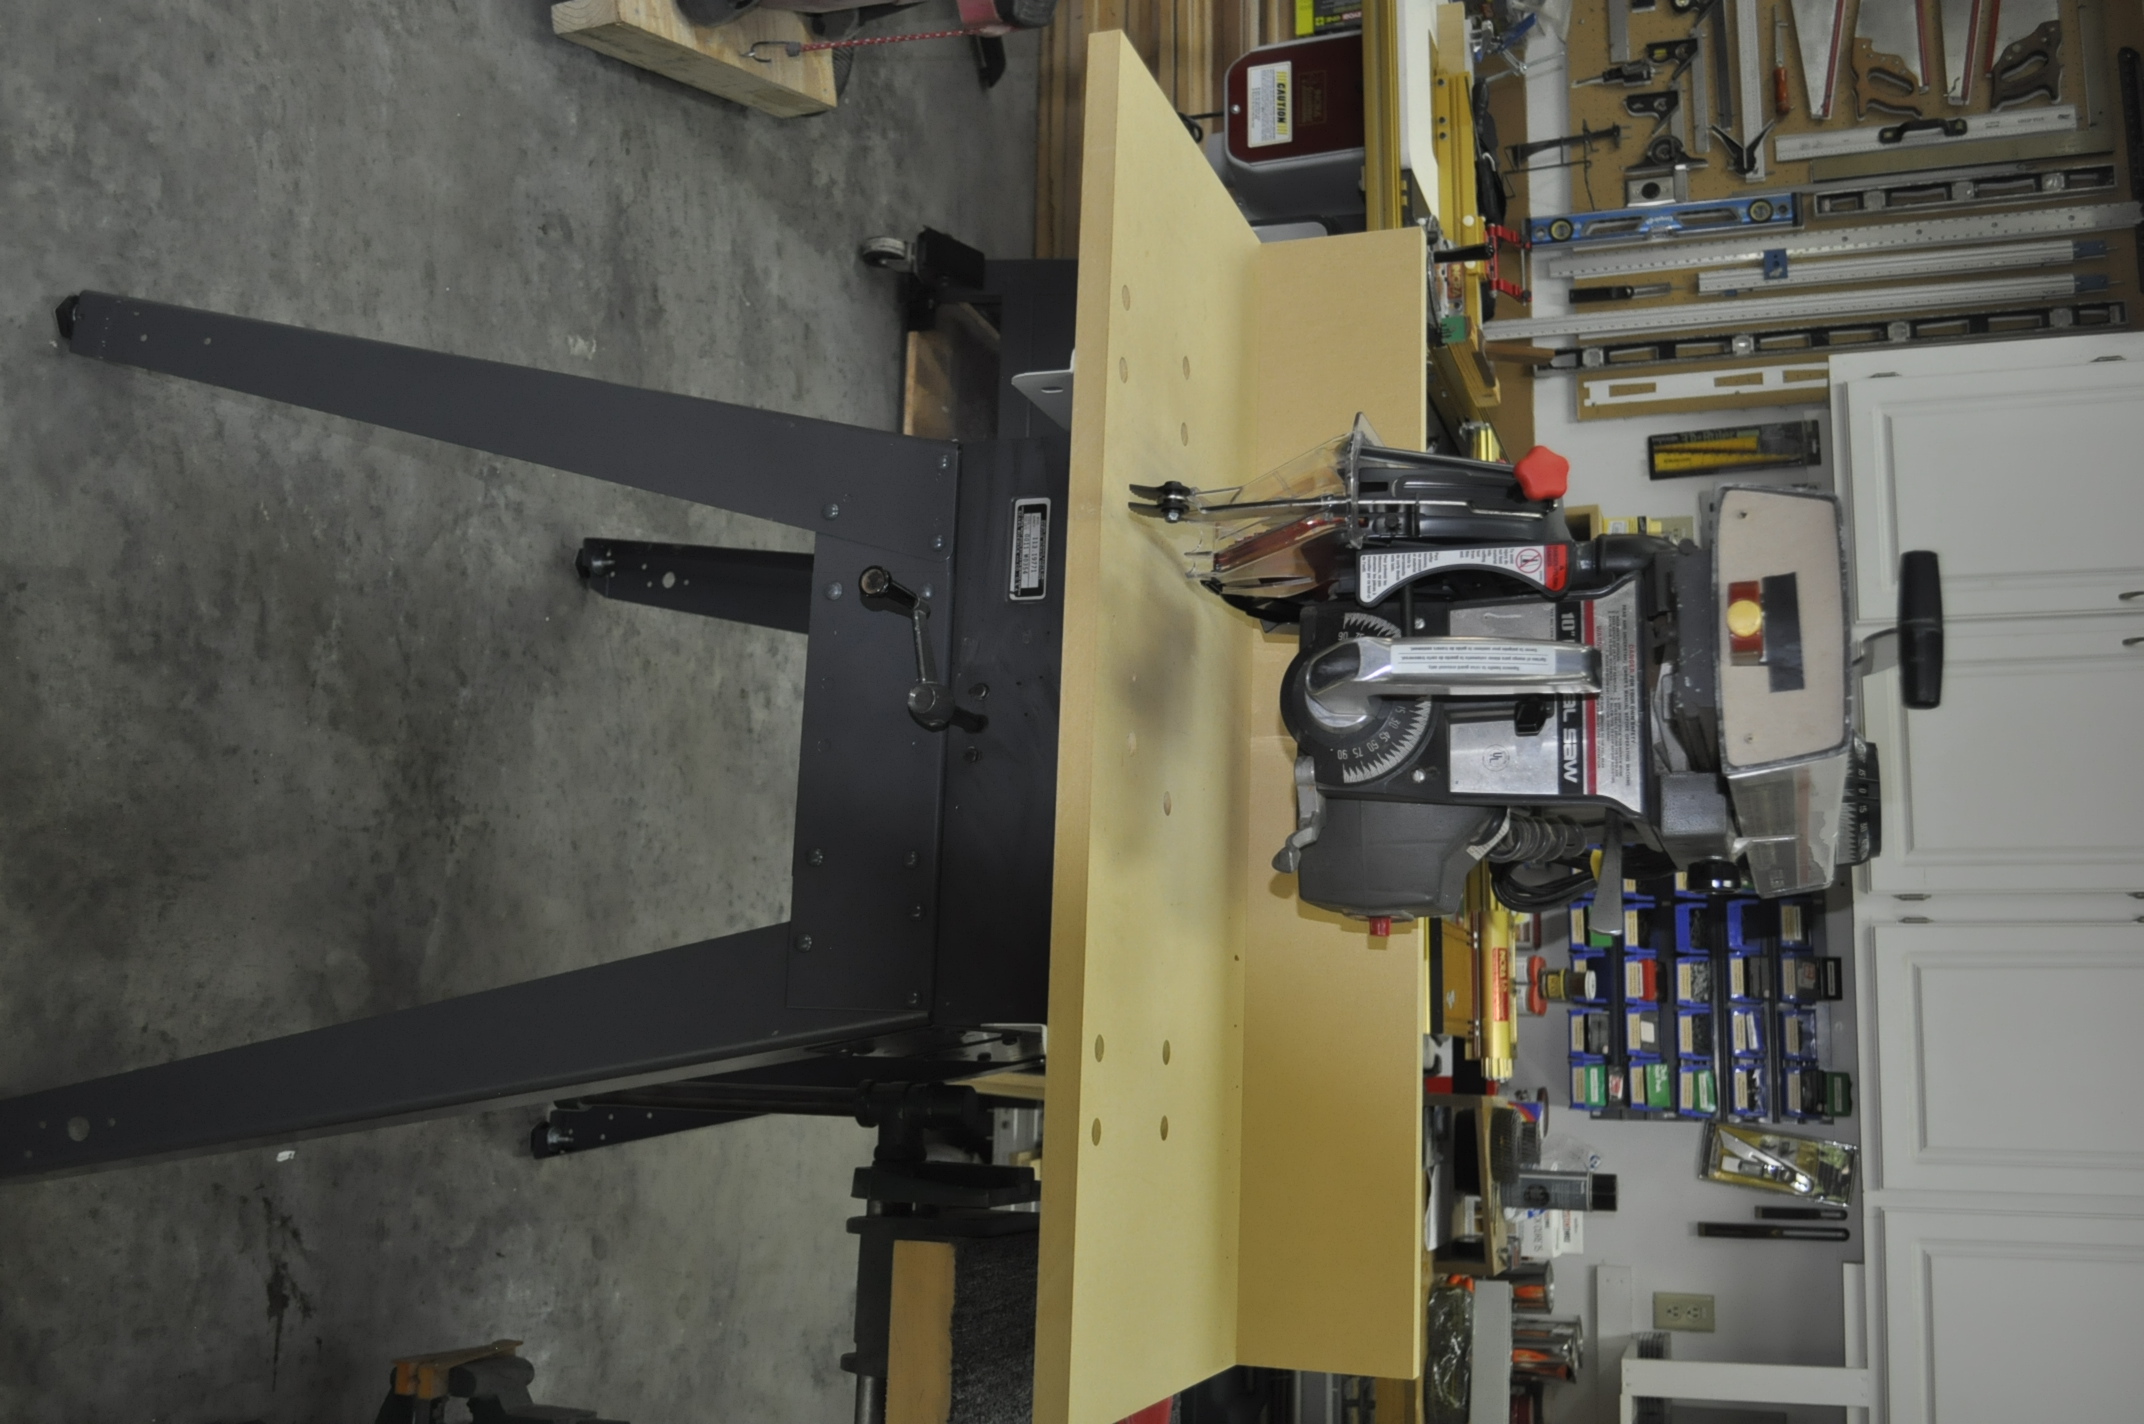
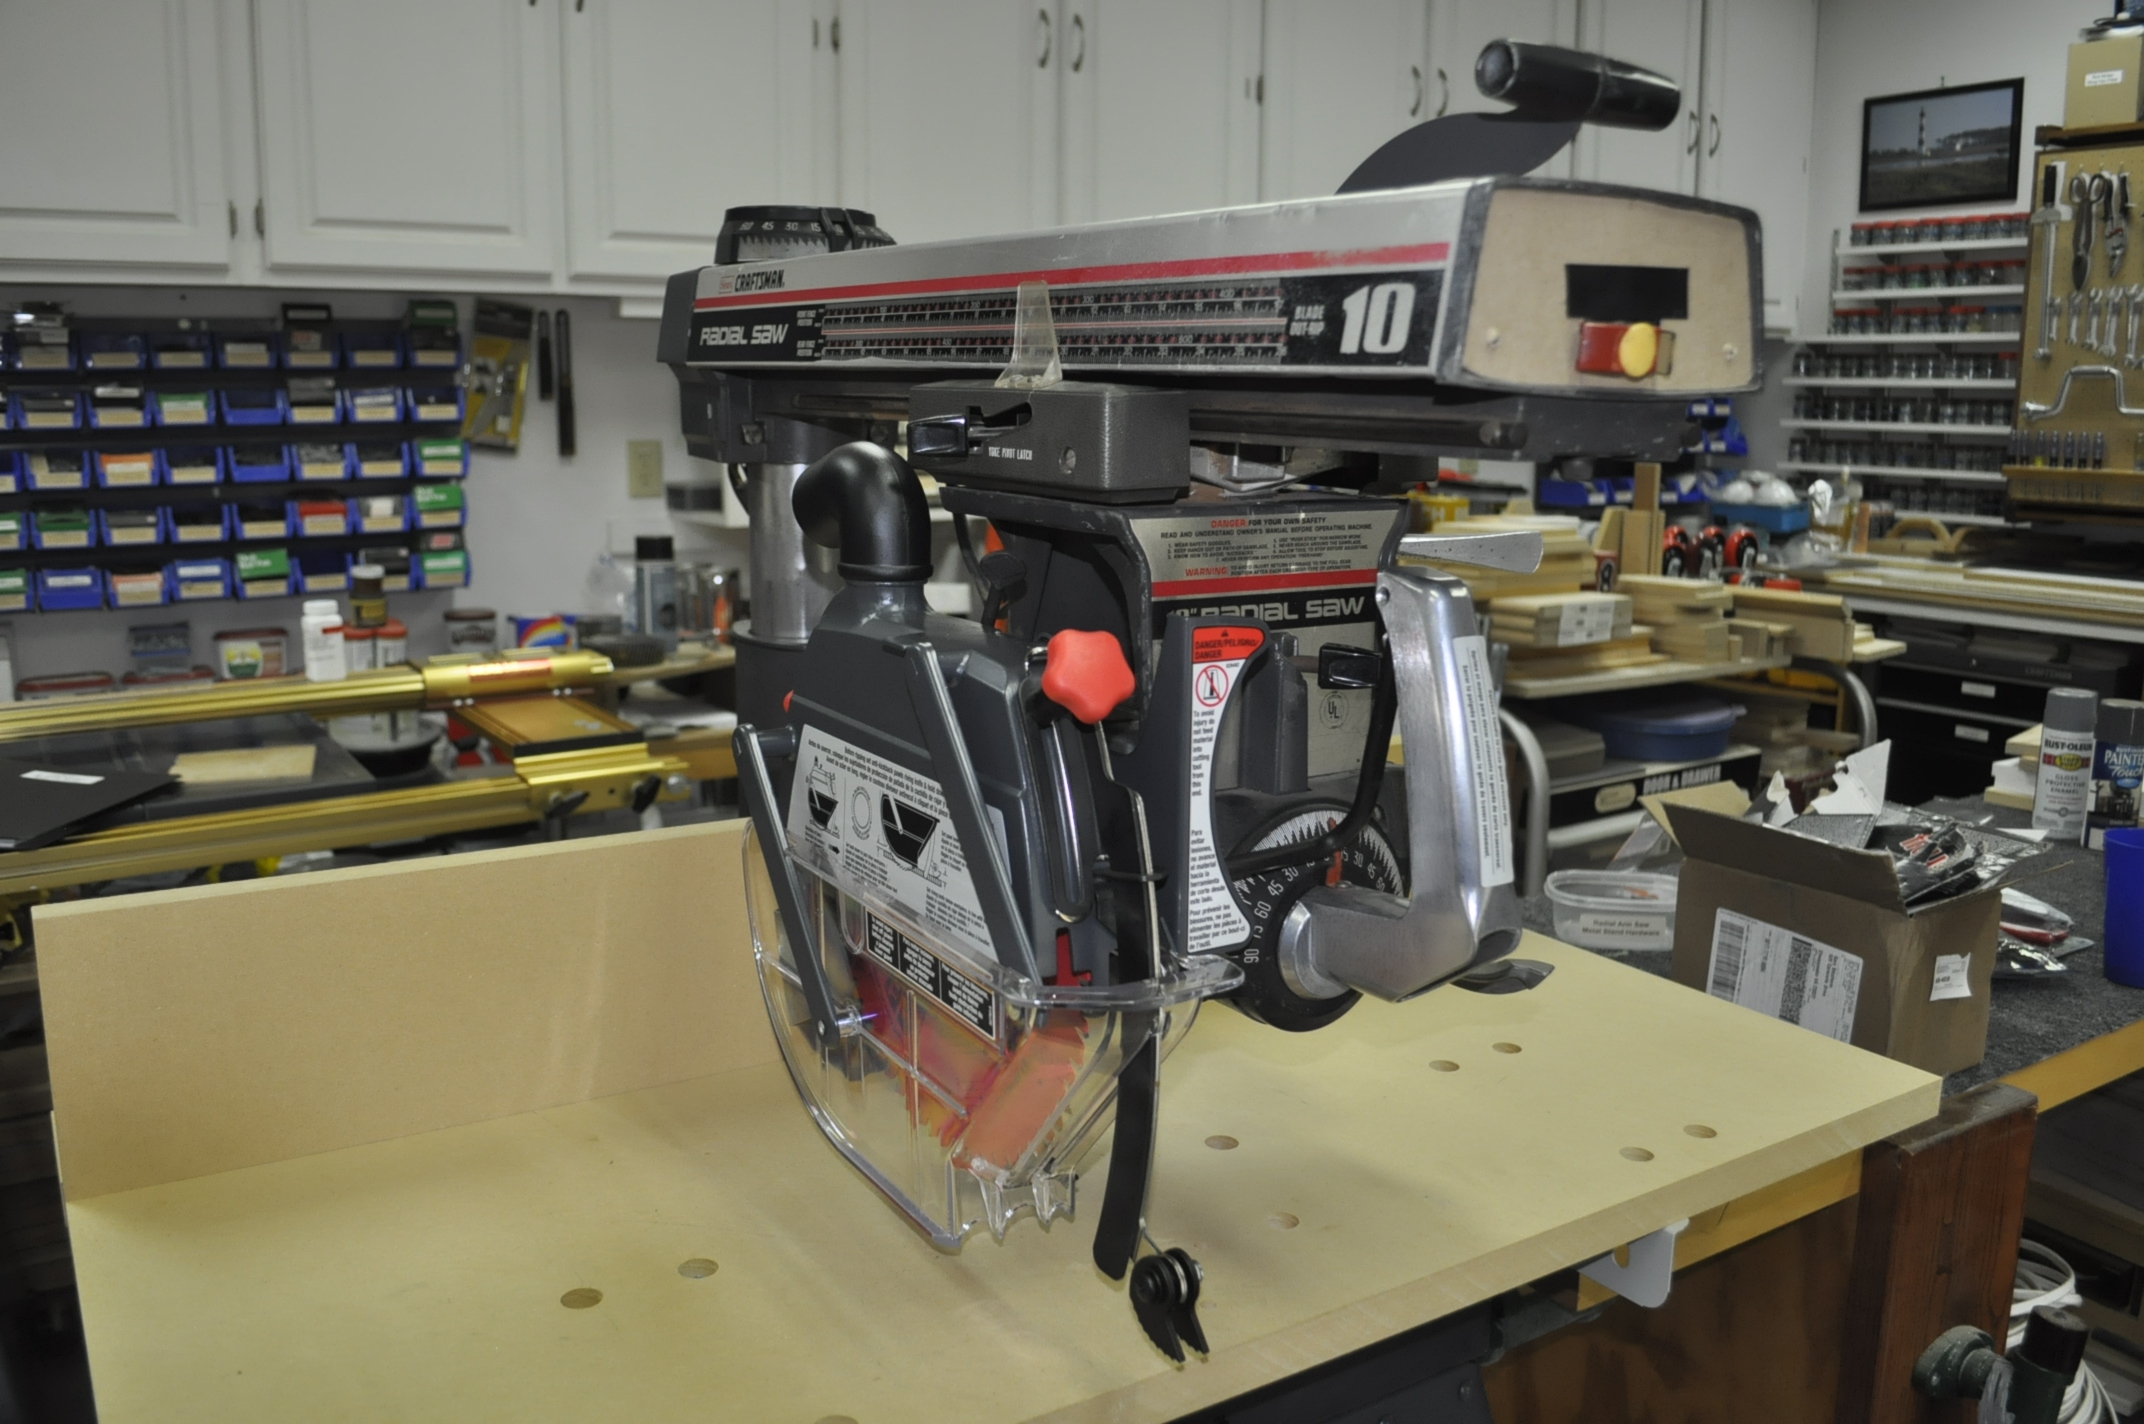
Craftsman Radial Arm Saw Before Restoration Fast forward 10 years and I finally got the saw and the safety upgrade package out of the attic and into my shop for refurbishment. First job was cleaning up the saw from years of use and neglect. The steel rod that moves the saw up and down had some rust but it came off very nicely and the cylinder was not pitted. The next big issue to tackle was that the arm would not rotate out of the 90 degree position and that led me into the inner workings of how the saw works. It was a real learning curve. After opening up the inner workings of the saw I saw it was full of saw dust and resin pitch from cutting lumber. The reason the arm would not rotate was due to the fact that the saw dust and resin had hardened over time into the consistency of cement! Took a lot of scraping and polishing but the effort paid off and the arm now rotates freely in both directions. After many trips to the hardware store for nuts, bolts, paint and other hardware I had the saw and saw stand back in prime shape. Now for the safety upgrade. The upgrade kit came with a new instruction manual of 47 pages, an addendum to the new instruction manual in many languages and with the 43 page manual that I had already down loaded I was ready to start. The problem was that the information was not totally clear on how the upgrade was to proceed and I did not know that you were supposed to save all of the hardware off of the old table saw top (mine was missing when I was given the saw). The other part of the problem was that this upgrade path fit 11 different model numbers so there were lots of extra holes in the table saw top that were irrelevant to my saw upgrade. Confused I went to my old standby, You Tube. Sure enough there was a 55 minute video of this gentleman describing the upgrade process on his saw. This video really helped and I watched it many times to get clarification when I became stuck on the upgrade process. The new top was installed, leveled left to right and front to back. It was time to move on to the fancy new blade guard system. After another learning curve on the blade guard housing I had it on but there was a big problem. The motor shaft which holds the blade was inaccessible because it was now under the blade guard. After many hours of trying different things to do with the blade guard I went back to the video and watched this operation all over again. When this gentleman explained the guard mounting he did not have a saw blade mounted to his saw and one of the steps he did in the video got in my way. Not to fear, I went back to You Tube to look for another video about this problem but found no answers to my problem. Google was my next choice but Google struck out also so it was back to the shop and start the learning all over again. I went back to the manual to take another look at the blade guard installation and something caught my attention about how this was to be accomplished. It turns out that the addendum for installing the blade guard is different from the new instruction manual!!!! For this to work you first install the saw blade and then slip the new blade guard over the saw blade! The only problem was the piece of plastic that I had installed earlier from watching the You Tube video made this impossible. After looking at this for a while I discovered that the plastic piece could be taken out, the guard slipped over the blade and then reinstalled. Success. After getting the new blade guard system installed the rest of the safety upgrade went very smoothly and now it was time for a drink or two.
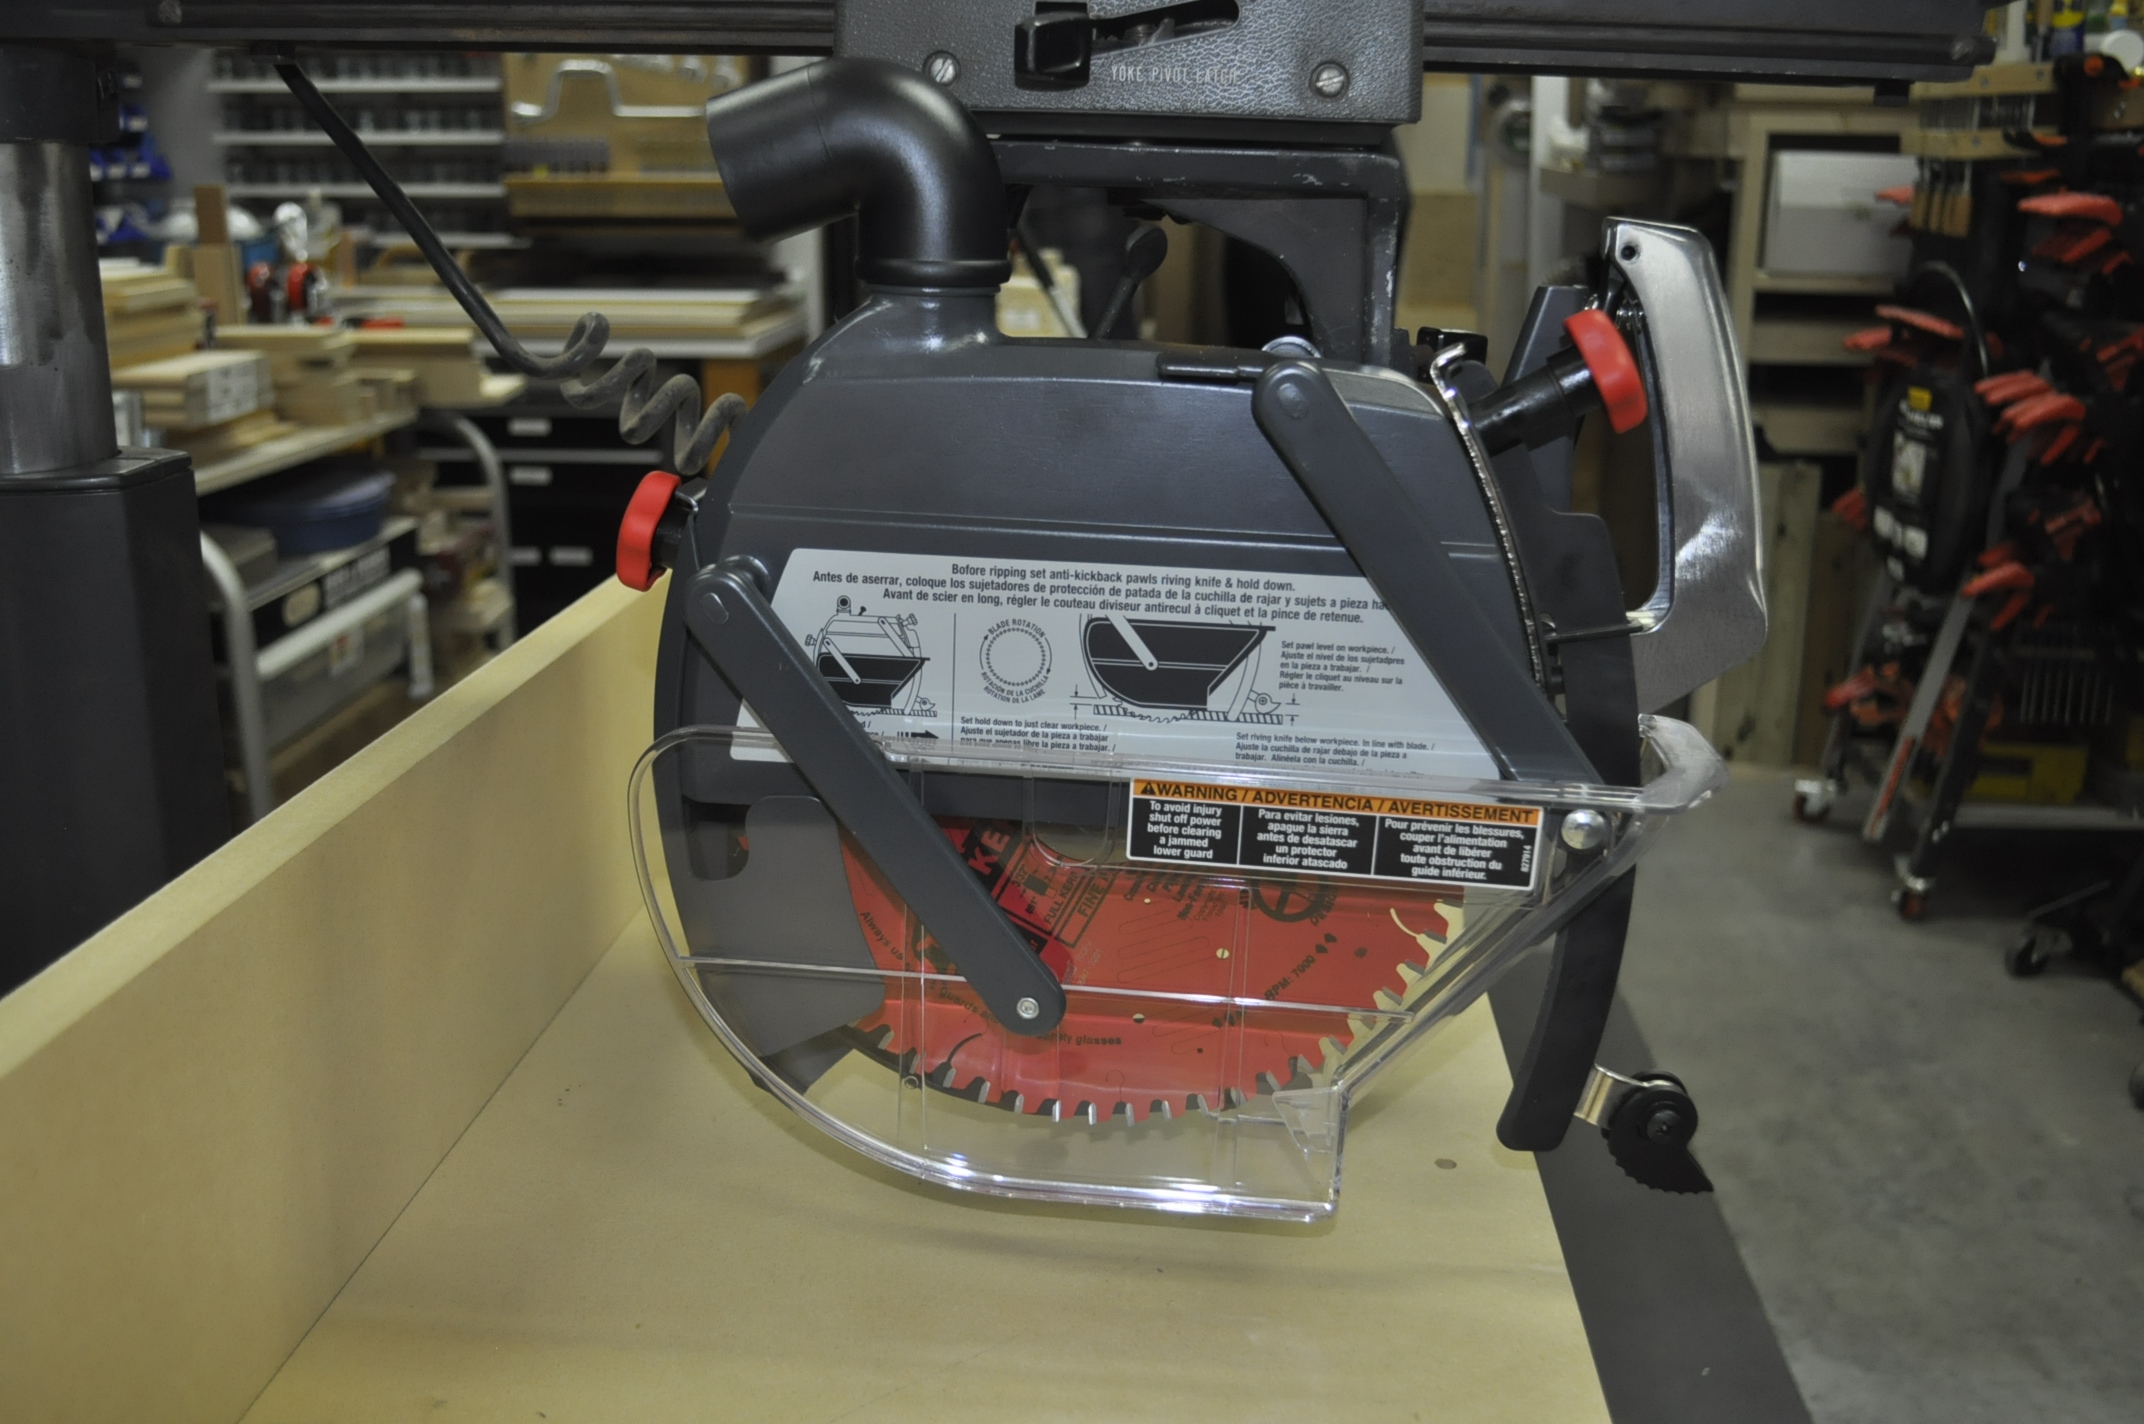
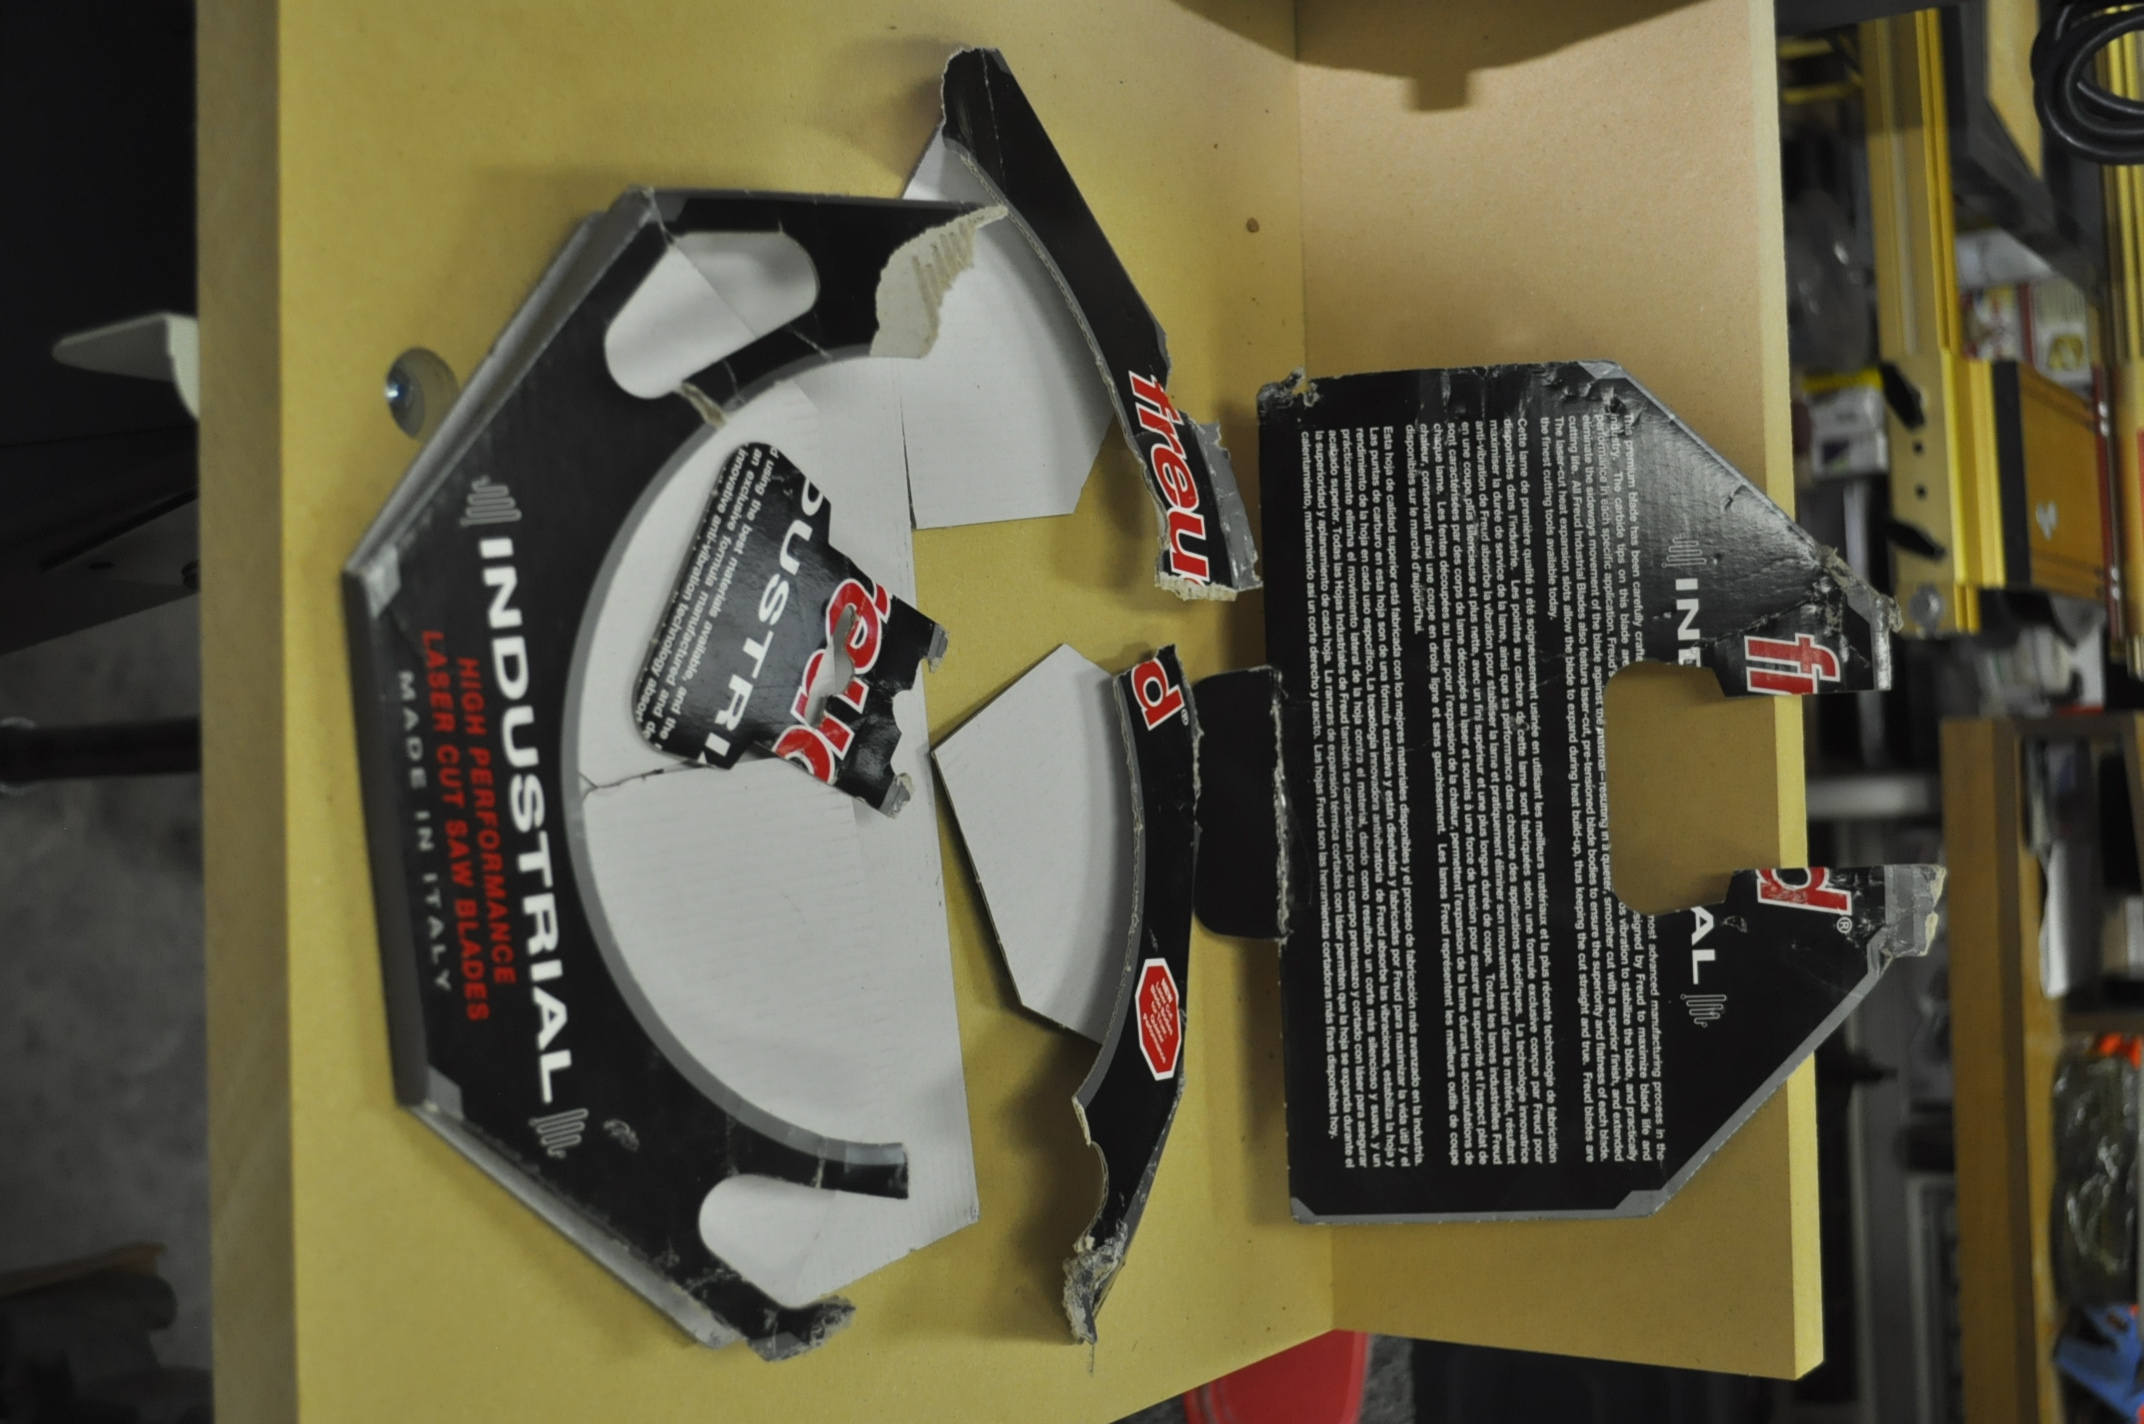
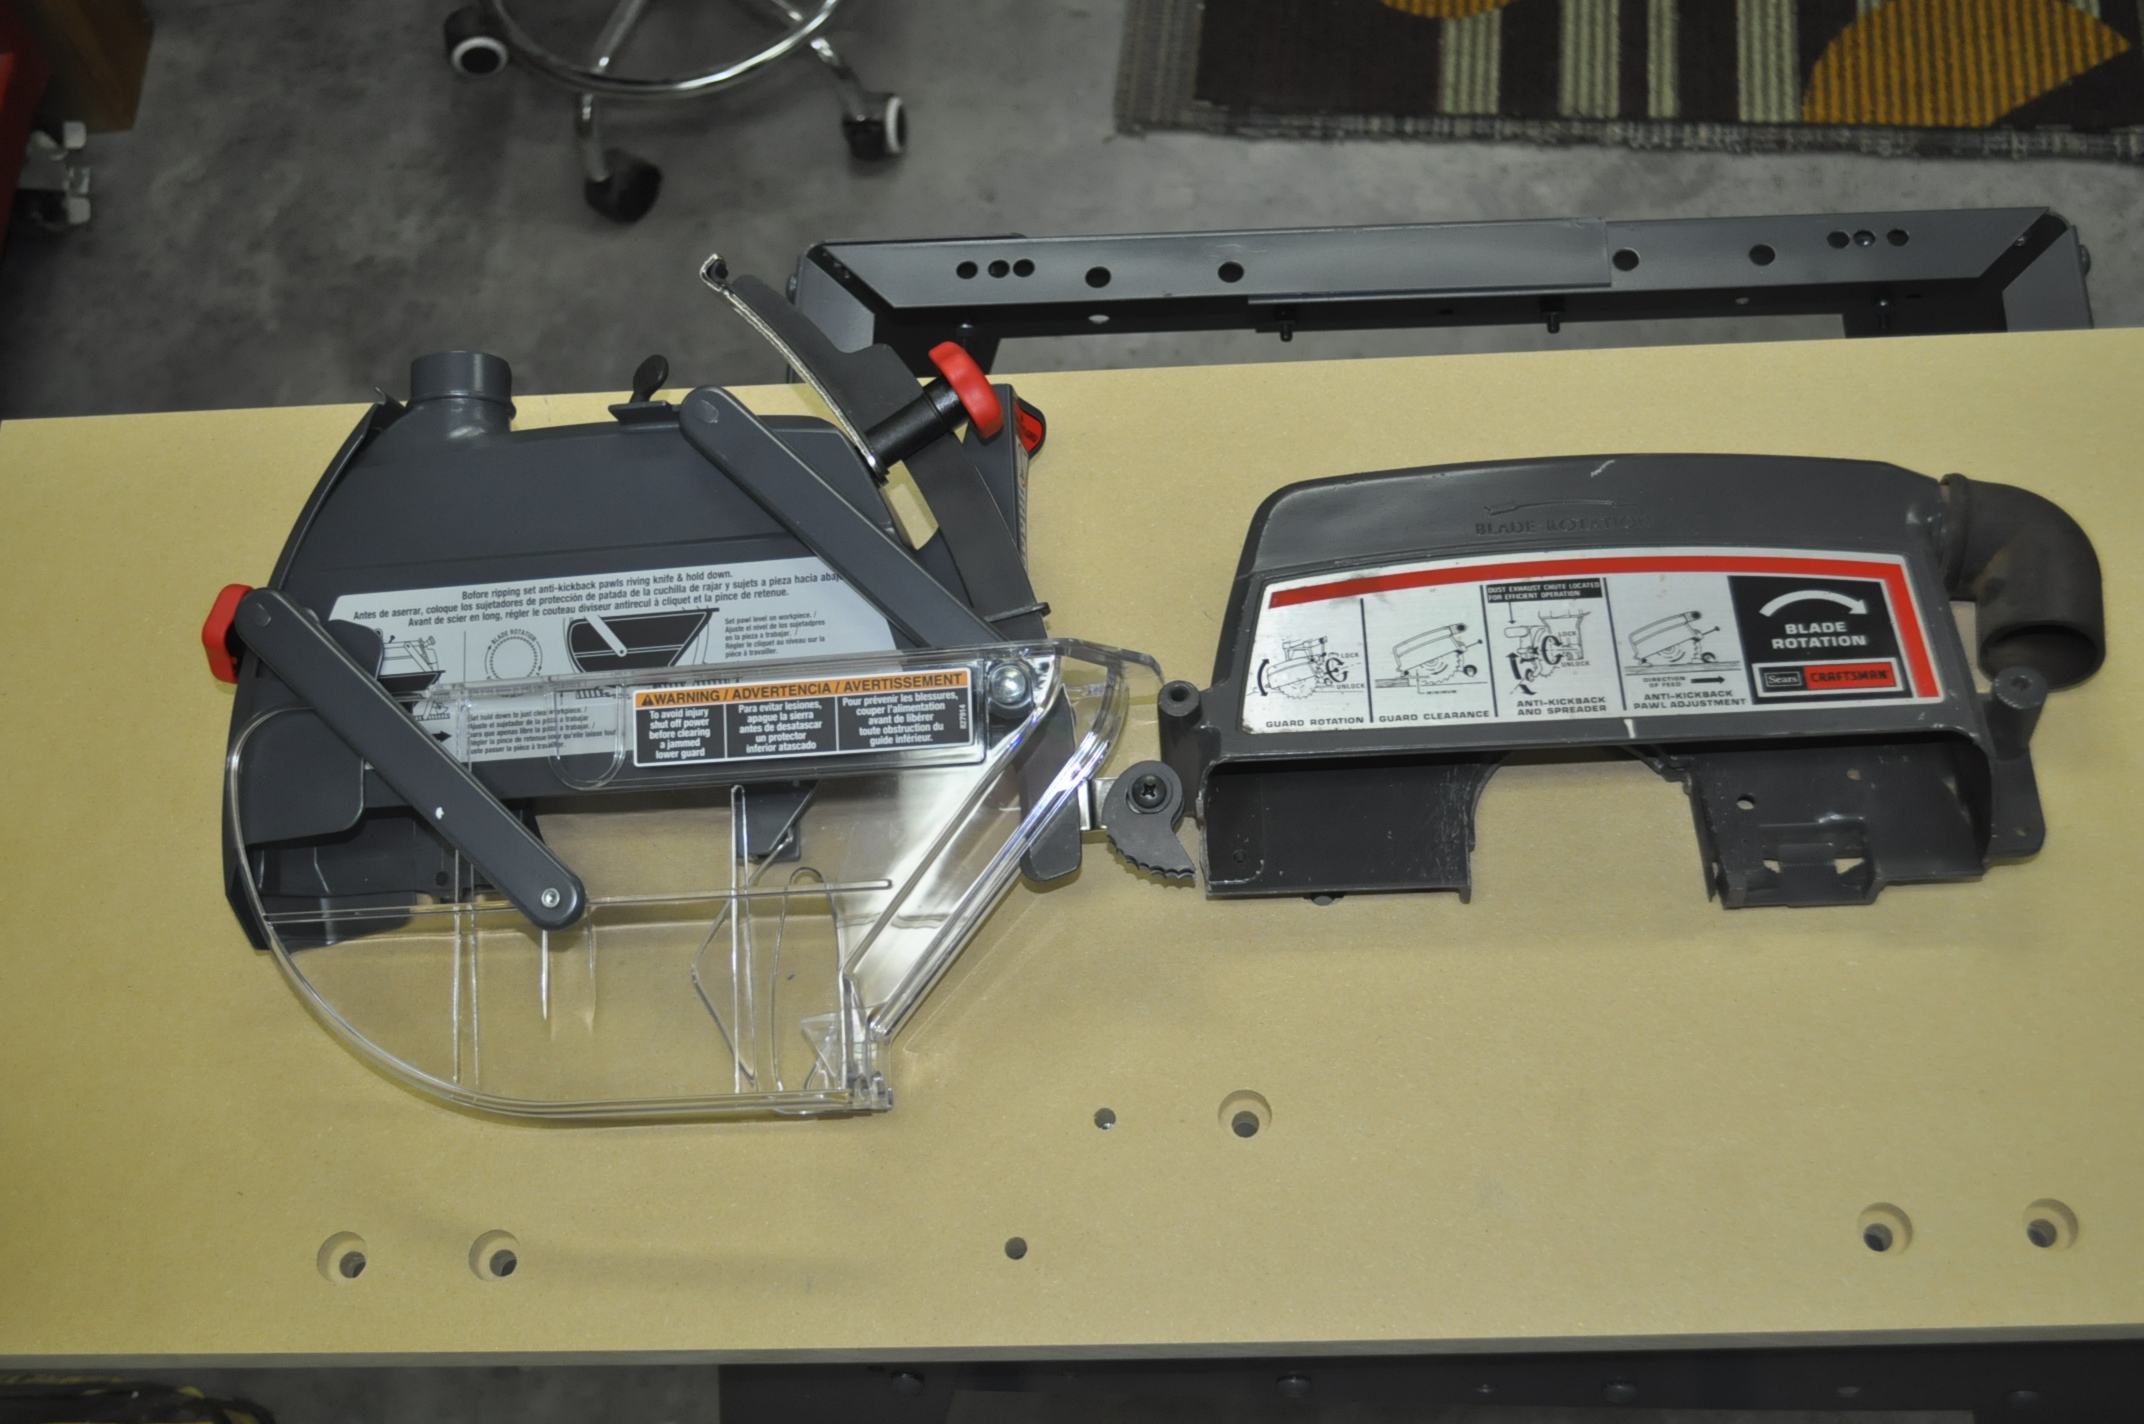
Craftsman Radial Arm Saw Photos After Restoration Craftsman Radial Arm Saw Photos After Restoration One of the big complaints about radial arm saws was that they were dangerous, particularly because of saw blade technology and the way the saw cuts. They had a tendency to grab the wood and actually climb over the piece of wood that was being cut. Very scary. During the upgrade process I replaced the saw blade that was on the radial arm saw with a newer more modern design designed for sliding compound saws and radial arm saws. I chose a Freud 60 tooth10” saw blade with alternate tooth bevel grind and a negative 5 degree hook angle. This 5 degree negative hook angle helps prevent the blade from being too aggressive and pushes the work piece down and towards the fence. It is a thin kerf blade and removes less material that standard thick kerf carbide blades. One of the scariest thing about this blade happened a few days ago. This is an expensive blade running about $85. It was a special order from Woodcraft sometime back and I had it sitting on our kitchen island top and though nothing about getting it out to the shop until I was ready for its installation. Anyway, a few day ago I took my wife to the laser vision center for her cataract surgery consultation. Because they dilated her eyes I drove her over to the center and then went back home. I was only gone about 20 minute’s total. When I got home I found our face masks that we hang on the refrigerator all over the floor, papers and a notebook that were on the island were now on the floor and the remains of the box and packing material of the new, never opened Freud saw blade all over the kitchen floor and family room! All I could think was that Smokey, the Boxer dog had just ruined an $85 dollar saw blade. I finally found the saw blade in the family room and even though it had fallen about 40 inches from the island counter top onto the ceramic tile floor it looked undamaged. I think the box the saw blade came in took the brunt of the fall. Saw Blade Package After Smokey The Boxer Ate It! Another thing I like about the upgrade package to the blade guard is the new dust port. If you look at the pictures below you can see that the dust port on the old blade guard came out right in front of the blade and in your face! The new blade guard dust port takes the dust out the back and away from your face.
Dust Port Differences - New Blade Guard On Left, Old Blade Guard On Right While I enjoyed bringing this old saw back to life it is for sale if anyone is interested. I do not have room in my shop for any more equipment. Not planning on making a profit on the sale of this saw which is what I have in it for materials. The saw is for sale for $150, what I have in it and most of that $150 goes toward the $85 saw blade. If interested please contact Gary Stephens at This email address is being protected from spambots. You need JavaScript enabled to view it.. Gary Stephens |
||||
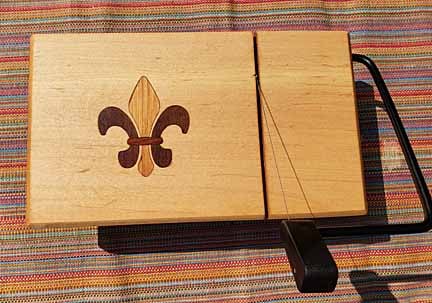
Guild Woodworking ProjectsOur first project comes from Karl Bogot. Project 11 for the year is another slicer, this one with an inlaid Fleur de Lis in 3 different woods. This is a 'large' board, 5.75" wide by 10" long" and treated with food safe mineral oil and bees wax. This board is available for sale at $35.
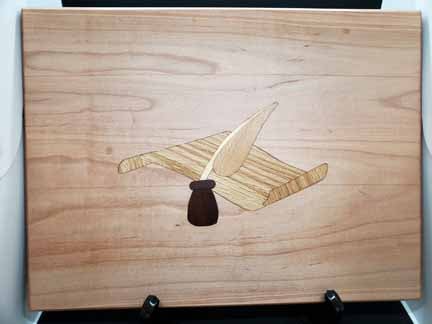
Karl's second Project 21-12 is a completely original design and execution of a scroll and quill inlay on a maple board 11 x 15 x 7/8. There are seven inlays in four different woods. This is a router template project similar to the Multi-Layer Inlay System, but I made the templates for this one.
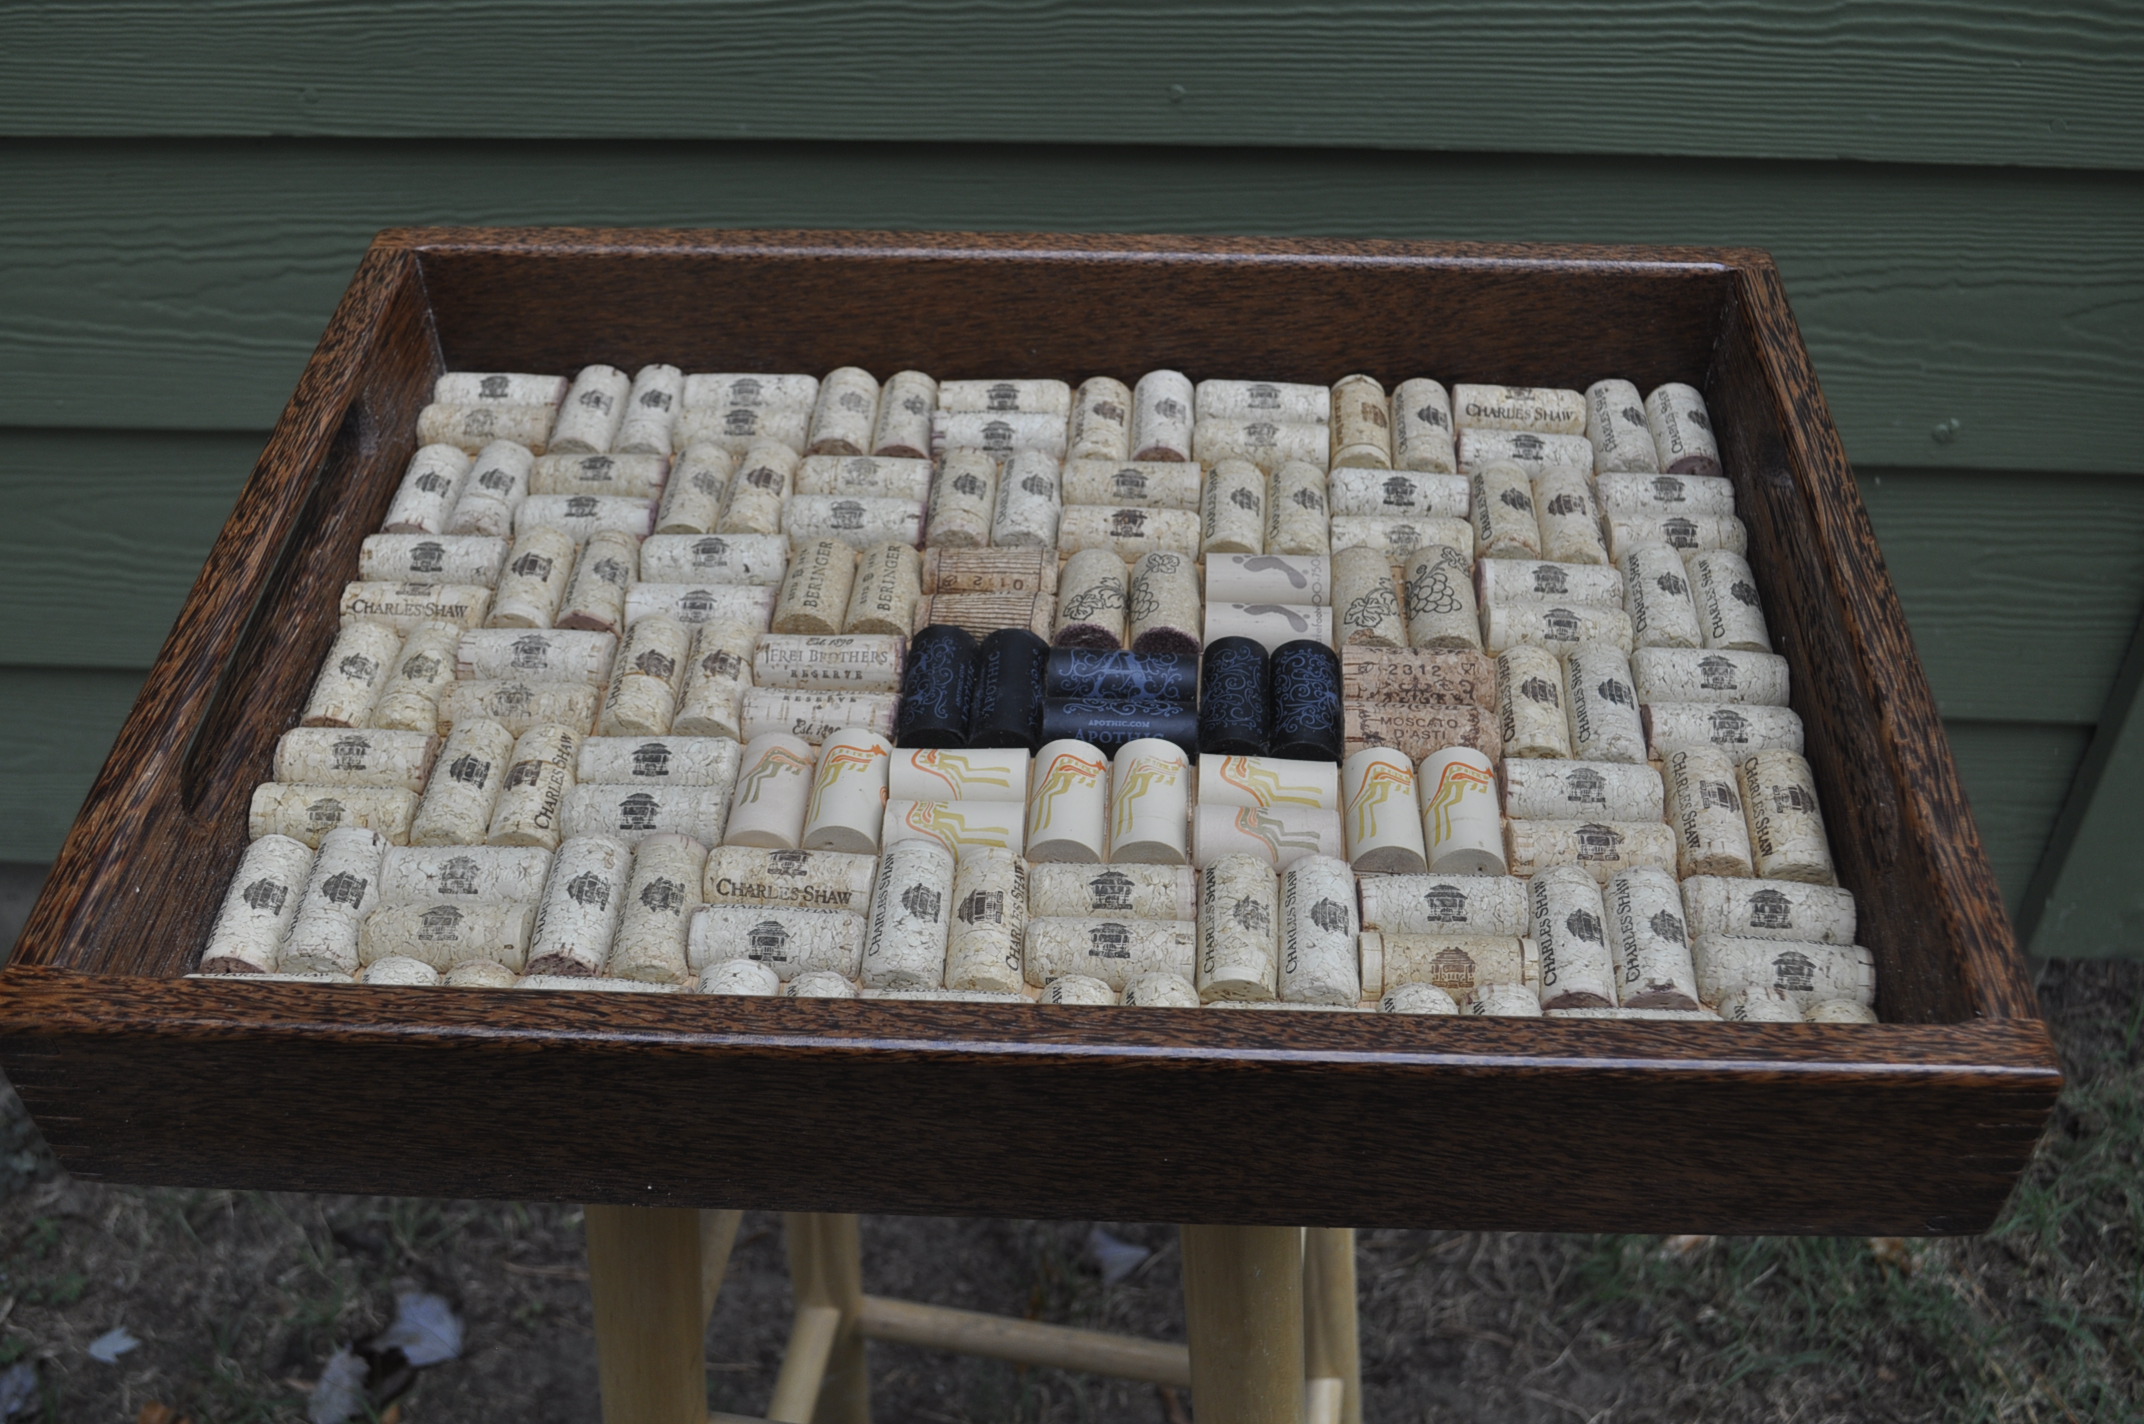
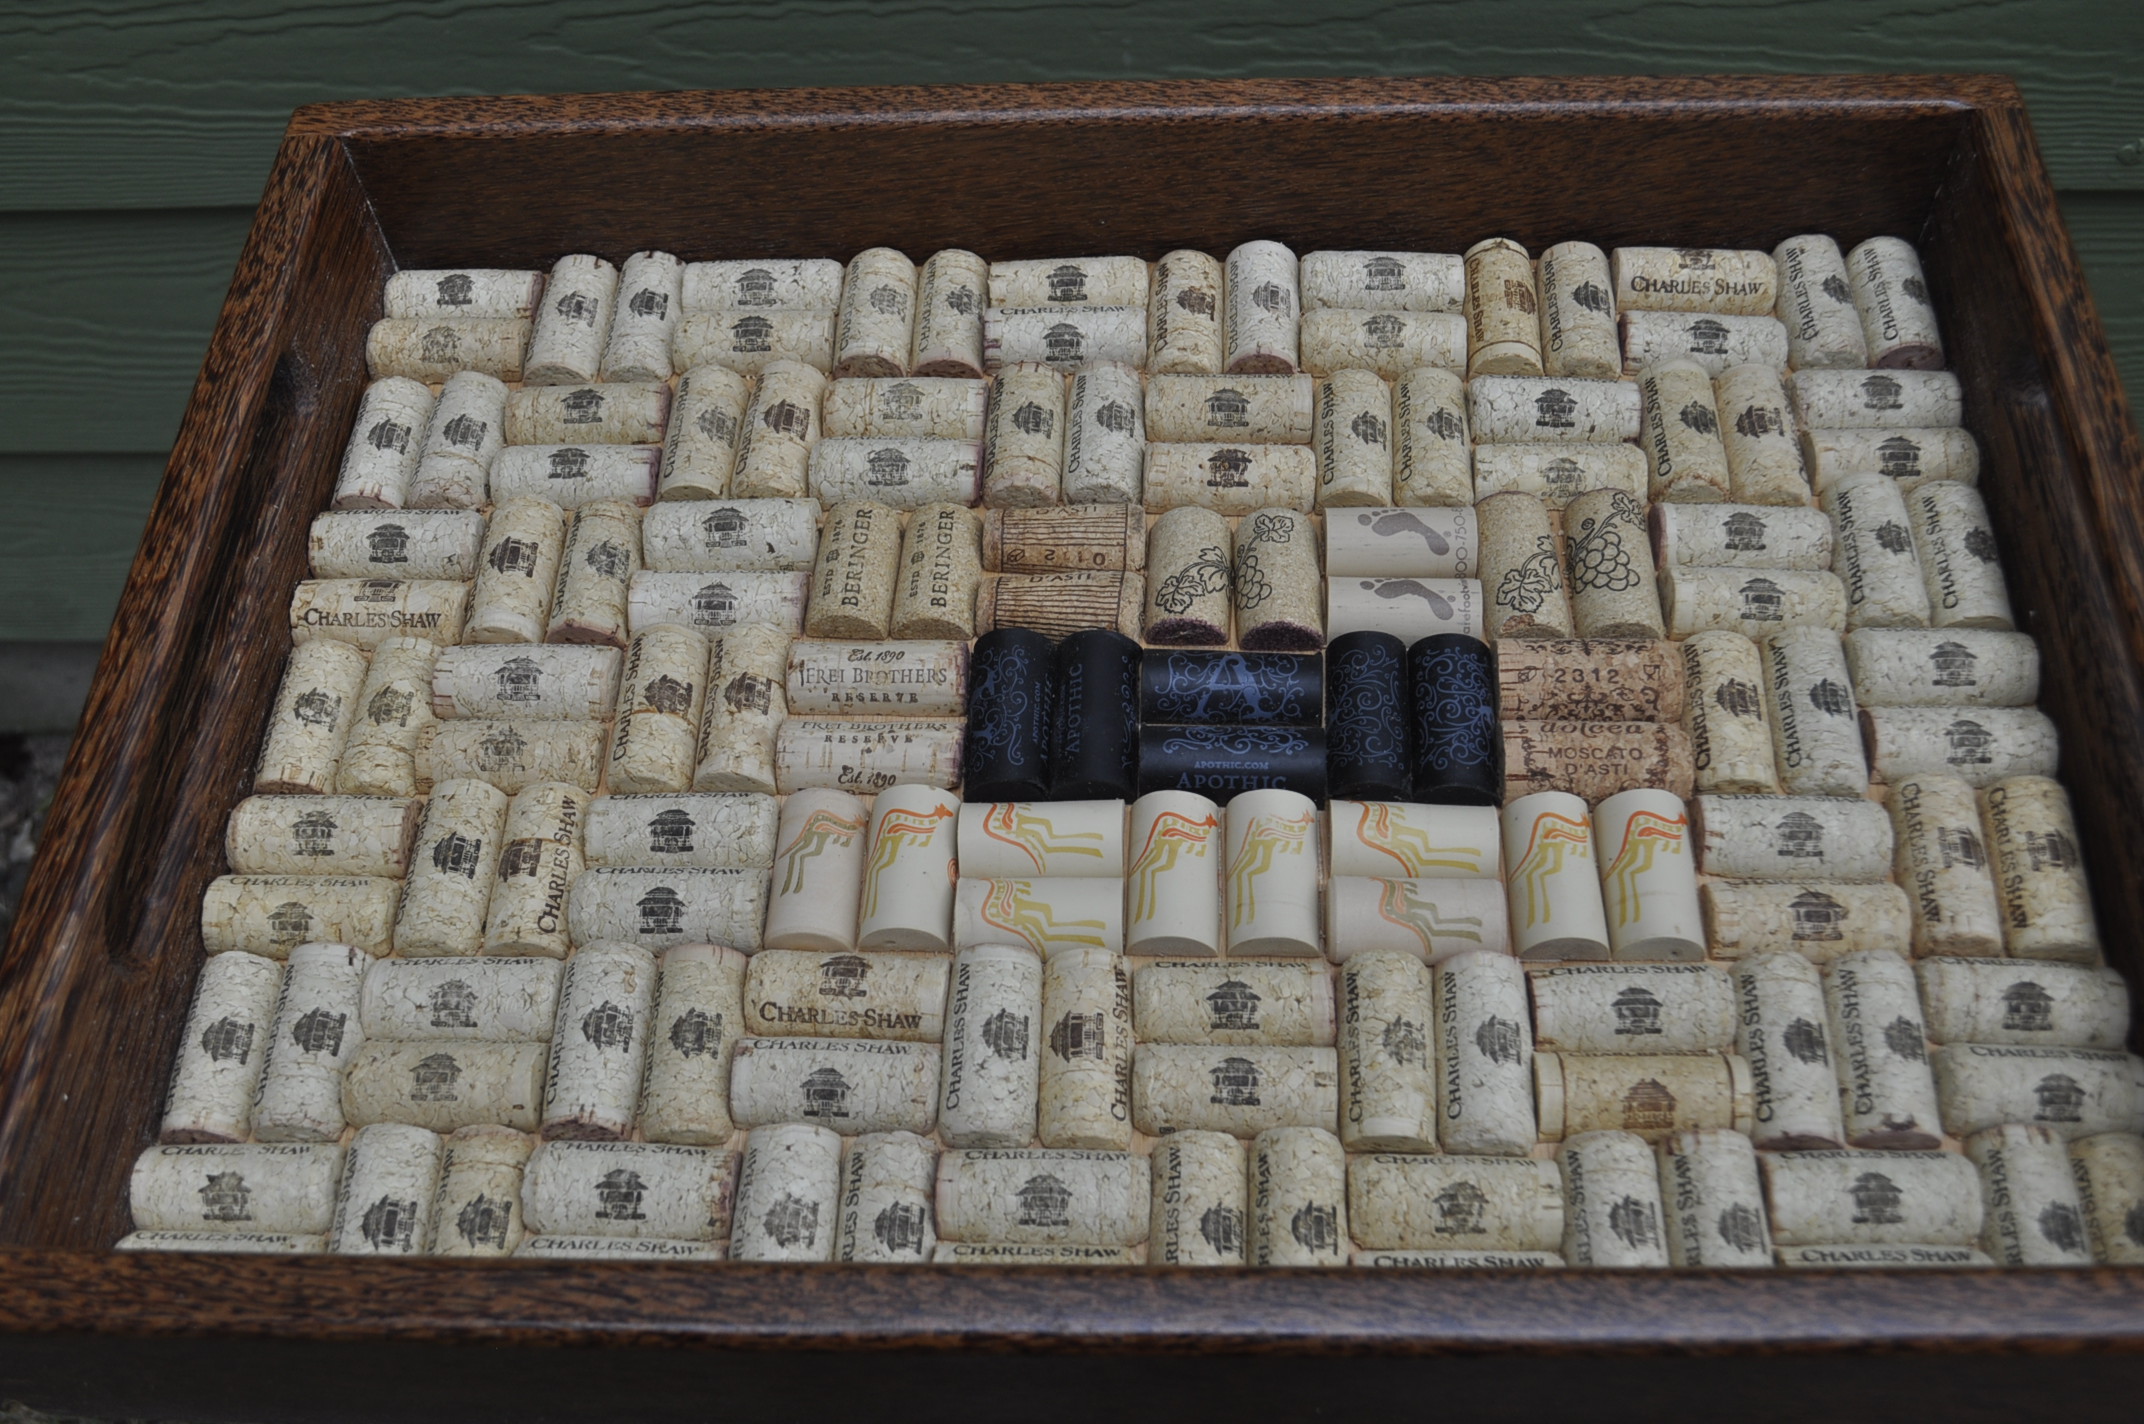
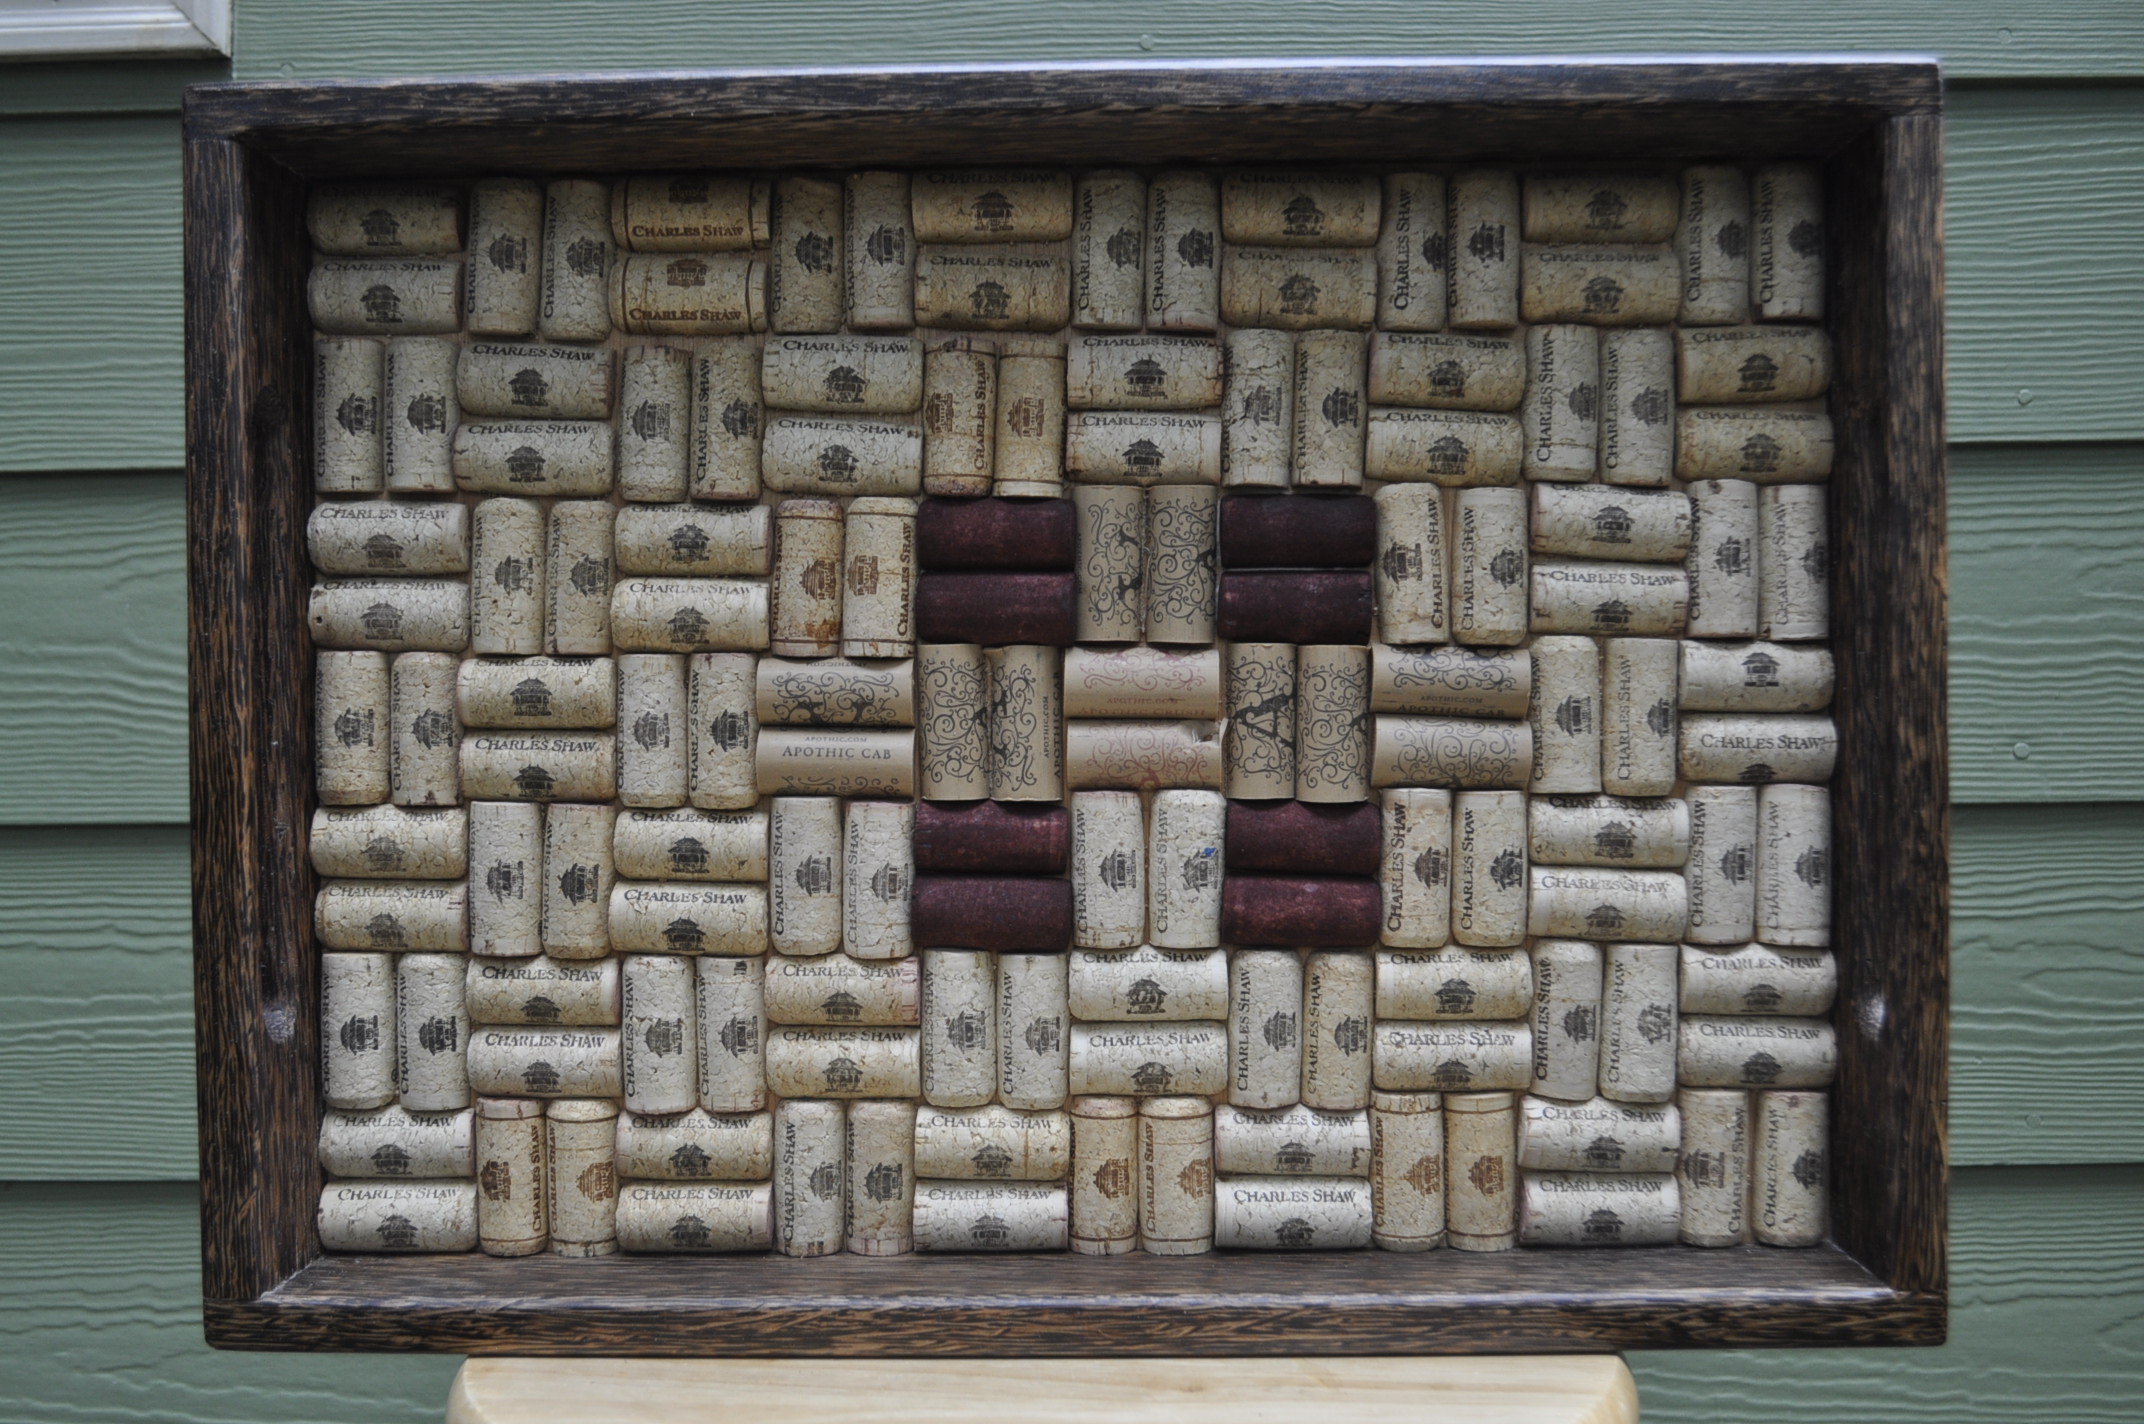
Project 21-12 is a completely original design and execution of a scroll and quill inlay on a maple board 11 x 15 x 7/8. There are seven inlays in four different woods. This is a router template project similar to the Multi-Layer Inlay System, but I made the templates for this one. The next project comes from Gary Stephens. If these projects look familiar you have a good memory. Back in January of this year I featured two of these serving trays made out of Red and Black Palm "wood". At the time I had cut out the material for four of these serving trays but I wanted to finish two of these trays with a high gloss spray lacquer finish. It was the winter and my heater was running and I did not want to stink up the shop with lacquer finish or have the potential for a flash explosion so I set two of the serving trays aside until warmer weather. I finally got around to getting back to the final two serving trays this month and finishing them the way I wanted without blowing up my shop. One of the nice pleasures of making these serving trays are the corks. It takes 70 corks to cover the the bottom of the serving tray. 70 bottles of wine on the wall .... Working with the palm wood was different from normal hardwoods or softwoods. When cutting the finger joints on the table saw my sweat shirt that I was wearing looked like a porcupine sprayed it with hundreds of tiny splinters. When routing the curved edges of the serving tray it sounded like WWW III as the "wood" came off in long splinters and I thought it was going to destroy the wood. After turning off the router I found that the finish on the "wood" was very smooth but full of small splinters. Red Palm Serving Tray And Cork Arrangement Detail Black Palm Serving Tray |
||||
Southern Magnolia Tree Classification?Softwood and hardwood are distinguished in nature in terms of their reproduction rather than their end appearance and attributes. In general, hardwood comes from deciduous trees which lose their leaves annually. Softwood comes from conifer, which usually remains evergreen. So, since the Southern Magnolia tree keeps its leaves all year long, is it a hardwood or softwood? Check it out on Google. |
||||
Is It Woodworking?After lasts months program on vectoring for CNC machines there was much discussion on whether or not CNC machines was real woodworking. For example, some in our guild hand cut dovetails. I make dovetails using a router and a Porter-Cable dovetail jig. Is this woodworking? I think so. Anytime I work with wood I consider it woodworking, from watching a log sliced up into slabs, stacking these slabs onto to my drying rack, to surface planning the rough stock in preparation to using the wood for a project, I call this woodworking. In the Wood Magazine, Issue 277, October 2021 there was an exact editorial on this subject (I think they listen in to our programs). I have reproduced this editorial for your review and consideration. RU4 CNC? When these high-tech tools first came on the scene, they were unfamiliar, huge, and noisy, and only the pros could afford one. But they brought to the table speed, power, and repeatable accuracy, which made them the darlings of people who made their living in a woodshop. Meanwhile, hobby woodworkers derided the technology, snorting, “That’s not real woodworking.” More than 30 years later, the machines finally became accepted in, and affordable enough for, home shops. These days, if you don’t own one, some would question whether you are a “real woodworker.” Which high-tech tool am I talking about? The handheld, motorized router, patented more than 100 years ago. I hear the same arguments against CNC routers: “too big,” “too expensive,” “not real woodworking.” Manufacturers hear those arguments, too, and—like the router makers in the early 20th century – have addressed them. Some companies, such as Axiom Tool and Next Wave, make CNC machines that cost a bit more than a well-equipped cabinet saw, and take up less space. Still others, such as Shaper and Goliath, have come up with portable units that look and act more like the router in your shop. But is it “real woodworking?” Whether you choose to cut parts with a table saw, band saw, router, hand tools or CNC, those parts still need to be cleaned up, assembled, and finished. So yes. At the least, a CNC machine cuts parts with reliable repeatable precision—the same necessity for which you currently make templates, or set up stops. At its best, it creates intricate carvings not possible with other power tools. But it will never replace your table saw, band saw, router, or hand tools. Sure, CNC workflow is different, and you will trade some shop time for screen time as you program the cuts. But, as with any tool, after you’ve used it a few times, you get the hang of it pretty quickly. Randy Johnson’s “Getting Started with CNC” article on page 44 demystifies and simplifies the process to get you under way faster. I don’t own a CNC now, but I suspect I will before too long, because sometimes it’s simply the right too for the job. And shouldn’t we always strive for that? See you in the shop! Dave Campbell, Wood Magazine editor Food for thought. Editor.
|
||||
September Meeting And PicnicThe September meeting will be held at Pat Lester's home, same location as in the past except for the COVID year when it was cancelled. The address is 1450 Plantation Lakes Circle and will be a go rain or shine. The only thing that would cause it to be cancelled and rescheduled would be a hurricane! We will be starting earlier than our usual meeting start time and Pat informed me that you can start arriving as early as 5:30. We will be outside so it will be a safe environment. You will be able to see his outstanding shop and keep a social distance if necessary. Pat will be cooking hamburgers and hot dogs for everyone so we will need to know how many will be attending. If you plan on attending, please respond back to me by next Wednesday. My email address is This email address is being protected from spambots. You need JavaScript enabled to view it.. I will collate the responses and give Pat the number that will be attending so he will know how much to purchase. If you have not been able to attend an in-person meeting, please consider coming to the cookout. It certainly would be great to see you again. Fran |
||||

