Copyright 2022
Tidewater Woodworking President: Fran Foster, Vice President: Greg Guertin, Treasurer: Chris Zuchristian, Secretary: Larry Larue
  |
||||
| Web Links | At the Meeting | Last Meeting Notes | Tip of the Month | Editors Notes |
|---|---|---|---|---|
What's In The Newsletter?
|
||||
Presidents Report ...Father’s Day is always a time for us to celebrate if you have children and remember if your father is no longer with us. We all learn from our fathers and some of us may have gotten the spark to work with wood as a hobby or profession. Personally, my father was an electrician by trade and evolved into a TV repairman and shop owner in which I helped install antennas on roofs of his customers. Yes, I said antennas since that was how we got reception on our black and white TVs back in the dark ages. You may be asking, then how did I get started with my love of working with wood. I went to a small school in North Carolina and one of the classes I took was Agriculture. This class taught us a lot about farming, raising animals, etc. for half a year and the other half was spent in the wood shop. This was the spark that lit my fire and after graduation, I attended East Carolina College which become a university in 1968, my junior year. I majored in Industrial Arts Education and the rest is history. After graduating, I started teaching and was able to follow in my agriculture teacher’s footsteps by exposing students to working with wood. Some of my students even took best in show at state competitions. I am using my background as an example of how we all can impact others. By demonstrating our love for working with wood, we have the potential for lighting the fire in others. Keep that fire going by taking the time to help others who may want to try their hands at the rewarding activity. This email address is being protected from spambots. You need JavaScript enabled to view it. Fran Foster President TWWWG |
||||
This Month's Program - Drilling Angled Mortises In Post & Rung Chairs by Jeff LefkowitzJeff started woodworking and chair making about 20 years ago. His first chairs were Windsor’s made with traditional tools. After a few years he began making the post and rung chairs that he learned in several classes with Brian Boggs. He also began assisting Brian at his classes and writing and illustrating class manuals to complement the instruction in each class. (His day job as a graphic designer finally paid off!). He began teaching Boggs designed ladder-back chairs about 10 years ago in his shop in Strasburg, Virginia, and continue to do so, though this will be his last year. In addition to teaching, Jeff draws chair plans for well-known chair makers Curtis Buchanan, Peter Galbert, and Bern Chandley. He found that creating the chair plans and the Boggs class manuals are a way to capture and preserve the beautiful work of these world class craftsmen for current and future generations. If you want it: Web site, blog, and longer bio: www.jefflefkowitzchairmaker.com Instagram: @jefflefkowitz And also if you want it, a description of the demo that I sent to the Washington Guild: Drilling Angled Mortises in Post & Rung Chairs For many woodworkers a barrier to building chairs has been the mystery surrounding drilling angled mortises into round, bent chair parts. Using a method called rise and run Jeff will demonstrate how to measure drilling angles off an existing chair or determine the drilling angles for a chair of your own design. These measurements are then applied to making a simple jig set for holding chair parts while drilling the mortises on a drill press. The result is a nearly foolproof method for drilling mortises that is easy, accurate, and efficient. Editor |
||||
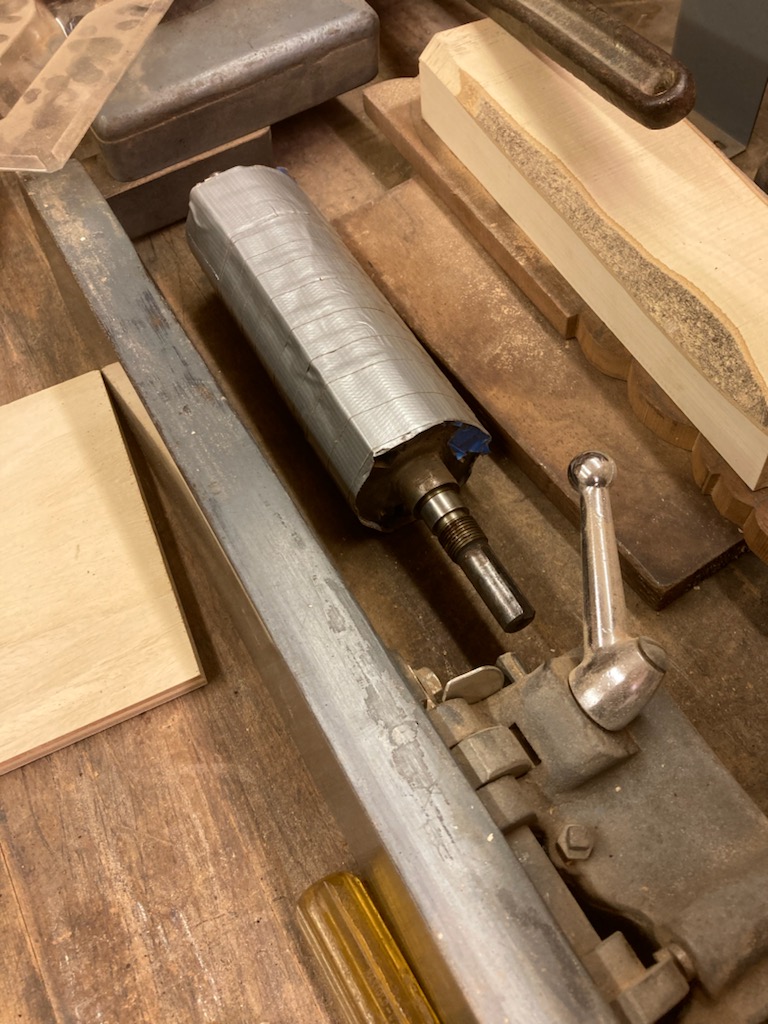
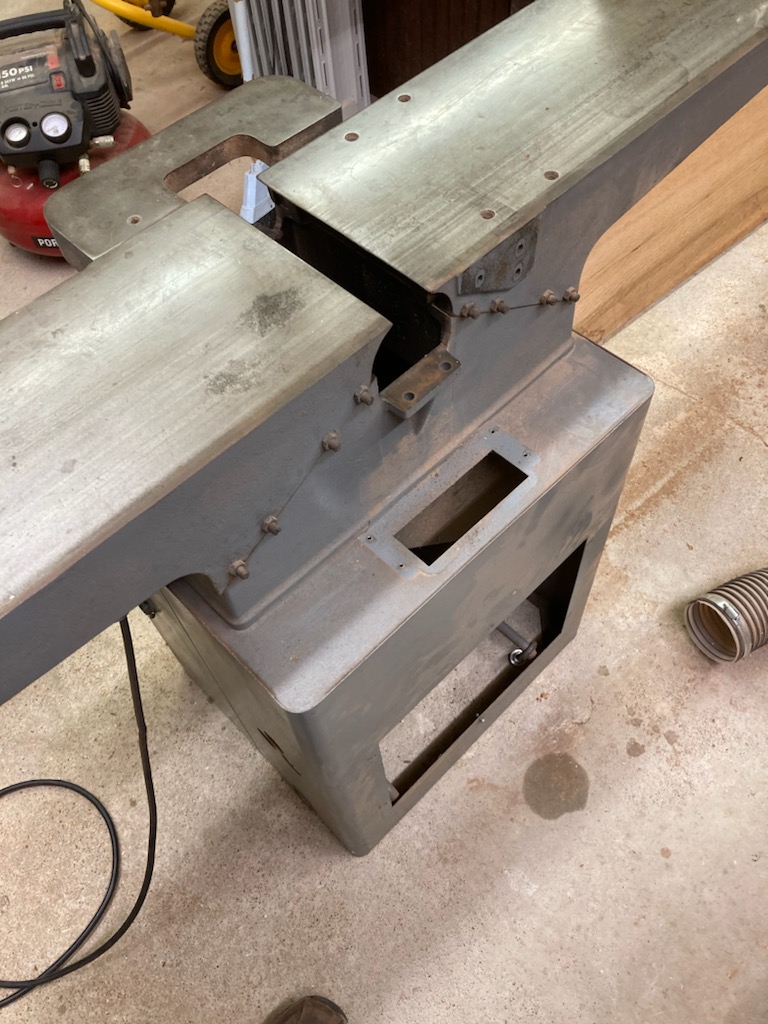
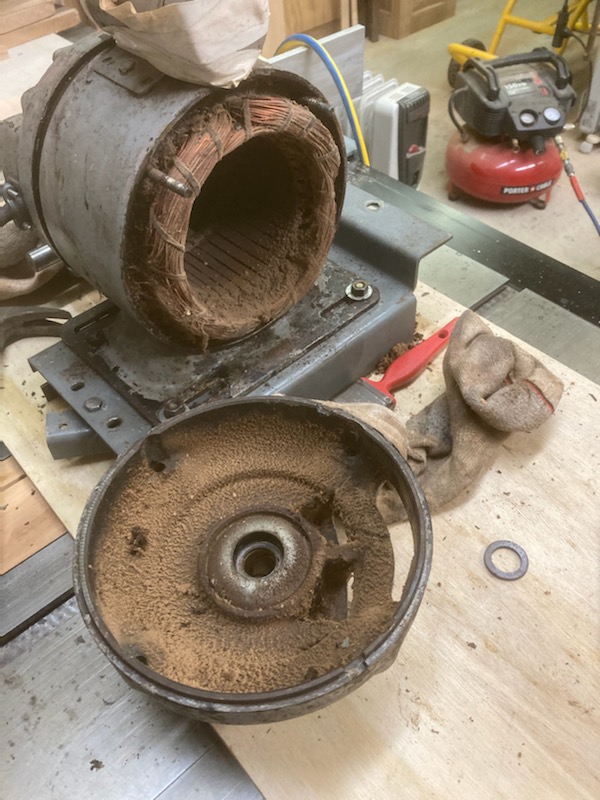
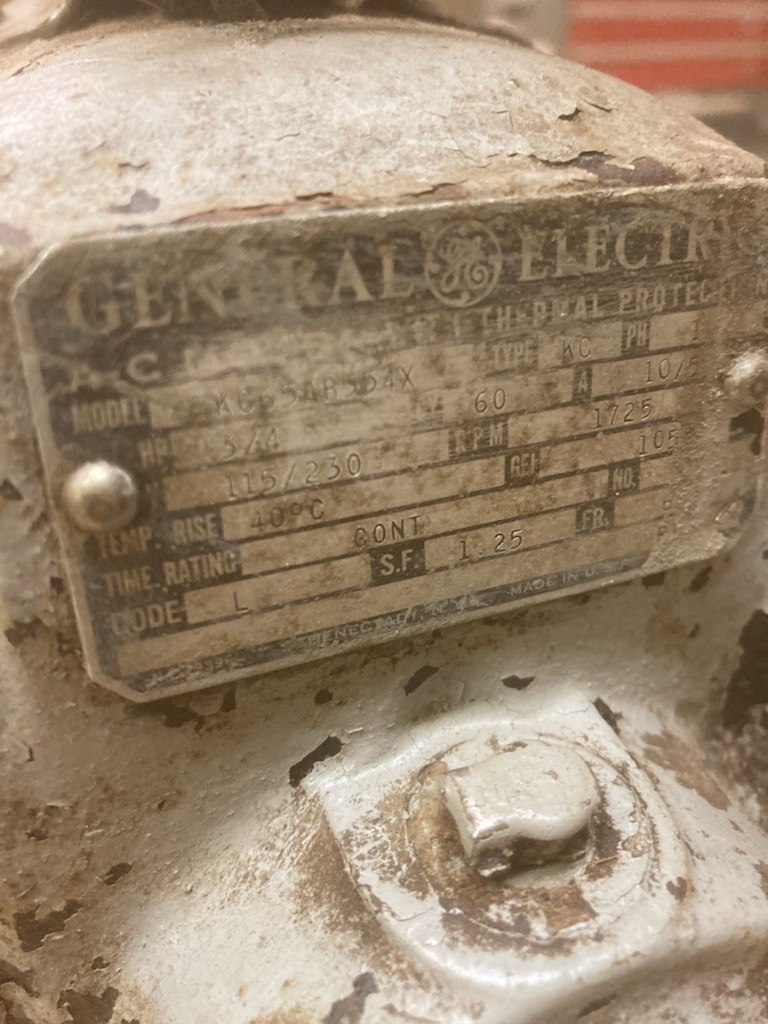
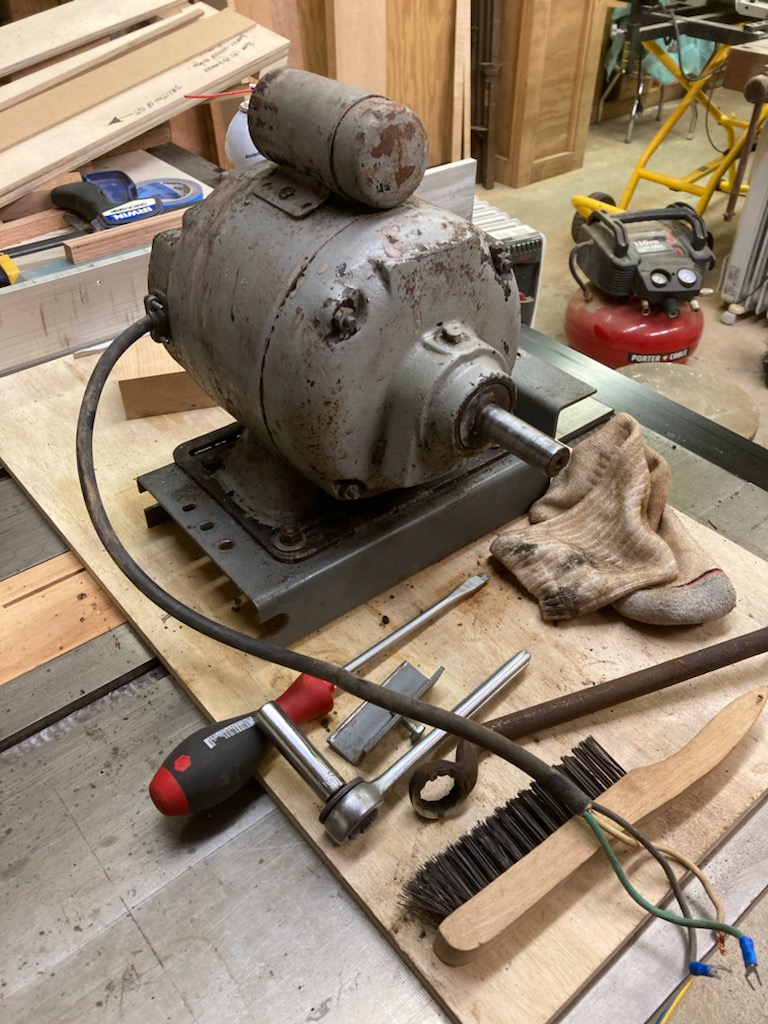
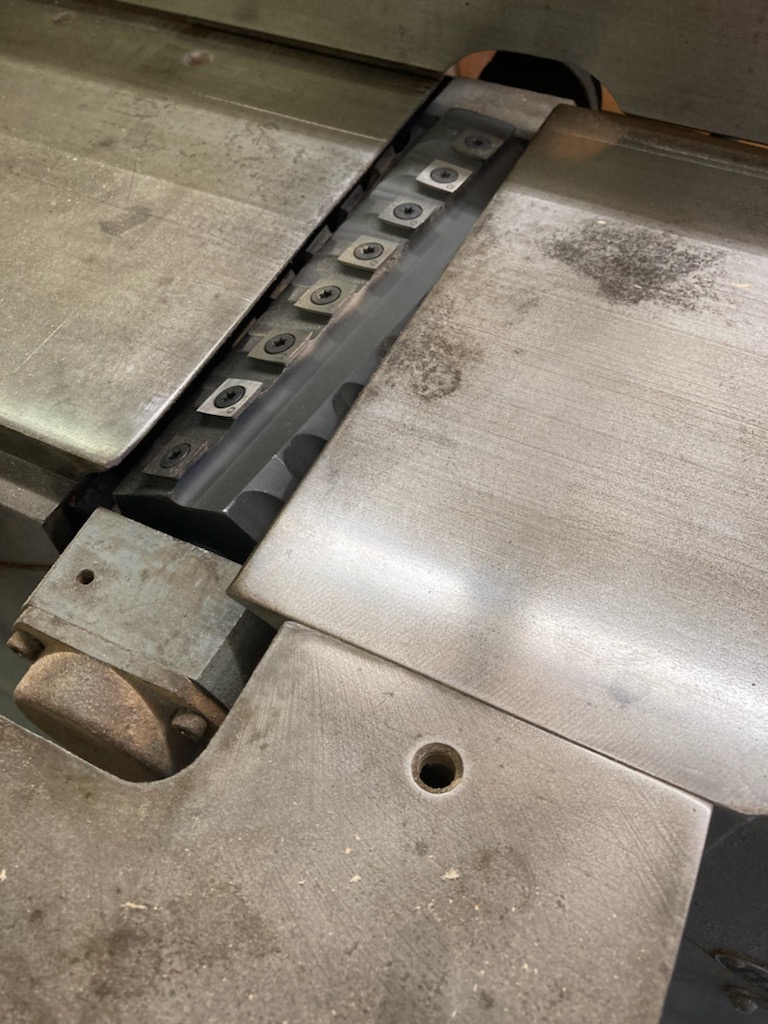
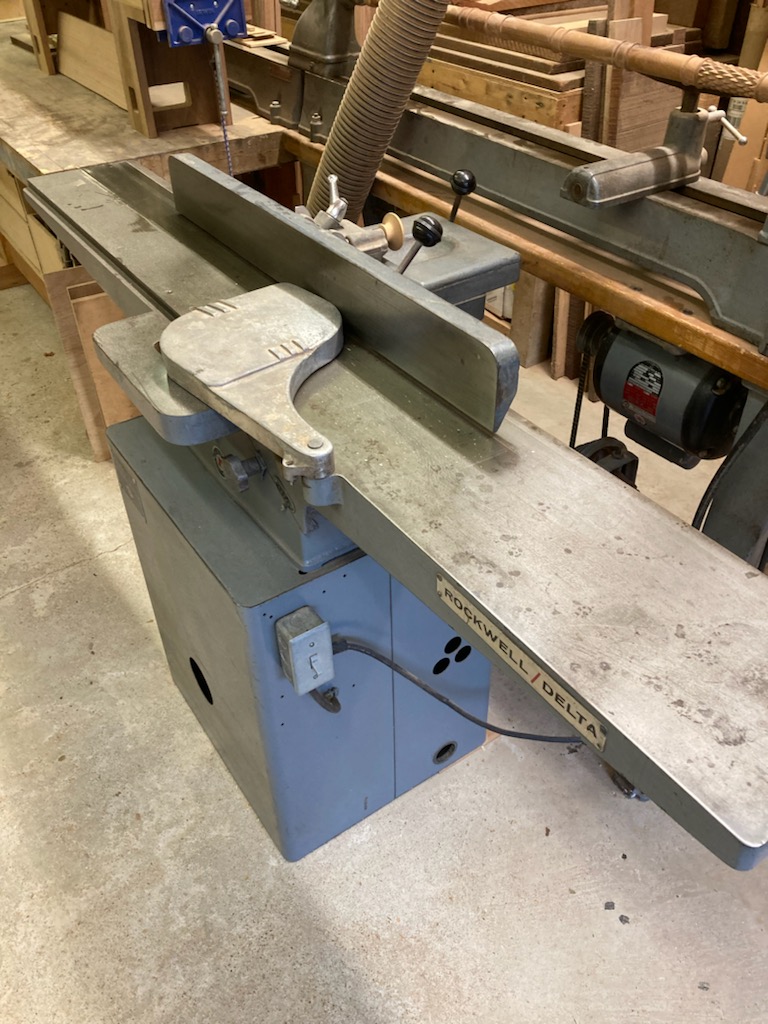
Helical Cutter Head Review By Chris HaycoxI'm sure everyone has had something like this happen. I'm close to finishing a cherry table for a client, trying to meet a deadline, and my jointer begins screaming while I'm working on the leg assemblies. A little background. Twenty-five years ago I was looking to upgrade from a 1948 6" Delta jointer. I found a 1964 8" Rockwell jointer in the local trading post, the original 3-phase Rockwell motor that had just been re-wound. The seller had no takers for the jointer apparently because it was 3-phase I went to take a look at the machine and immediately bought it. Got it home and completely disassembled it, cleaned it up and put it back together. I put the motor control and 3-phase motor in one of my cabinets and pulled out a 1940 GE 3/4 HP 120 V single phase motor that I got from my brother-in-law's father. For twenty-five years the jointer ran fine, just a real pain in the behind to change out knives and adjust them. I'm sure everyone knows what I'm talking about! The Old Cutterhead (Left) & Jointer Without Cutterhead (Right) Fast forward to the present. I'm in the shop, frantically trying to finish the table, all is well until...that screaming when I turned the jointer on. At first I thought it must be the bearings on that motor, I mean it is a 1940 vintage. Took the motor out of the cabinet, put it on the bench and hardwired it. Although full of sawdust, no screaming when I turned it on. The only other culprit, the cutterhead bearings. Pulled the cutterhead, checked the bearings and sure enough it was the cutterhead bearings. They spun too freely like there was no grease in them. I could have been angry, but I thought, this jointer was in a production shop before I got it and my neighbor and I have been using it regularly over those 25 years. The bearings were original and pretty good for lasting 58 years. I had watched the Stumpy Nubs video about helical carbide insert cutters and how well they work for figured wood. Another benefit, once you install the cutterhead and set the outfeed table, that's it. No knife setting, no hours of frustration. The only choking point, the price. A lot of soul searching and watching many hours of YouTube videos, I made the decision to go ahead. It was a hard decision. I originally paid $250.00 for the jointer. Now I was going to spend $550.00 for the cutterhead! I ordered the LUXCUT from mywoodcutters.com. While waiting for the cutterhead to arrive (shipped from the west coast), I cleaned the motor and checked the bearings. I didn't have to change the motor bearings which was a good thing, they were Babbitt bearings. The cutterhead arrived in about a week. Installation was very easy. I pressed in the new bearings (supplied with the new cutterhead) into the bearing blocks using a socket and my vice and installed the new cutterhead on the new bearings. I installed the new cutterhead on the jointer only to find that the bearing block on the pulley side was too far on the cutterhead shaft. After removing the pulley side bearing block, I measured the center to center distance for the mounting holes on the jointer body I reinstalled the cutterhead, the fence carriage and fence. Next came the pulley and belt. After turning the jointer on, I was amazed at the noise reduction. The new cutterhead ran about half as loud as the original before the bearing noise. Adjusting the outfeed table was a breeze. I lowered it and ran a board on edge about 3-inches across the cutter and turned off the jointer. I then raised the outfeed table to touch the board. I then ran my first board through to see if all the hype about helical heads was just hype. Well, they weren't kidding. The cherry I ran through was silky smooth and no tear out, So smooth I could skip sanding before finishing. Now was the real test. I took a piece of highly figured maple. Yep, it came out silky smooth also. A Look At A 1940 GE 3/4 HP 120 V Motor With 82 Years Of Dust & Dirt Buildup. Amazing It Still Works! GE Motor Restored! Check Out The Historical Nameplate. Conclusion: The LUXCUT cutterhead has been one of the best investments I have made for my shop. I do consider it an investment. It's an investment by giving me a finish ready surface meaning less time sanding. It's an investment in surface preparation on figured wood. It's an investment in future time savings by me never having to adjust jointer knives. If the LUXCUT is available for your jointer or planer, I highly recommend the "investment". I was hesitant about the purchase, but now that I've seen the quality of the cutterhead, the reduction in noise and the quality of the cut, I am so glad I made the leap! A Look At The Newly Installed Helical Cutter Head And The Refurbished Rockwell / Delta Jointer! Any guild member is welcome to contact me and see it in action! Chris Haycox |
||||
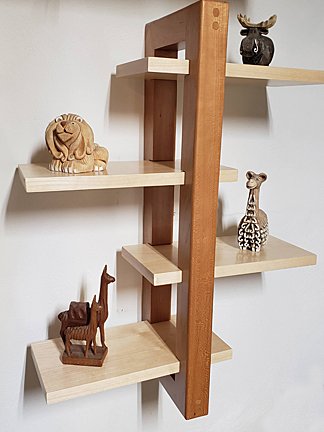
Guild ProjectsOur First project comes from Karl Bogot. Project 2 for this year, and yes, I'm behind. This is a 'floating shelf'. The shelves are adjustable as to their placement. It is Cherry and Maple, measuring 24" tall. The shelves are 12" x 6". I've designed it to be very versatile. I can build it with 2 to 6 shelves, depending upon the size of the bracket.
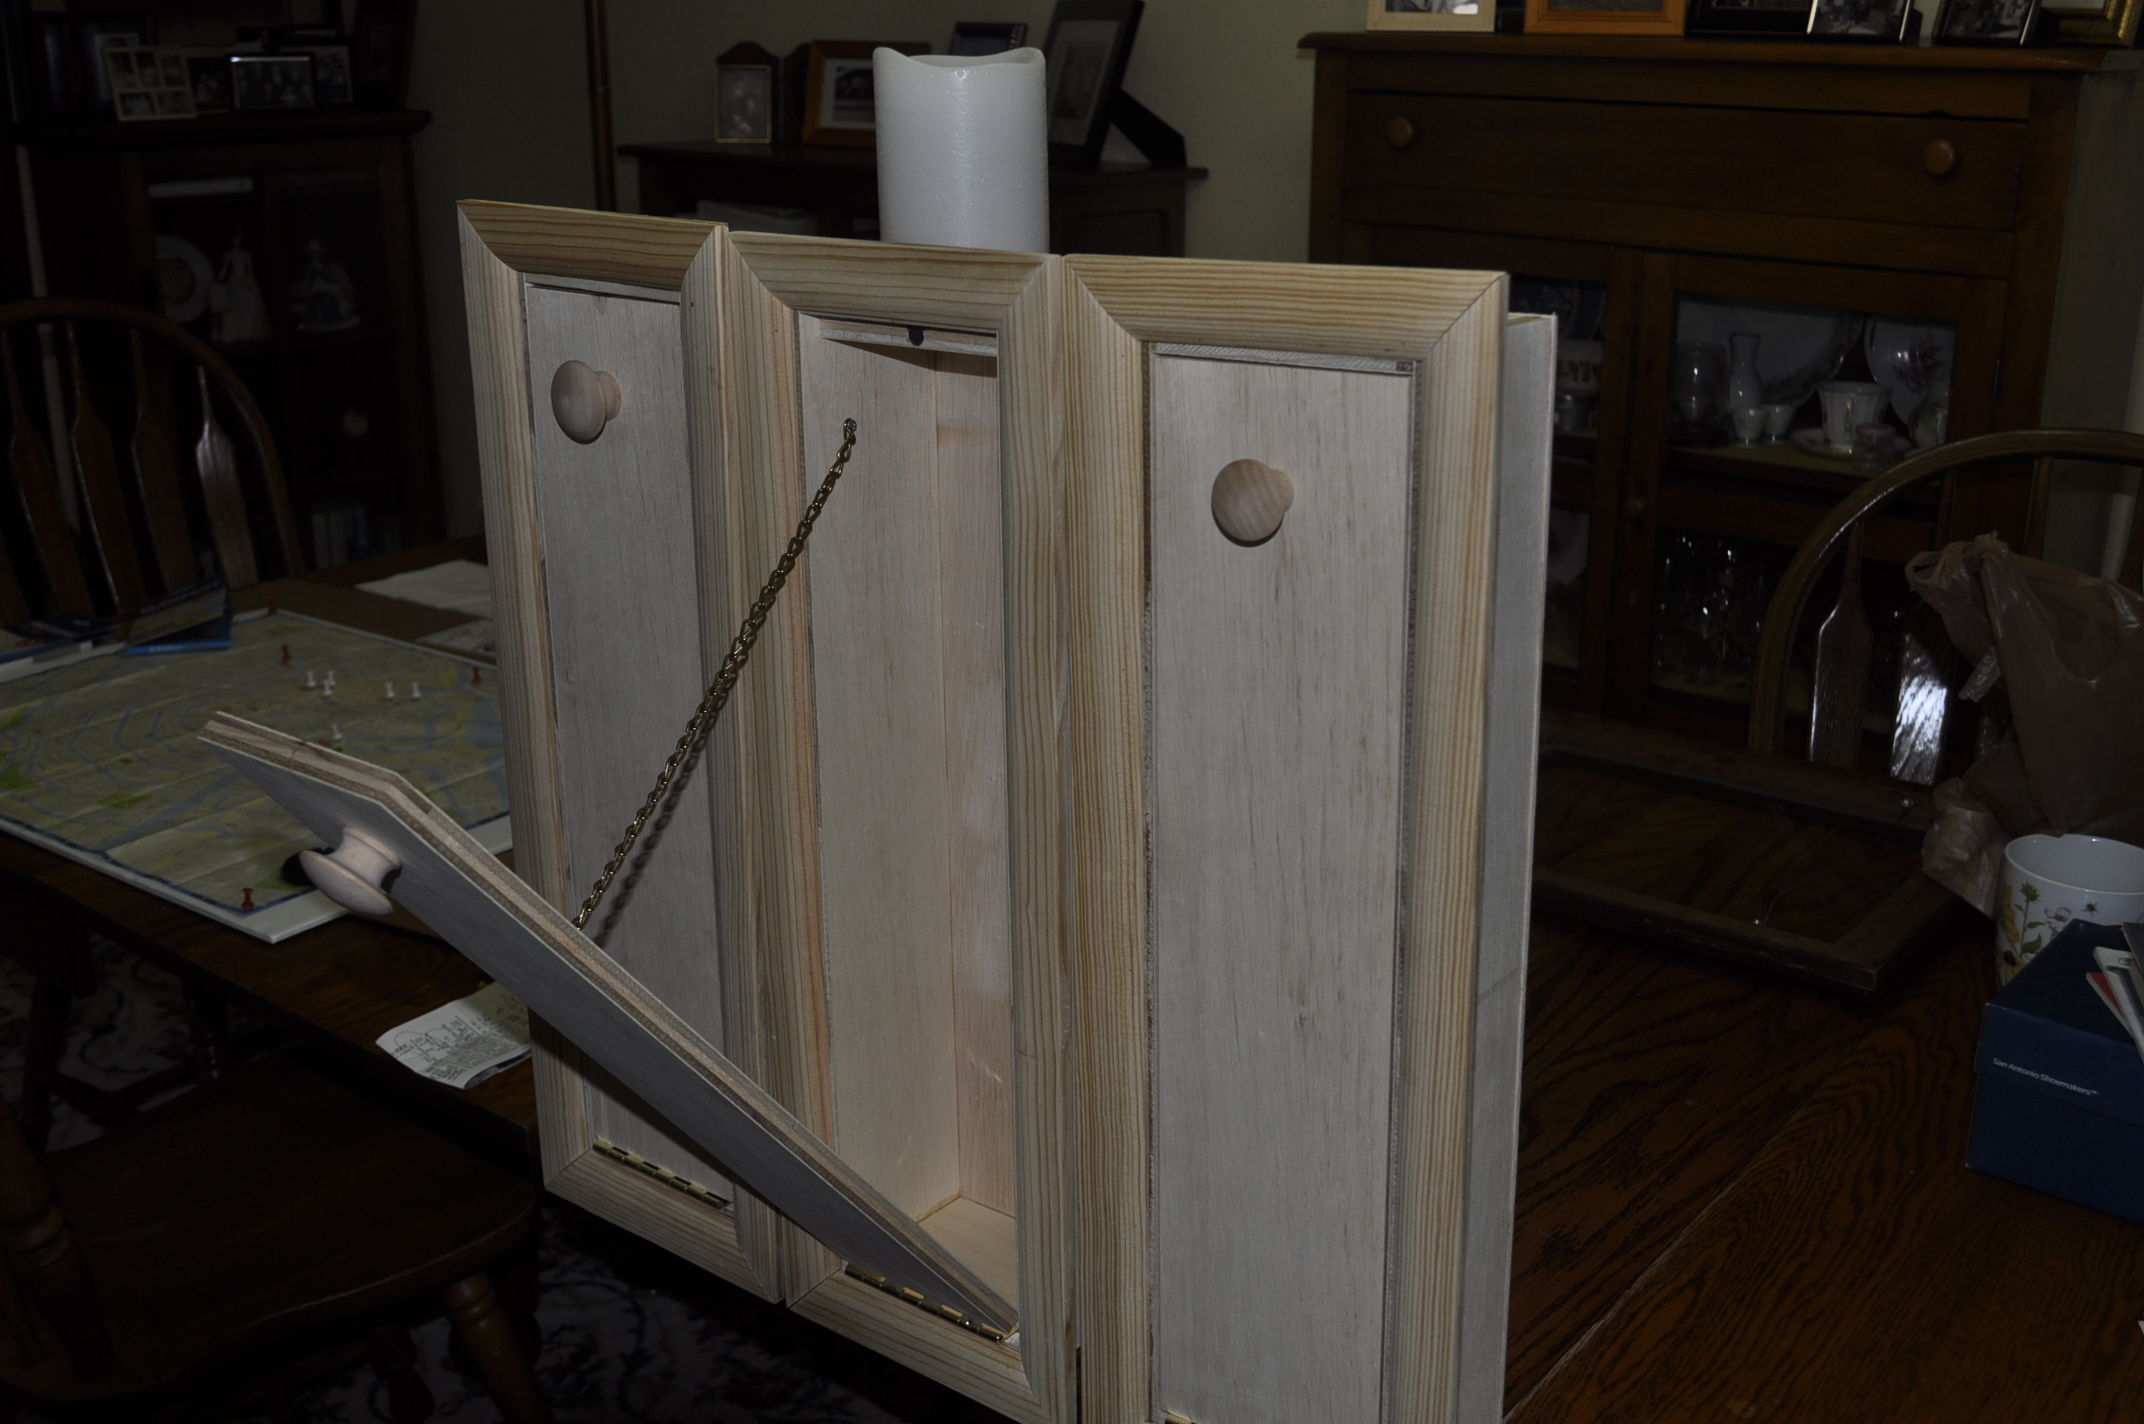
Our next project comes from Gary Stephens. My most unusual request to build something! A friend of ours are moving to a new home and she wanted me to build toilet bowl wand holder boxes to hide the toilet bowl wand. Since I am sure you are not familiar with toilet bowl wand cleaners here is your education. When cleaning the toilet bowl out you use a wand with a disposable cleaning cartridge to wipe the toilet bowl clean. When you are finished cleaning the toilet bowl you throw the cartridge away and store the wand in the box. The box is designed to be mounted in the hollow cavity of the bathroom wall between the sheet rock on either side of the bathroom wall. You open up the box by pulling on the handle and the face pulls out exposing the cleaning bowl wand and the new cleaning cartridge. The boxes were made out of scrap wood and the frame is nothing more than screen stop.
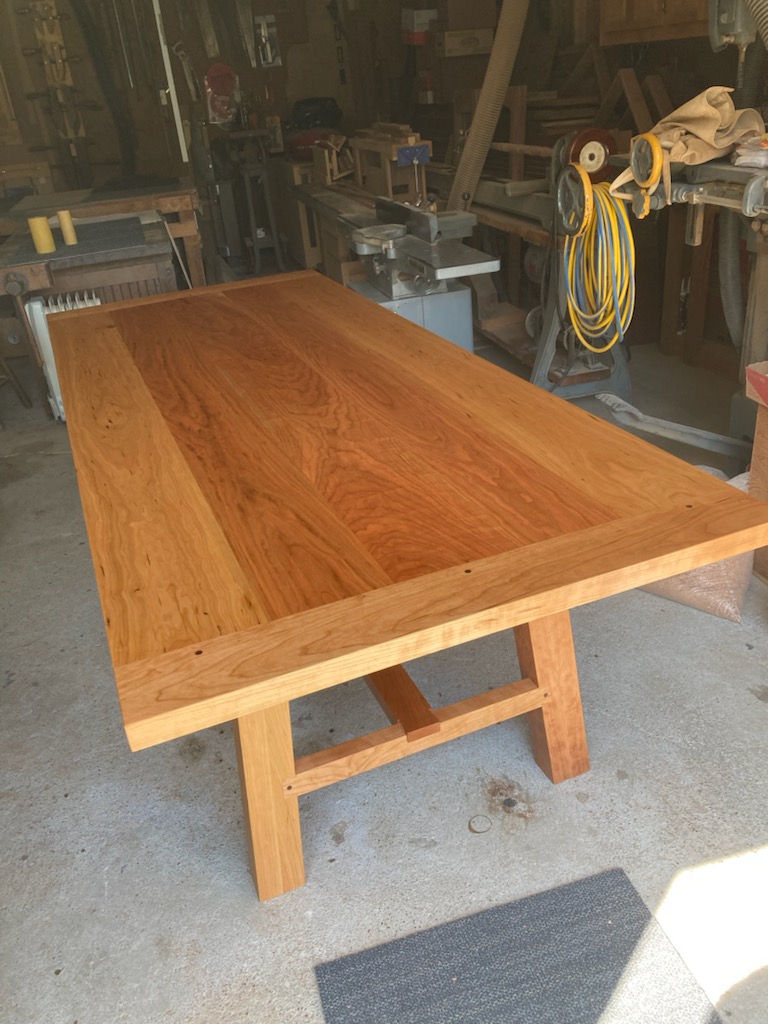
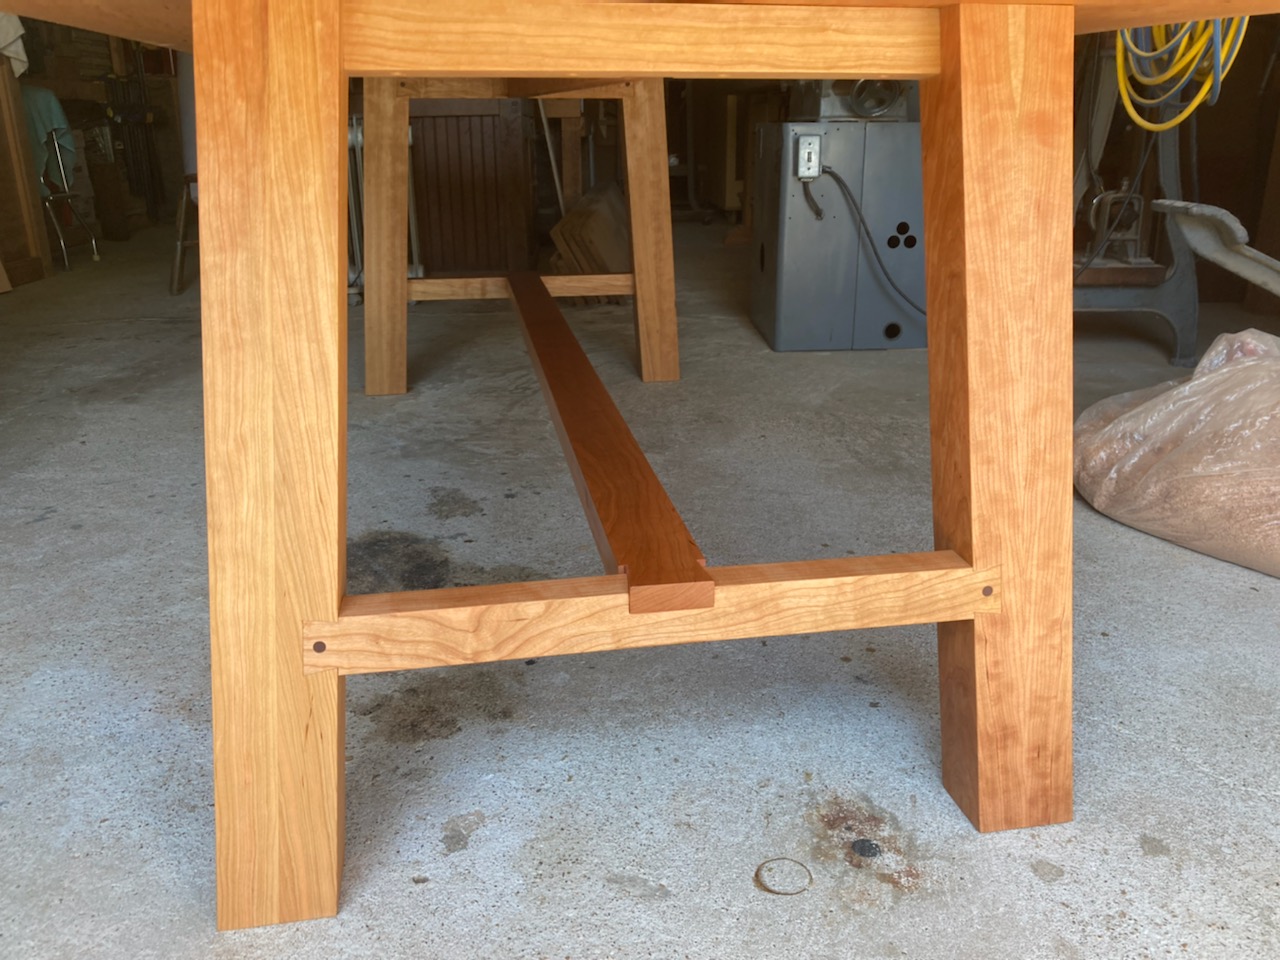
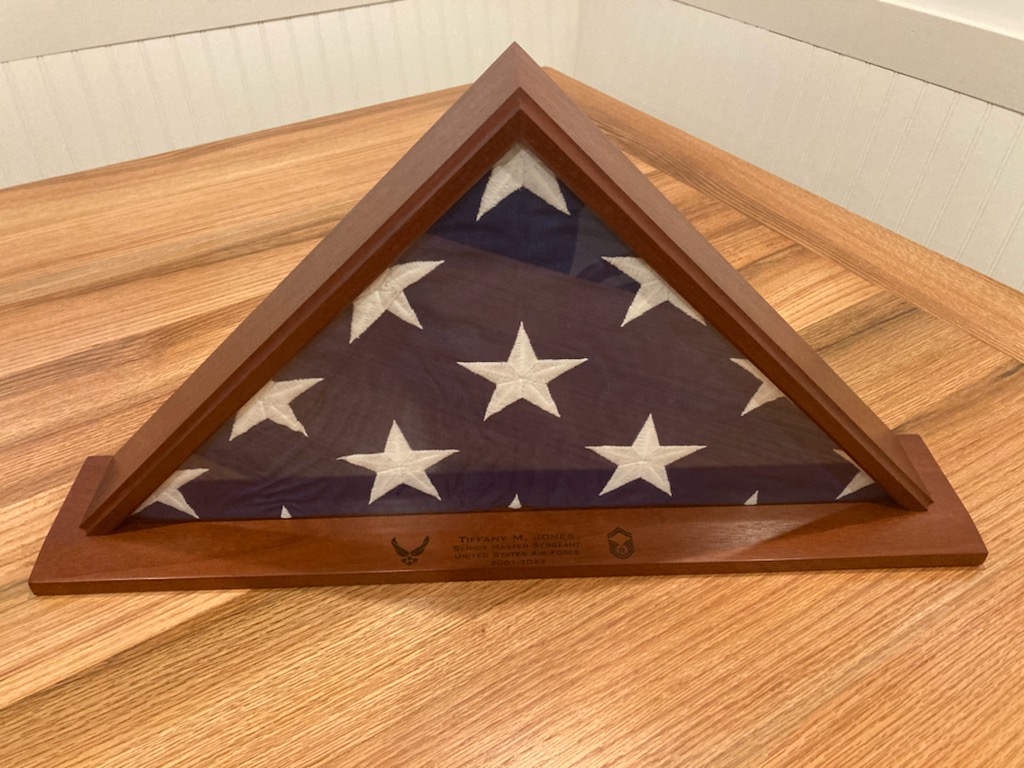
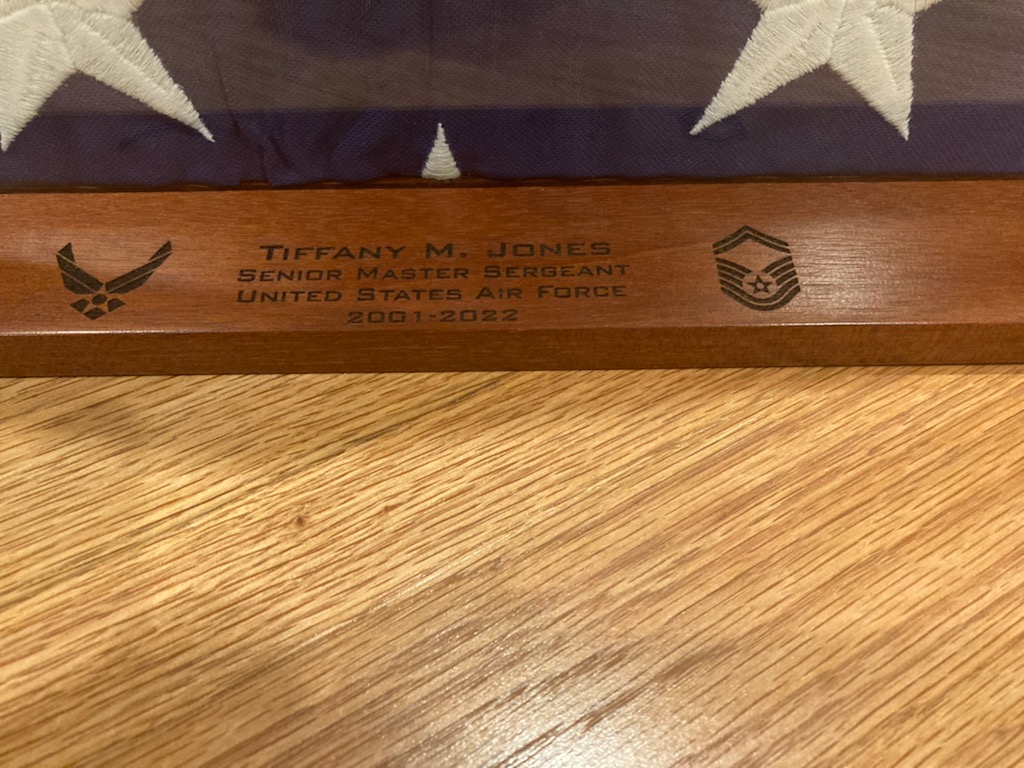
3 Toilet Bowl Wand Bathroom Holders For Their New House Our last project comes from Chris Haycox. A fellow woodworker and good friend, Scott, asked me if I would be interested in making a table for one of his friends, Wick. I made contact with Wick who happens to be friends with Greg Horvath. Wick and I met Greg's place to select wood for the table. The table is made from curly Cherry and measures 40" wide by 8 foot long and the top is 1 1/2" thick. Wick gave me a basic idea of what he and his wife were looking for and I went from there. Their requirement was for clean lines. I designed exposed dovetails between the legs and the stretcher between the leg assemblies for both aesthetics and mechanical strength. The table was finished with 6 coats of natural Danish oil and 2 coats of Butchers Bowling Alley Wax. The table weighs in at a whopping 130 pounds! Chris's Curley Cheery Table The flag box- So after 30+ years, my wife and I finally bit the bullet and wrote a contract with Dave's Concrete to have our driveway replaced. Dave came highly recommended and we signed the contract last fall knowing that he wouldn't be getting to us until this spring. Well, at the end of April Dave and crew replaced the driveway. If anyone in the guild needs concrete work done, I highly recommend him. Now back to the flag box. I had mentioned to Dave that I had finished a Cherry table and he was interested in seeing it. While in my shop, Dave noticed some Cherry flag boxes that I had lined up on a stack of lumber and asked me if I could make one for his daughter's retirement flag. The only requirement was that it be made out of Mahogany. The flag box was made from a piece of Cuban mahogany that came from my great great uncle's shop (around 1930). The laser engraving was done by a friend of mine. I did contract work for him building flag boxes and shadow boxes between 2002 and 2010. The finish is 3 coats of natural Danish oil, 3 coats of Deft semi-gloss lacquer, and 2 coats of Butchers Bowling Alley Wax applied prior to the laser work. Mahogany Flag Case & Laser Engraving |
||||

