Copyright 2020
Tidewater Woodworking President:Fran Foster, Vice President: Greg Guertin, Treasurer:Chris Zuchristian, Secretary: Larry Larue
  |
||||
| Web Links | At the Meeting | Last Meeting Notes | Tip of the Month | Editors Notes |
|---|---|---|---|---|
| Tips |
What's In The Newsletter?
|
|||
Presidents Report ...Every year in January, the guild topic of discussion is safety. It becomes easy for woodworkers to become lax when working in their shops and possibly take shortcuts or just not pay attention to the safe operations needed. Safety is paramount and should not be taken for granted. The article below came from Woodworking For Mere Mortals and can serve as a reminder for everyone. Woodworking Safety Safety is my highest priority. Sure, I like to joke around in my videos and have fun in my shop, but when the power tools begin to run, I give them my full attention. Woodworking is a perfectly safe hobby so long as you understand and stick to a few safety procedures. 1. POSITION YOUR BODY SAFELY • My number one safety rule is this: If you are about to cut a board or perform another procedure that feels awkward or just doesn’t feel right, stop. Figure out a better way to position your body or hands. Figure out a more secure way to hold the wood. Listen to your gut or that little voice in your head that is warning you. • Know where a piece of wood will go if you lose your grip on it. Position your body away from that potential projectile. • Beware of table saw kickback. The most common cause of injury with a table saw is kickback – that is, when wood is thrown backwards, in line with the blade. Always position yourself to the side of the blade, not behind it. Always be on the lookout for trapping wood between the spinning blade and the rip fence that guides the wood as its being cut. To learn more, watch my Table Saw Basics. • If you lose control of a board while running it through a machine, let go of it. Don’t try to “save it” by grabbing the wood. Otherwise, you risk serious injury to your hands. • Always do a test run without the tool powered on. Figure out where your body and hands will be positioned throughout the entire process, from turning the machine on, to sliding the board through the tool, to removing the wood and shutting the machine off. Go over it in your head each time. I do an imaginary test run every time I cut a board. 2. PROTECT YOURSELF • Always wear safety glasses or goggles when using power tools. • Protect your hearing with sound-blocking earmuffs. Noise exposure can lead to tinnitus – a constant ringing in the ears – or worse, to hearing loss. • Protect your lungs from sawdust. I recommend a dust removal system with either a dedicated dust extractor or a shop-vac attached to tools as you use them. At the very least, wear a dust mask. • Roll up long sleeves, tie long hair back, and remove dangling jewelry. • Don’t wear gloves. I see some people doing this, but I think it is safer to control a piece of wood barehanded. 3. MAKE YOUR SHOP SAFE • Keep your tools in good condition and properly tuned and aligned. For instance, make sure your rip fence stays parallel with your table saw blade to prevent kickback. • Inform everyone not to come into your shop if they hear a tool running. It can be very unsafe and startling to have someone suddenly appear or tap you on the shoulder. Consider making a “Do not disturb” sign for your door. • Use your power tools’ safety locks when they’re not in use. This is especially important if you have children. • Unplug all tools when you aren’t using them. • Lock the entrances to your shop when you are not in it. • In case of an emergency, have a plan in place. We almost always work alone, so have your phone nearby, or even a loud air horn to summon help. 4. BE IN THE RIGHT FRAME OF MIND • Never drink alcohol or use any drugs while woodworking. Just don’t. Enjoy that cold beer after you have wrapped up for the day. You earned it! • Never woodwork if you feel fatigued. Seriously, it can be as dangerous as driving while sleepy. At best you will make wasteful mistakes, at worst you will injure yourself. • Get plenty of sleep, eat well, and stay in shape. Woodworking involves a lot of standing and mental focus. If you have a long session of standing, do some stretches at least once an hour. Learn a few good yoga poses! • If you start feeling frustrated or angry because something isn’t working out, take a break. Force yourself to step out of the shop and take a walk. It will do wonders to your mood and project success, as well as helping you avoid accidents. 5. FOLLOW SAFETY INSTRUCTIONS • Read and fully understand the safety precautions in the manuals that come with your tools. Believe it or not, they actually have very good information and advice! 6. ABOVE ALL ELSE, USE COMMON SENSE • Never operate a tool if you are afraid of it or uncertain how to use it safely. By observing these safety rules, learning how your machines work, and protecting yourself from injury, you can use power tools with a sense of respect rather than fear. Stay safe and have fun in your shop! Fran |
||||
The Woodworking Shows AnnouncementIn case you did not receive the e-mail from The Woodworking Shows about their 2021 schedule I have included it in this month’s newsletter. On behalf of everyone at The Woodworking Shows, we hope this email finds you well. We know you have been waiting to hear what TWWS has planned regarding the 2021 show schedule and we cannot thank you enough for your patience. We have been spending the last few months working on various show scenarios, launched a new website with further digital capabilities, as well as patiently watching how the pandemic has been playing out. This includes following other in-person trade shows and events, outreach to each show venue, and learning about general public safety guidelines, specifically around large gatherings. With so many unknowns affecting each show location, we have made the very difficult decision to not hold any in-person shows through March 2021. We will reassess the situation in the spring of 2021, and we will be sure to keep you informed of any and all developments. In the meantime, we are excited to announce our first online woodworking education seminars, which will be launching shortly. We would love to hear your feedback, so please reach out directly to let us know if there is a seminar that you would like to see. We are also currently working on plans for "The Woodworking Show - Virtual" to launch in early 2021. We will be in touch with further details around timing, exhibitor registration and tickets. Until then, we are continuing to develop our online platform, which will also help the show's growth with the goals of reaching more woodworking enthusiasts. We do understand that the shift to a virtual season may be disappointing, but we truly hope we have your support as we navigate these new territories, while doing what is best for the health and safety of all show vendors, goer's and supporters. We also understand that this adjustment may create financial hardships for our vendors and educators. Please know that we are working hard to creatively provide an unique virtual experience, and if there is any way we can pivot to support the woodworking community, we will do so. Please feel free to share your ideas with us as well. The time is also a financial hardship for The Woodworking Shows, so we appreciate any and all involvement and support during the 2021 season. Please note, that help can be as simple as sharing a TWWS social media post, or forwarding one of our emails to a friend. We have truly missed being on the show floor, sharing stories, and seeing all the amazing woodworking projects up close and in person. We know that this will be a temporary adjustment to TWWS, and that we will be able to gather safely with the woodworking community in the not so distant future. Sincerely, Bryce Beermann - Show Producer & Owner |
||||
Sharpening A Card ScraperIt seems to be a perennial struggle; sharpening a card scraper so that it creates shavings instead of sawdust. I've found that the usual culprits in this struggle are too great a burr angle and heavy-handedness in creating the burr.
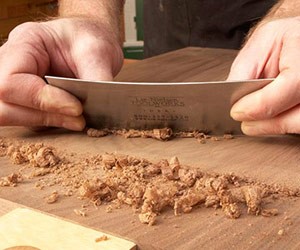 Various jigs available help a person create a burr (which cuts the wood) on the scraper's edge from 1 degree to about 15 degrees. The thing to realize is that the greater the angle of burr, the more a person has to tilt the scraper over for the burr (picture the burr as a hook - see the picture below) to catch the wood. A 5 degree burr is generally all that's needed. In the second picture below, the burnished angle (and thus the burr) appears to be at too great an angle. 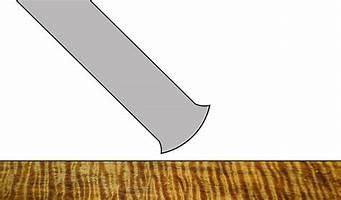 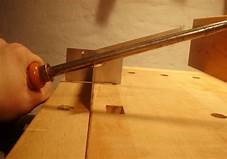 Also, a person can be too heavy-handed using the burnisher to create the burr. As a result, the burr created is too big, causing the scraper to operate roughly (it tries to grab too much of the wood). The solution is to use a force on the burnisher that is similar to the force you use when buttering toast with room temperature butter (i.e. not a whole lot of force). Here's the link demonstration; Paul Sellers video on sharpening a card scraper; lots of good info in just five minutes. Hopefully this will put you back on the straight and narrow. Jim Francis |
||||
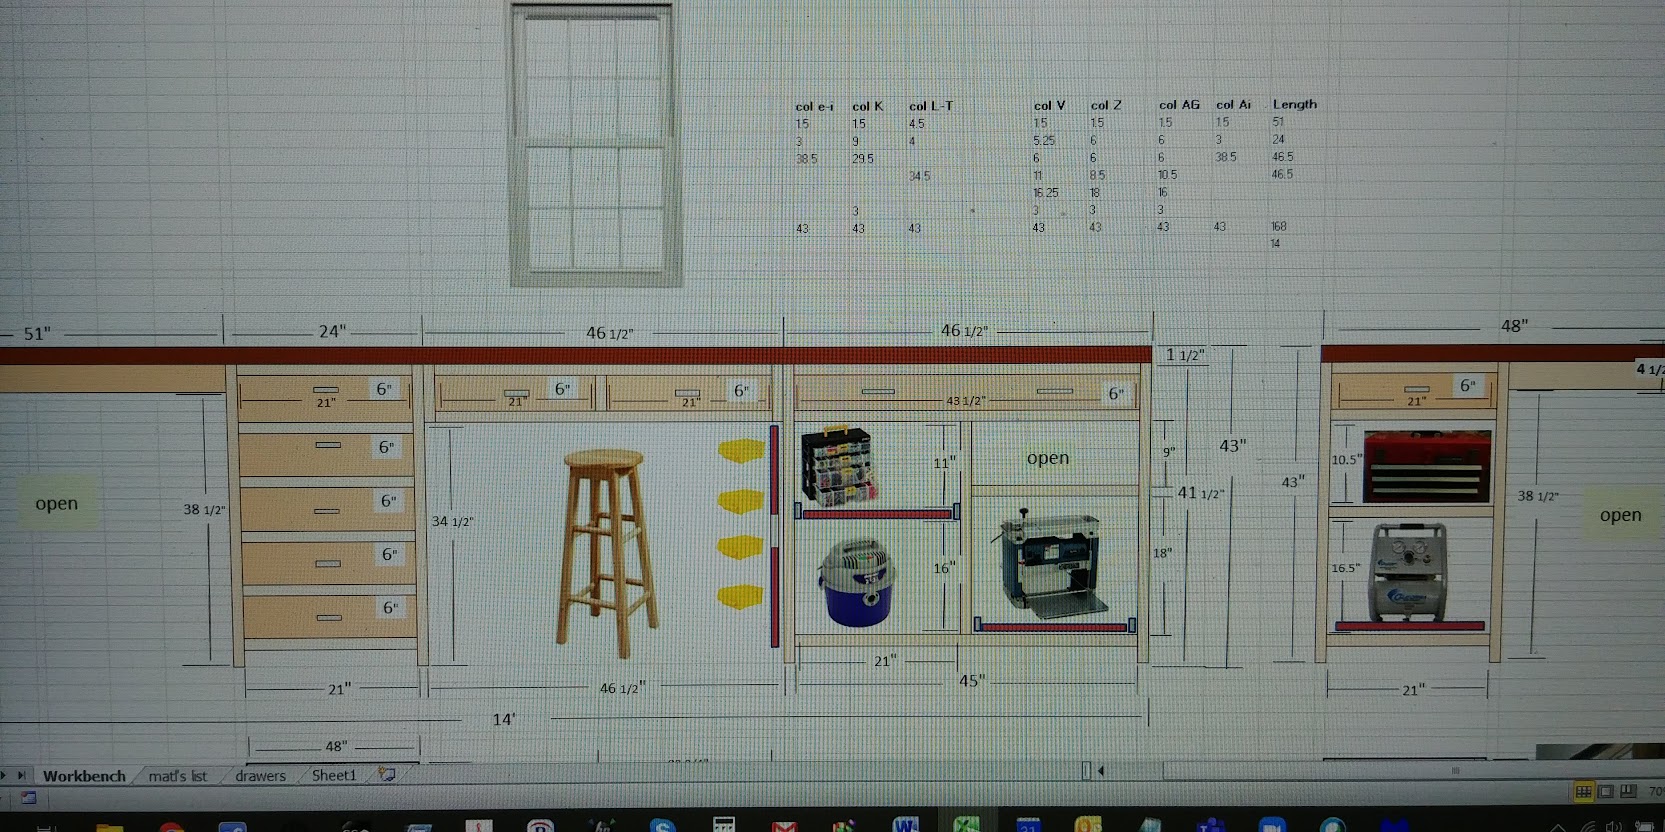
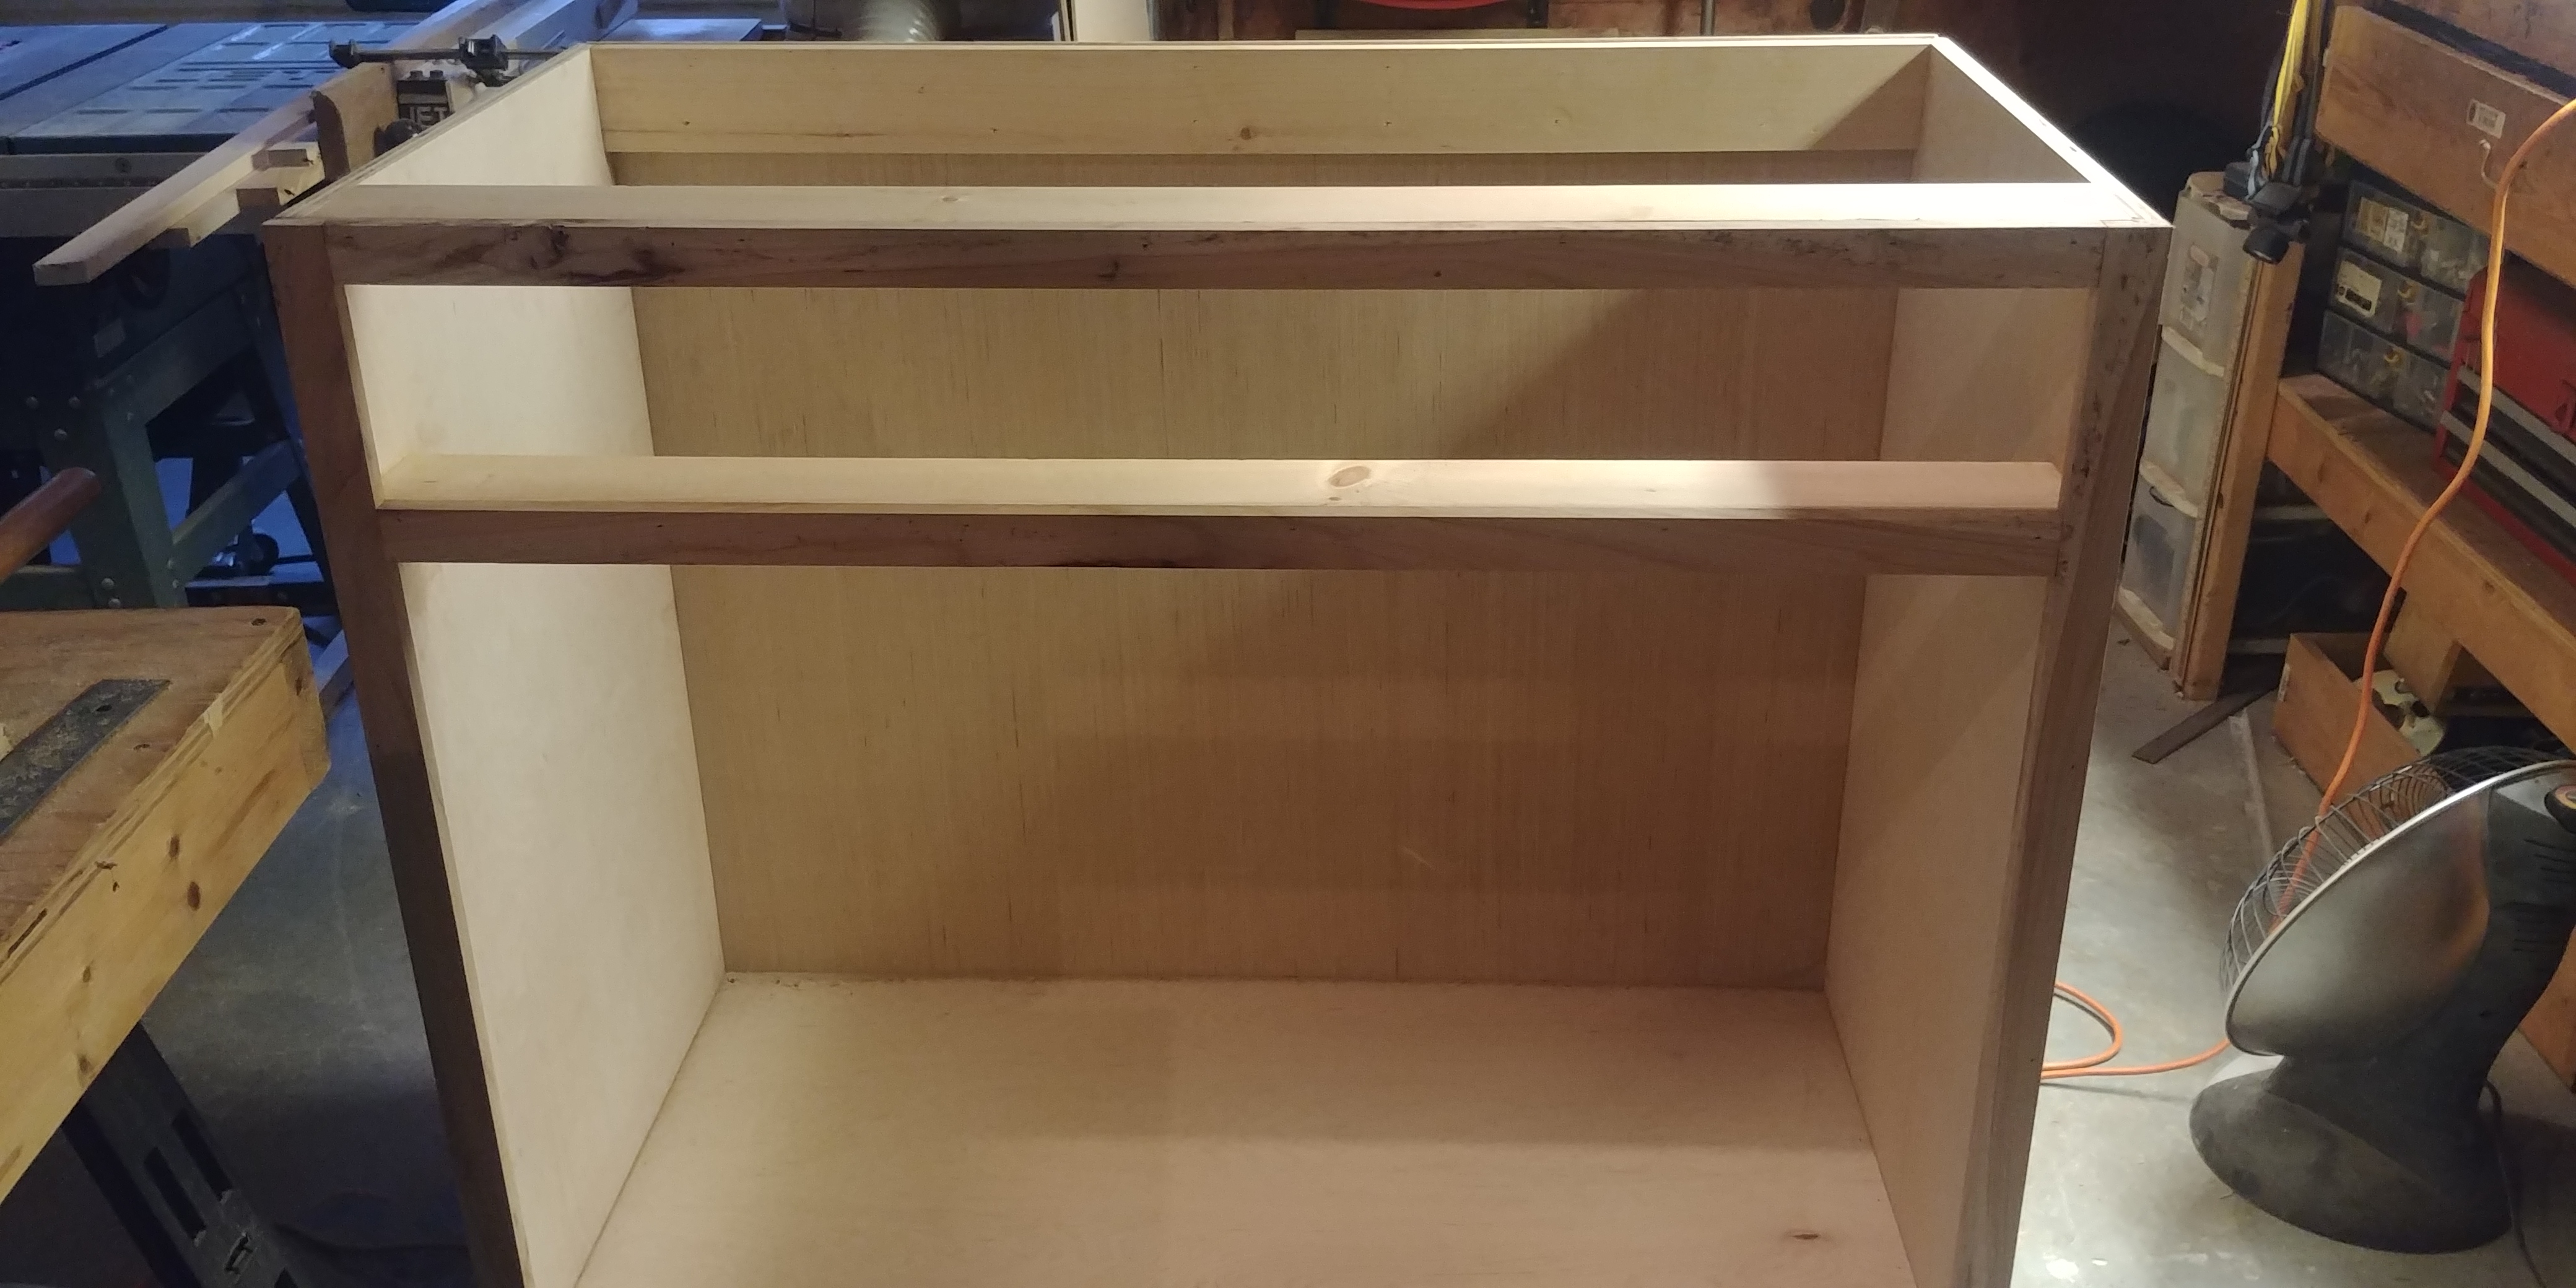
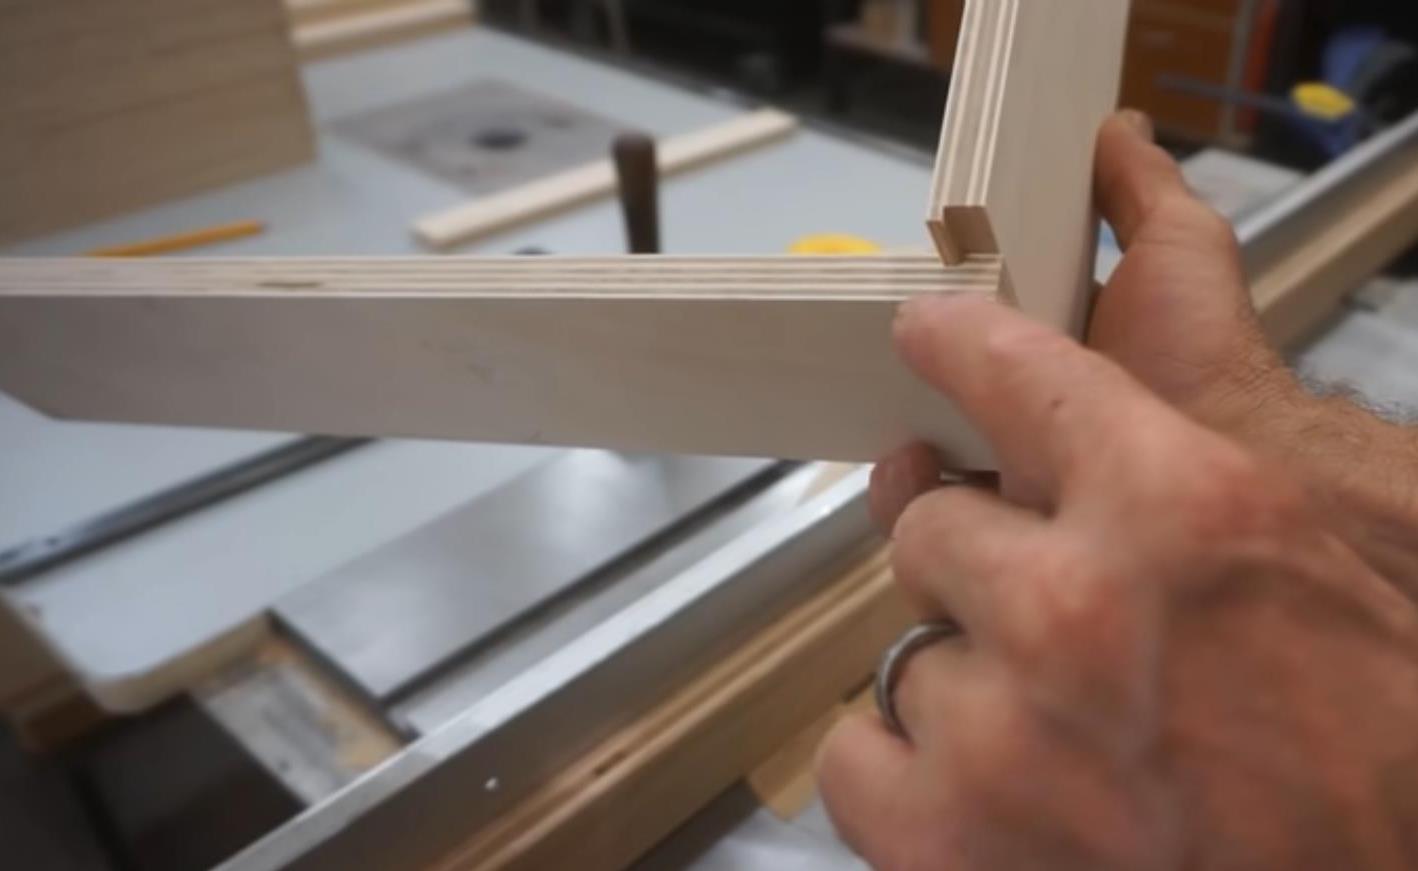
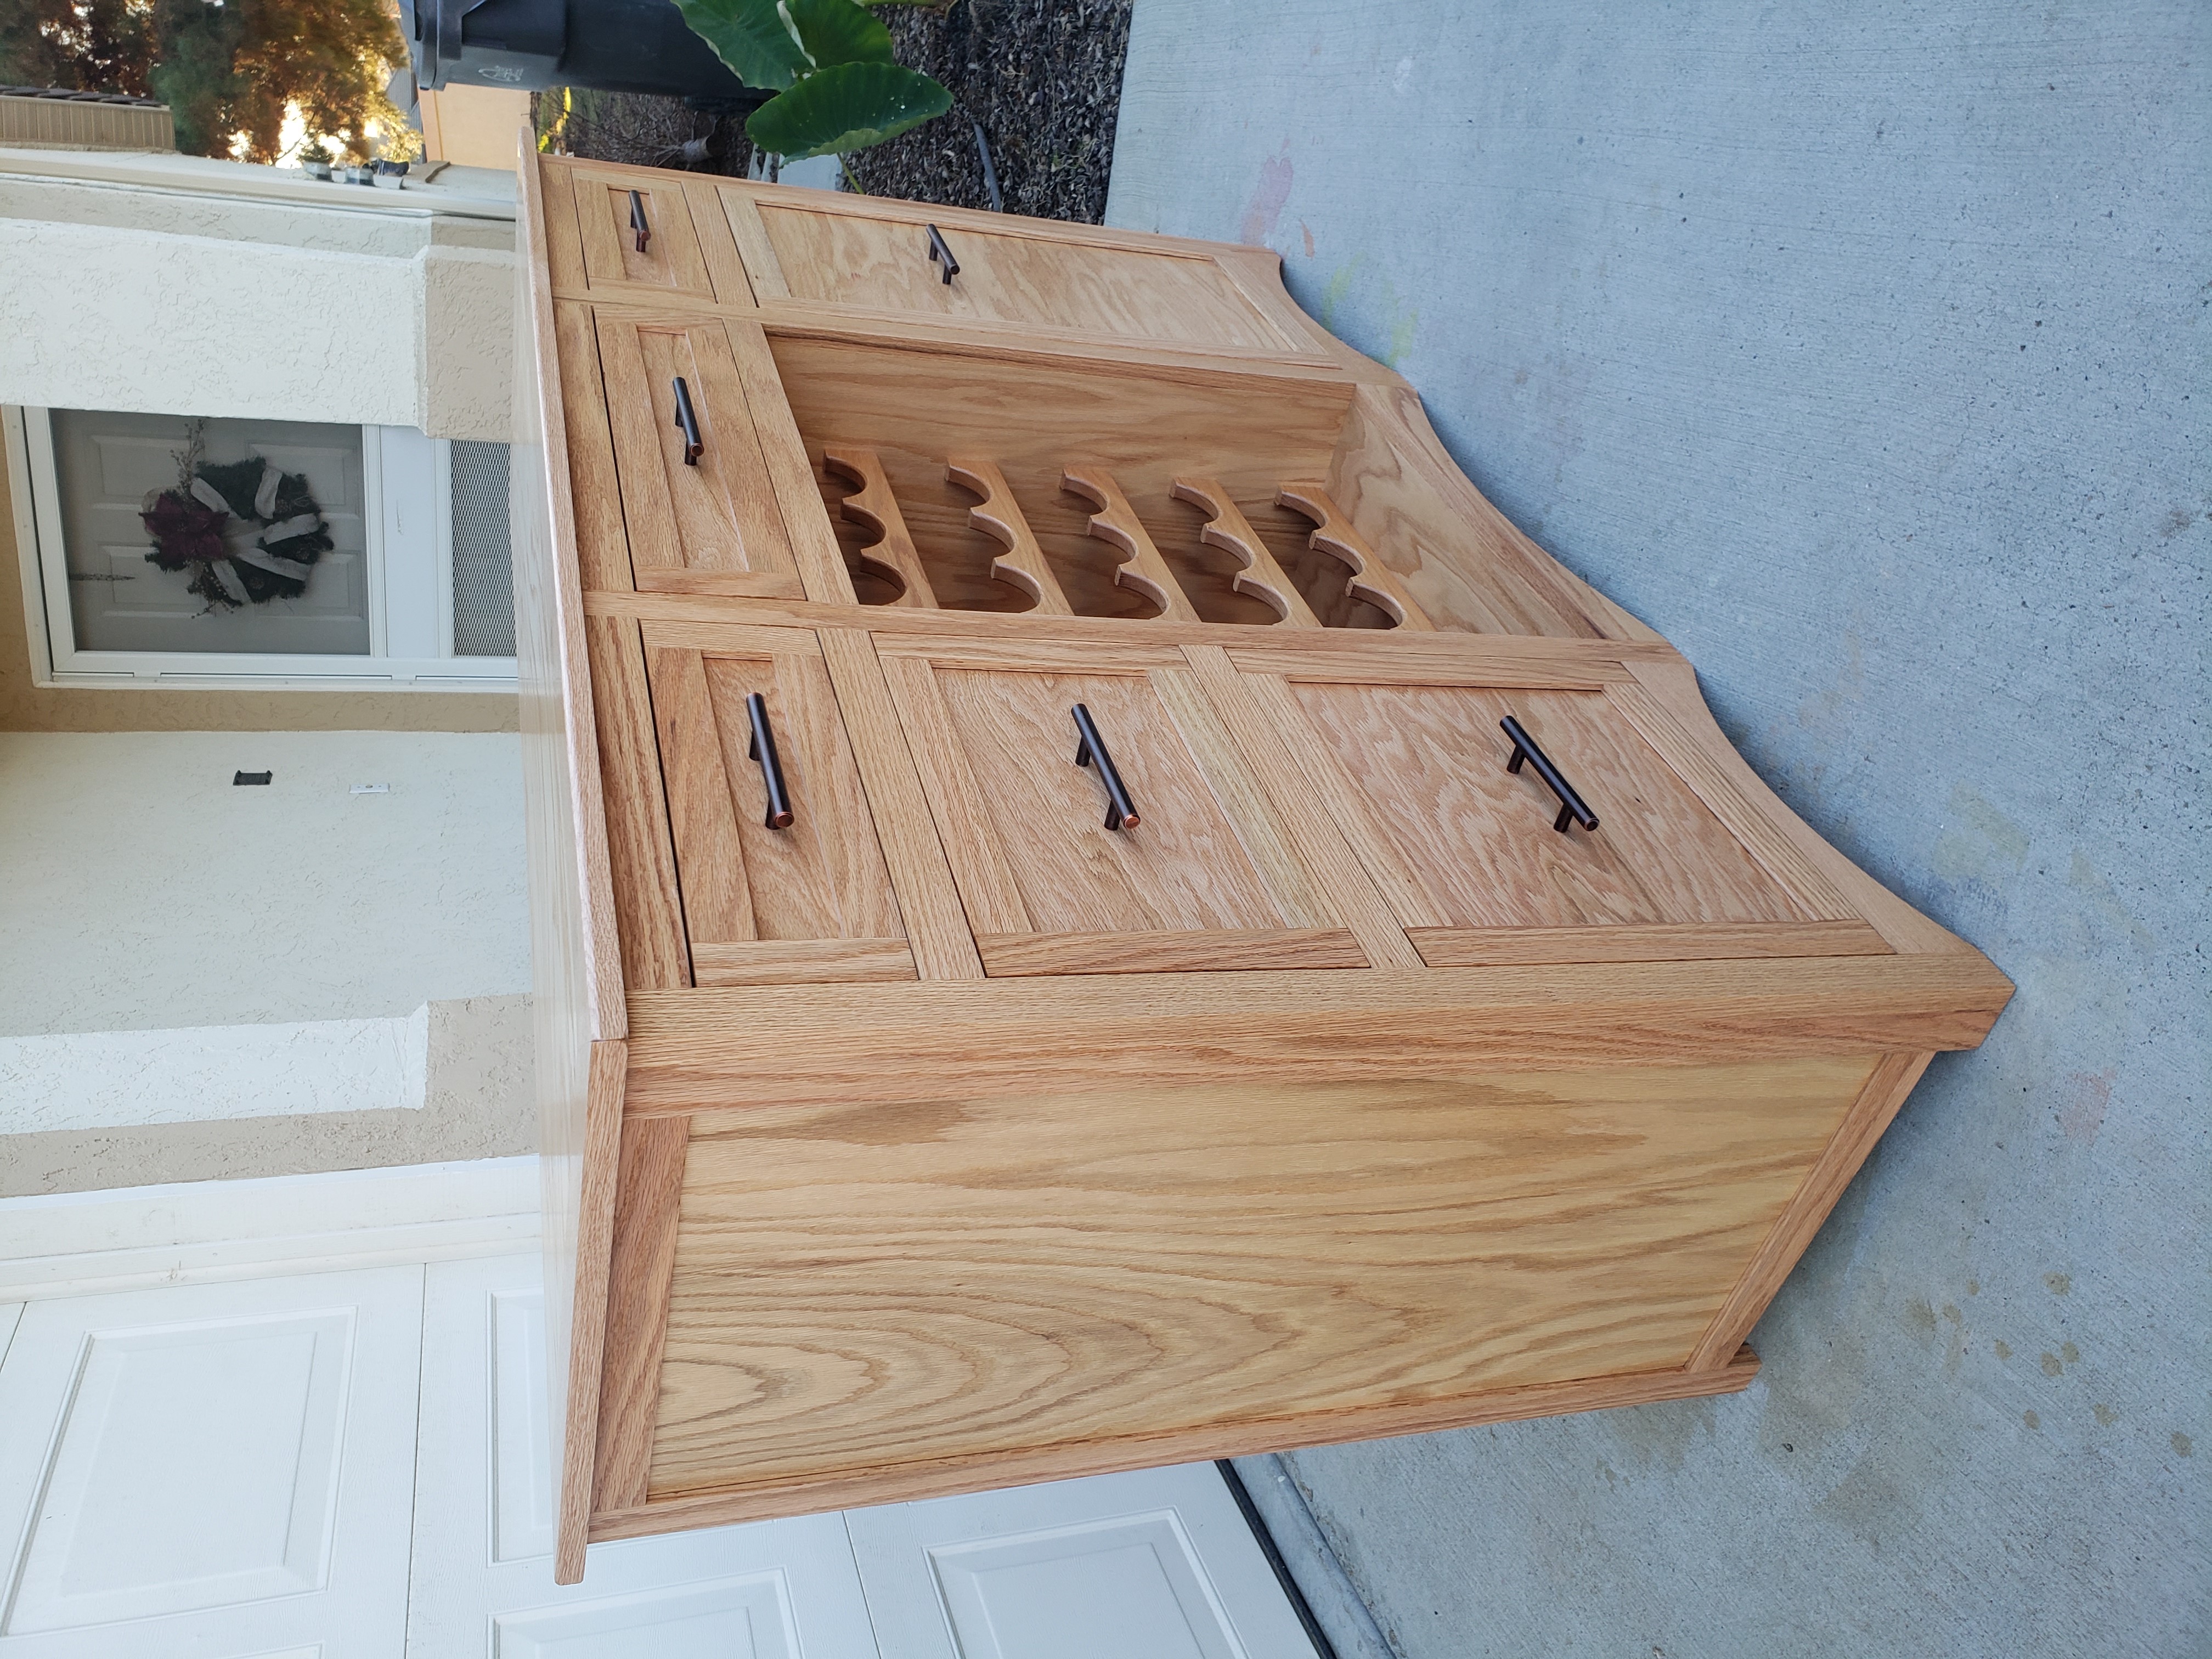
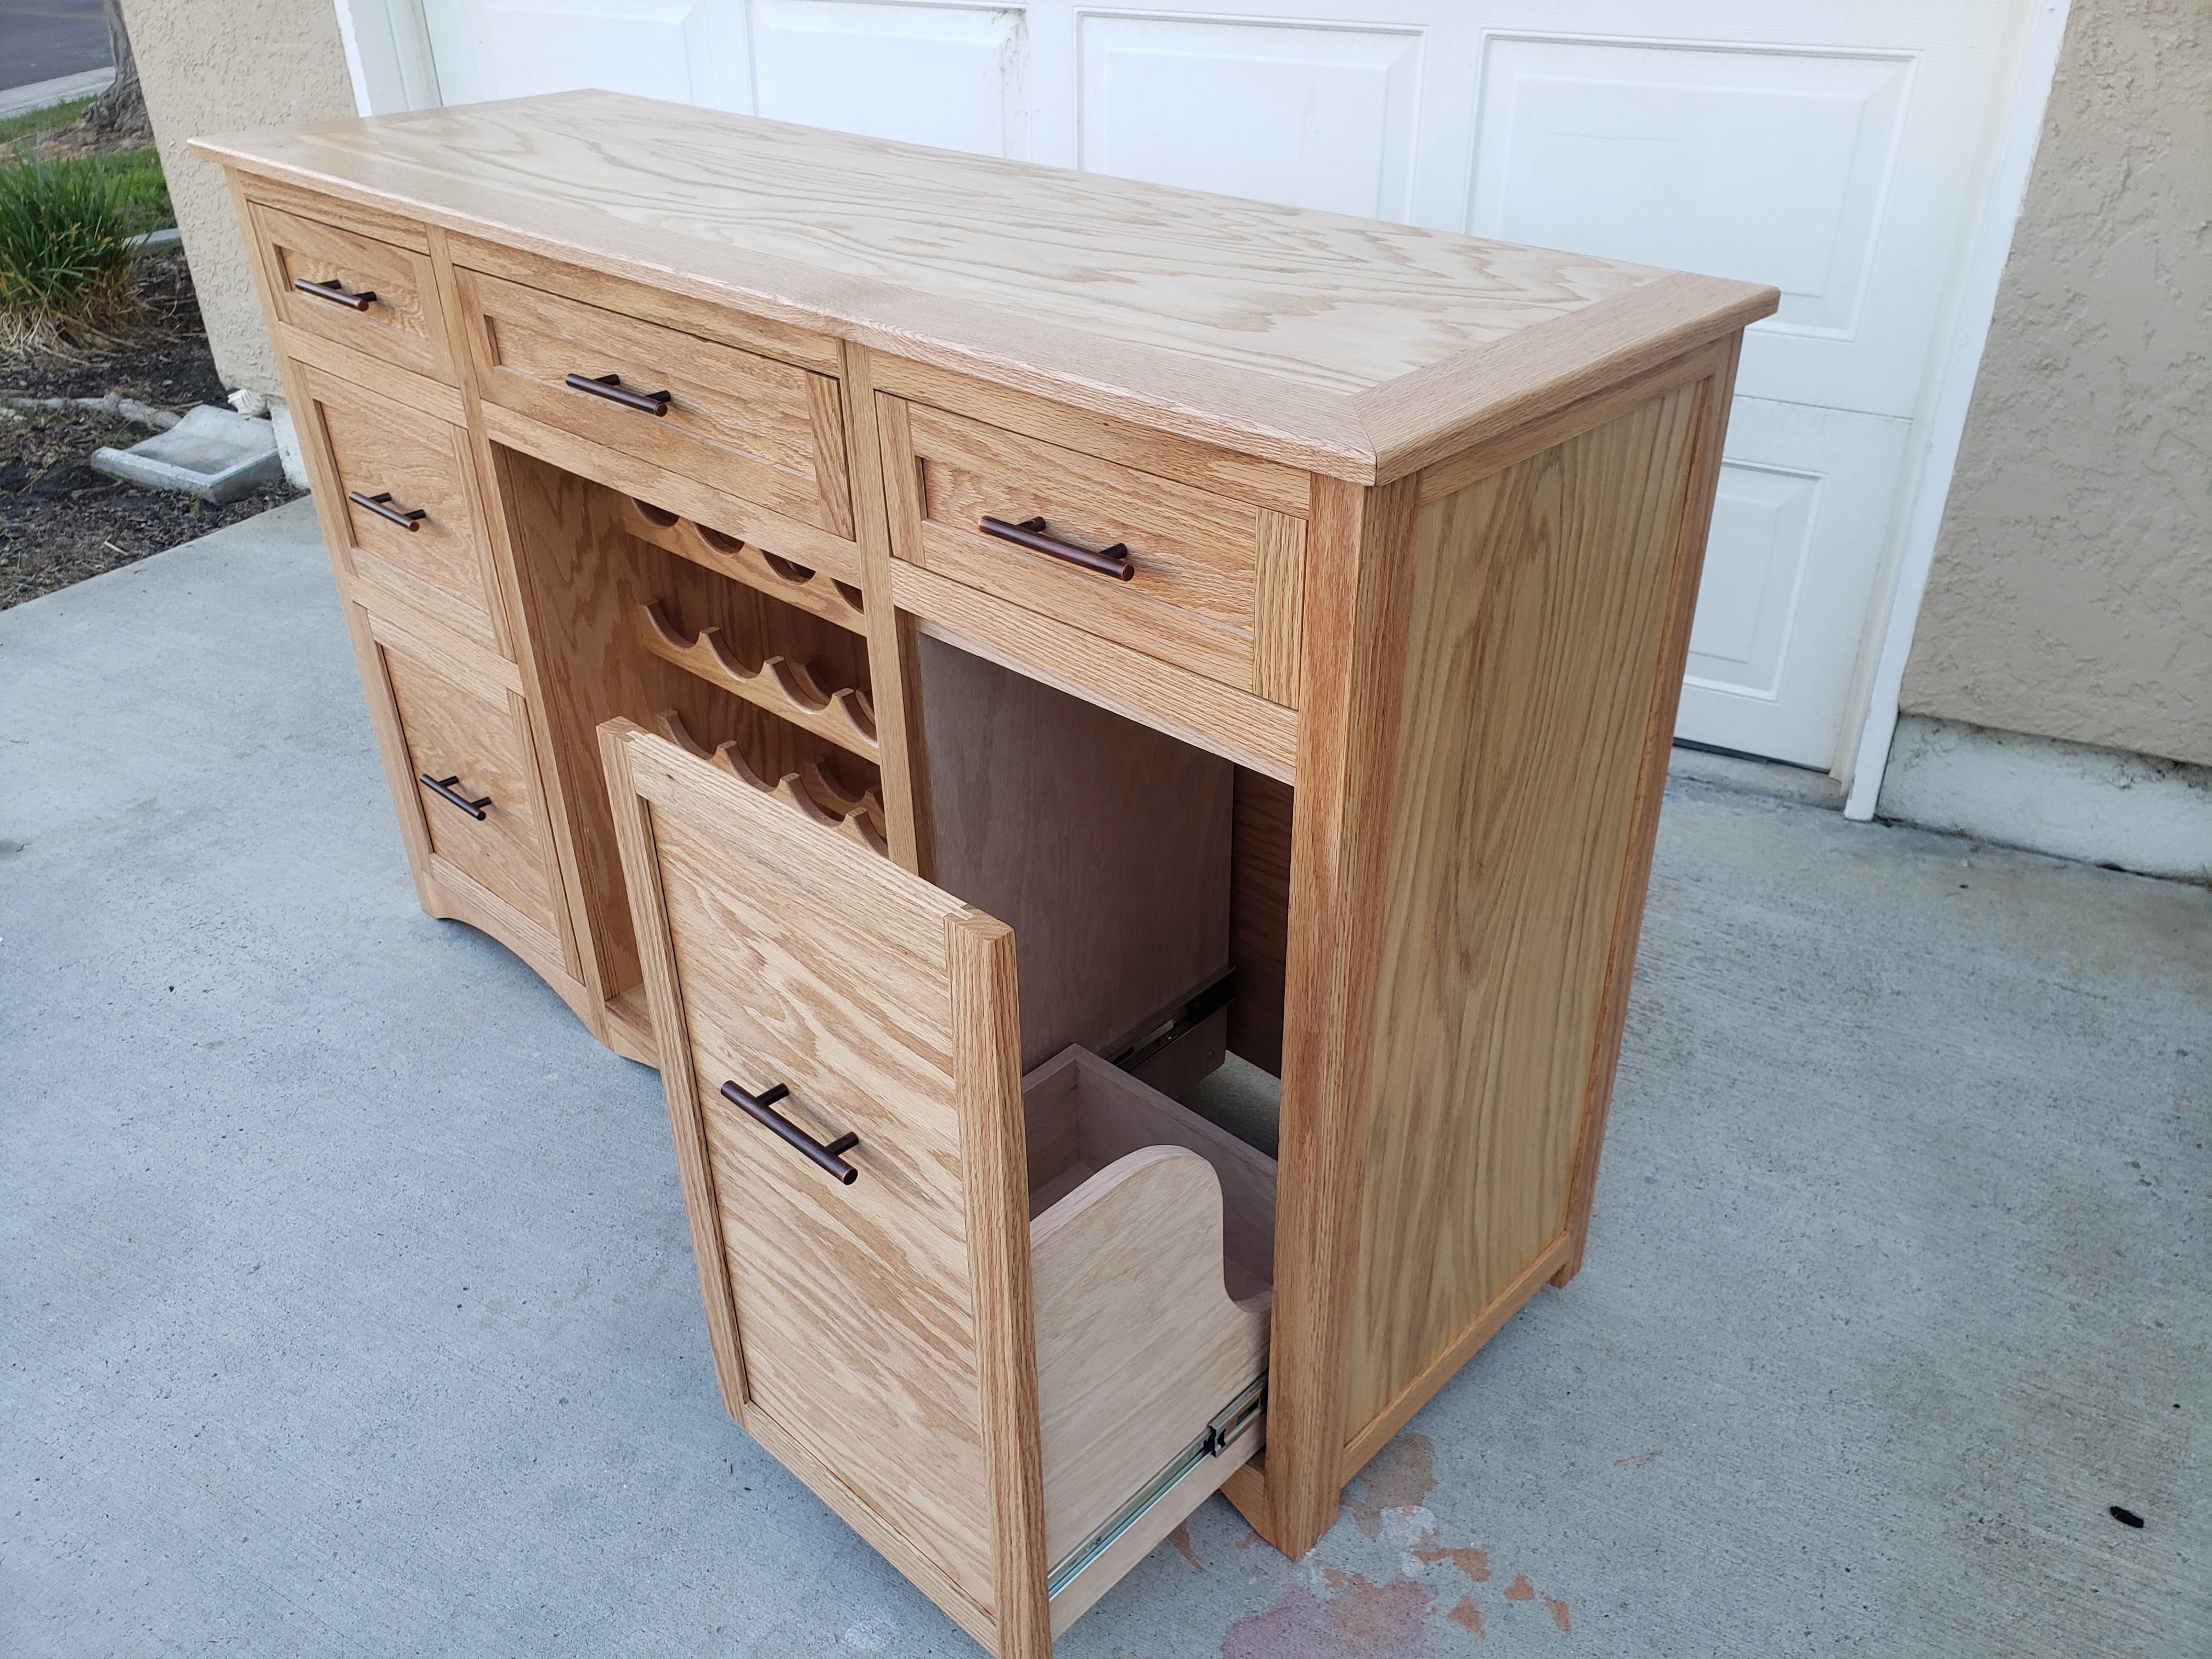
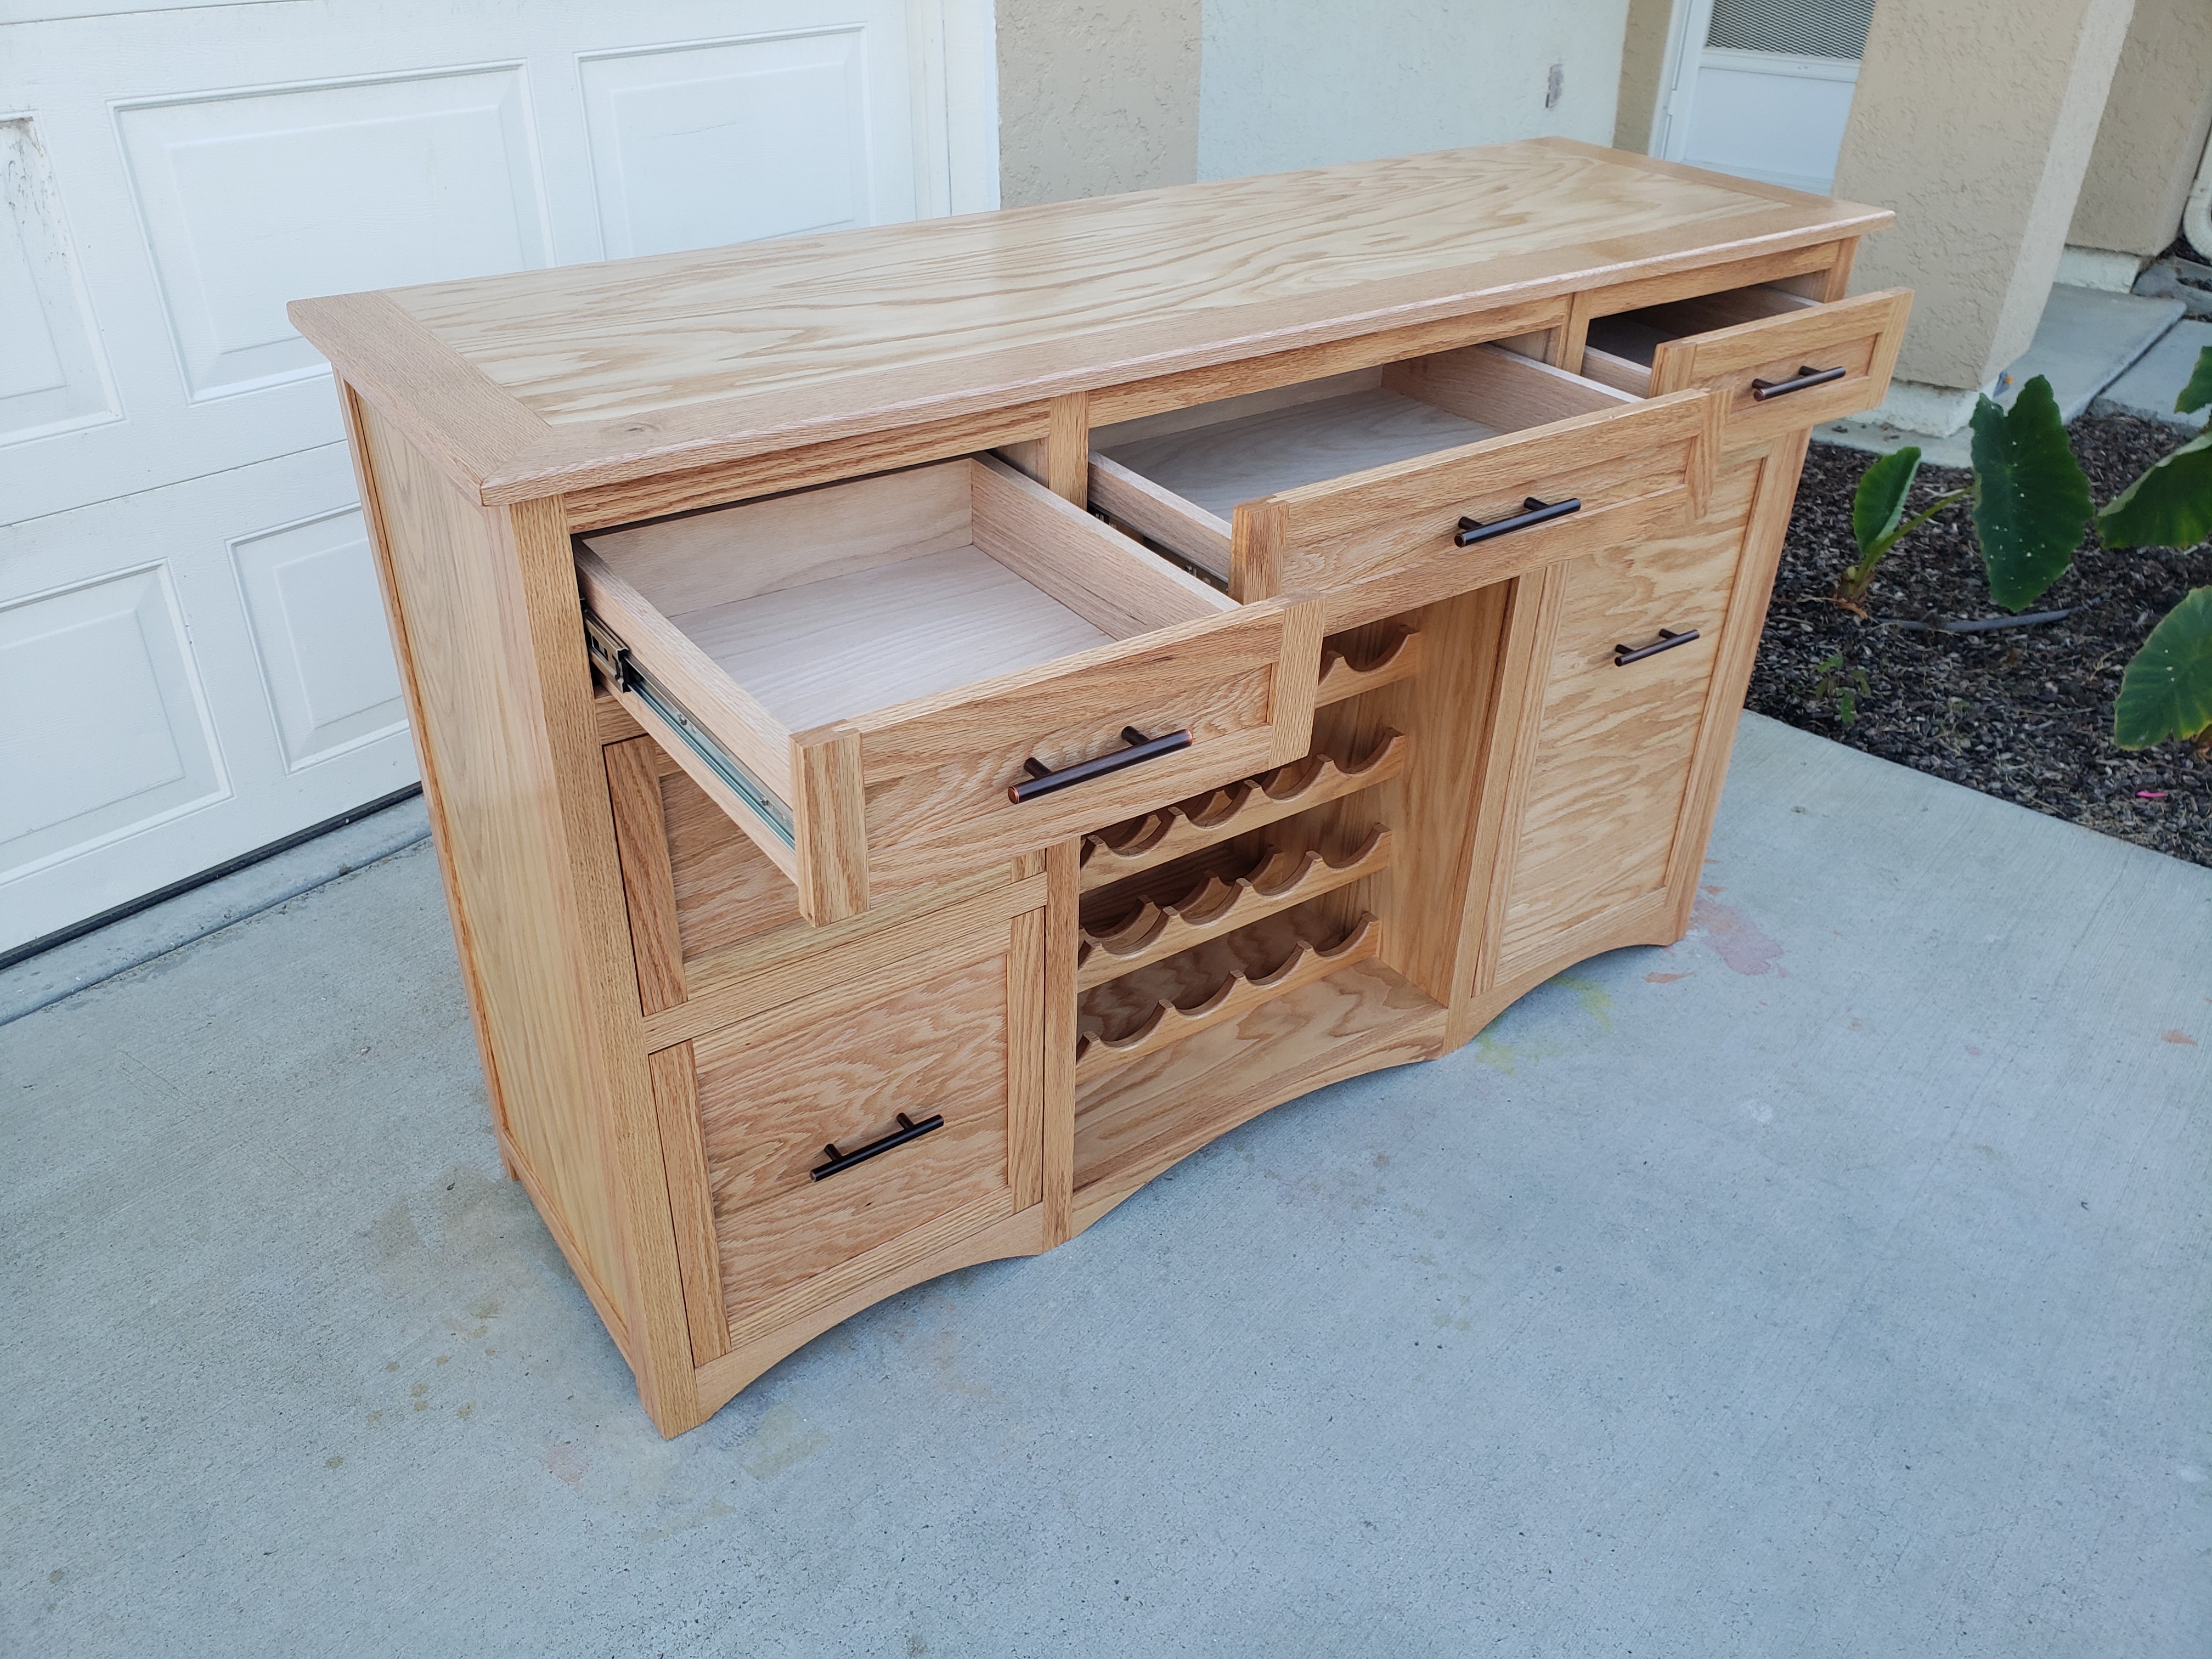
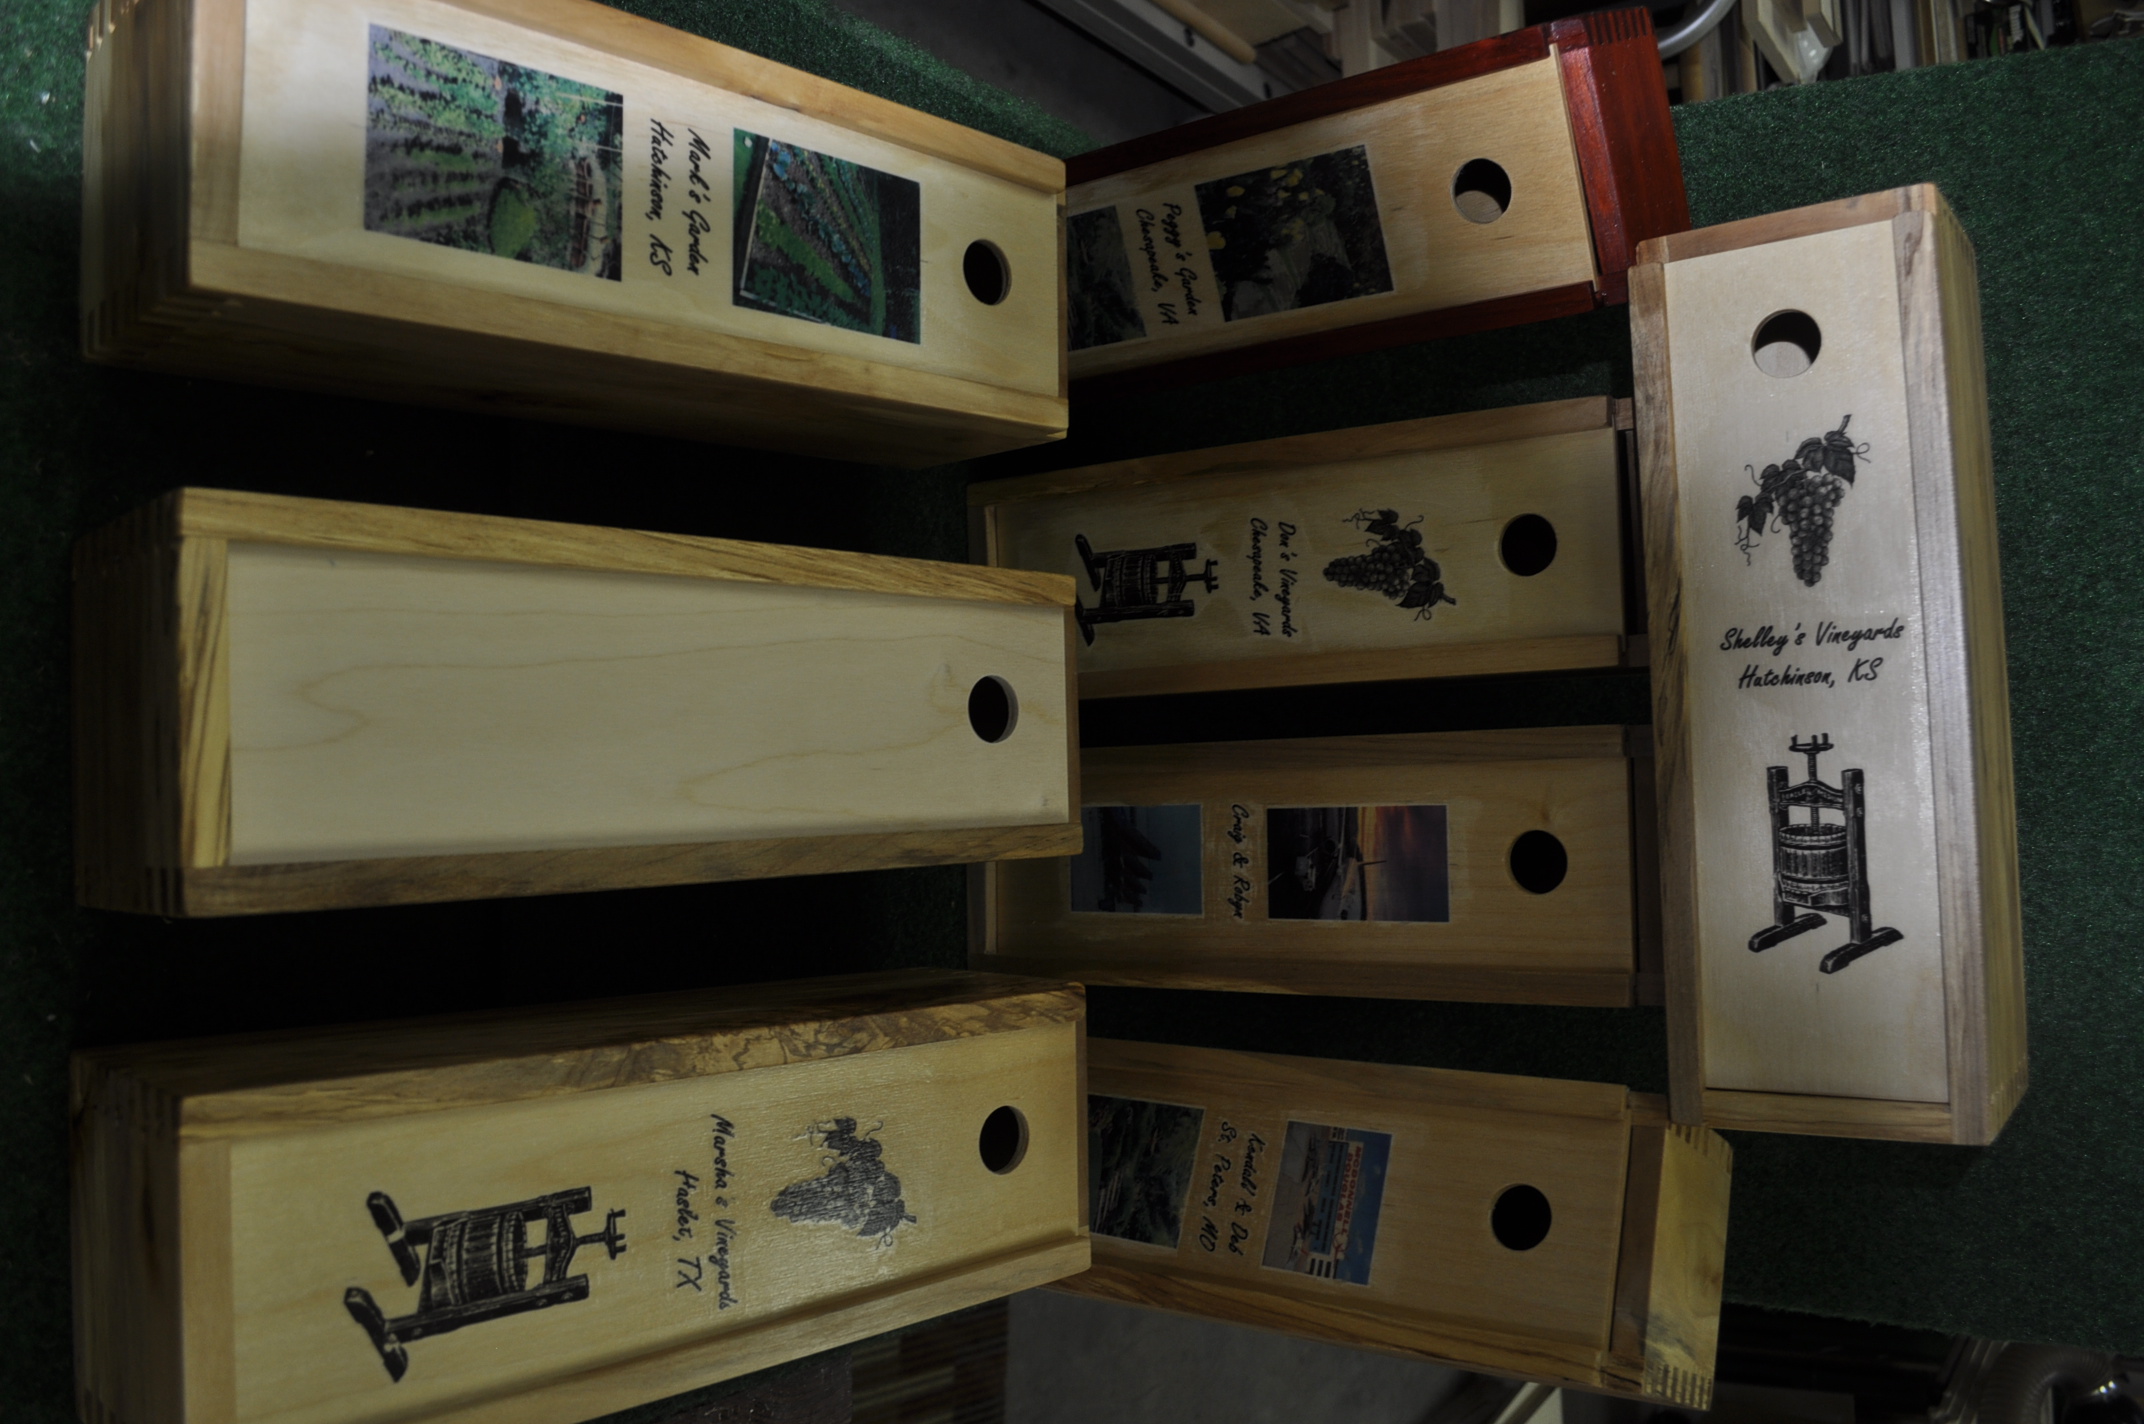
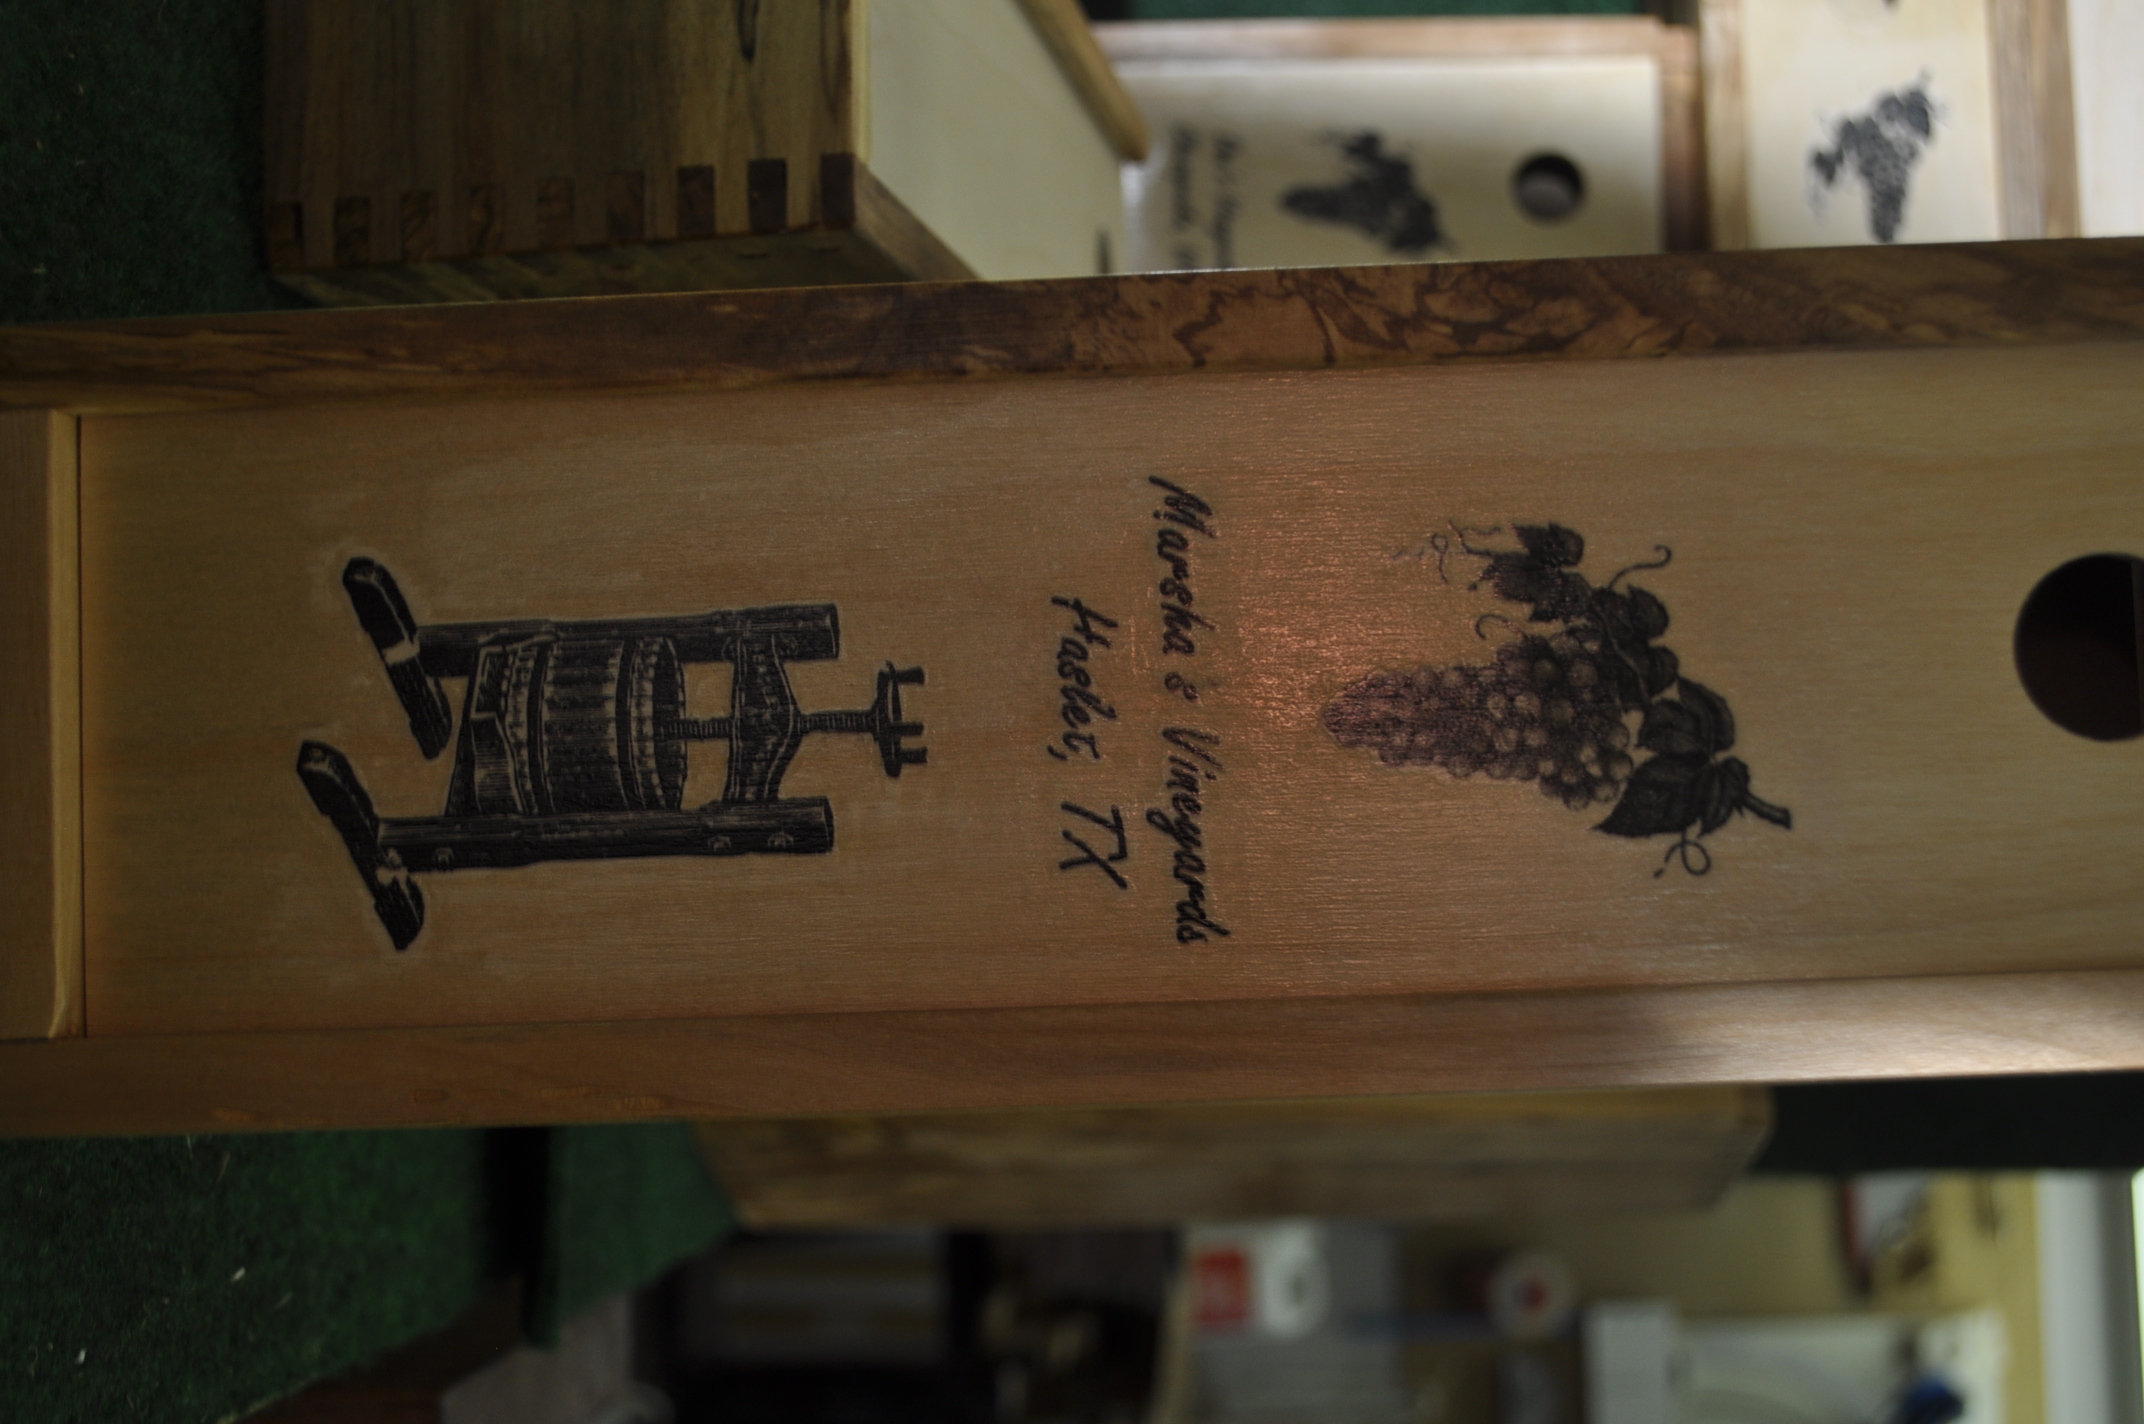
Guild Woodworking ProjectsOur first project for this month’s 2021 newsletter comes from Russ Palmer as he is building his “L” shaped cabinets for his garage workshop. Garage Workshop Cabinets I’ve finally started the cabinet project for my garage/workshop. I wanted more drawers for better organization for future projects. I used full extension drawer slides and purposed spaces (thanks to my wife's recommendations) are features of the project. I'm also incorporating a little slot-in-groove for drawer construction. Our next project comes all the way from TWWWG member Bradley Vierkant who is currently stationed in California. Wine Bottle Buffet Table Great news, first I would just like to say thank you for keeping me on the e-mail chain while I have been stationed in CA. I have greatly enjoyed staying in the loop of all that is going on in the guild. I am getting stationed back in VA and will be in the area come June. I understand dues are not due, due to COVID, but I would be more than happy to throw in my fair share when you need it. Hopefully by the time I am back we are in person again, if not, virtual meetings are going strong! I have definitely not been idle with my time here in California and just finished up a large commissioned piece (see pictures below). Everything is made from Solid Red Oak, and Oak plywood. The buffet table holds 25 bottles of wine and measures in at 5 feet across, 19 inches deep, and 39 inches Tall. The large drawer on the right side is made for a 10 gallon trash can. I have 20 Days till my shop is packed up and still have several projects I need to finish up. I look forward to being back with y'all! The next projects come from Gary Stephens and his woodworking Christmas presents. Customized Wine Bottle Boxes These customized wine bottle boxes were simple to construct for Christmas presents. I used finger or box joints the ends. The wood was splatted River Birch that I had cut 5 or 6 years ago. The lone red colored wine box was made with a left over piece of Paduk. The customization of the front of the box proved to be the most challenging. The image and message were created on my computer and then mirrored in Word so that when the transfer was complete the image would not come out backwards, especially the names. The removal of the paper from the wood to show the image and to whom it was made for turned out to be very time consuming but in the end everyone liked their wine boxes. Not something they could go out to the store and buy. Serving Trays
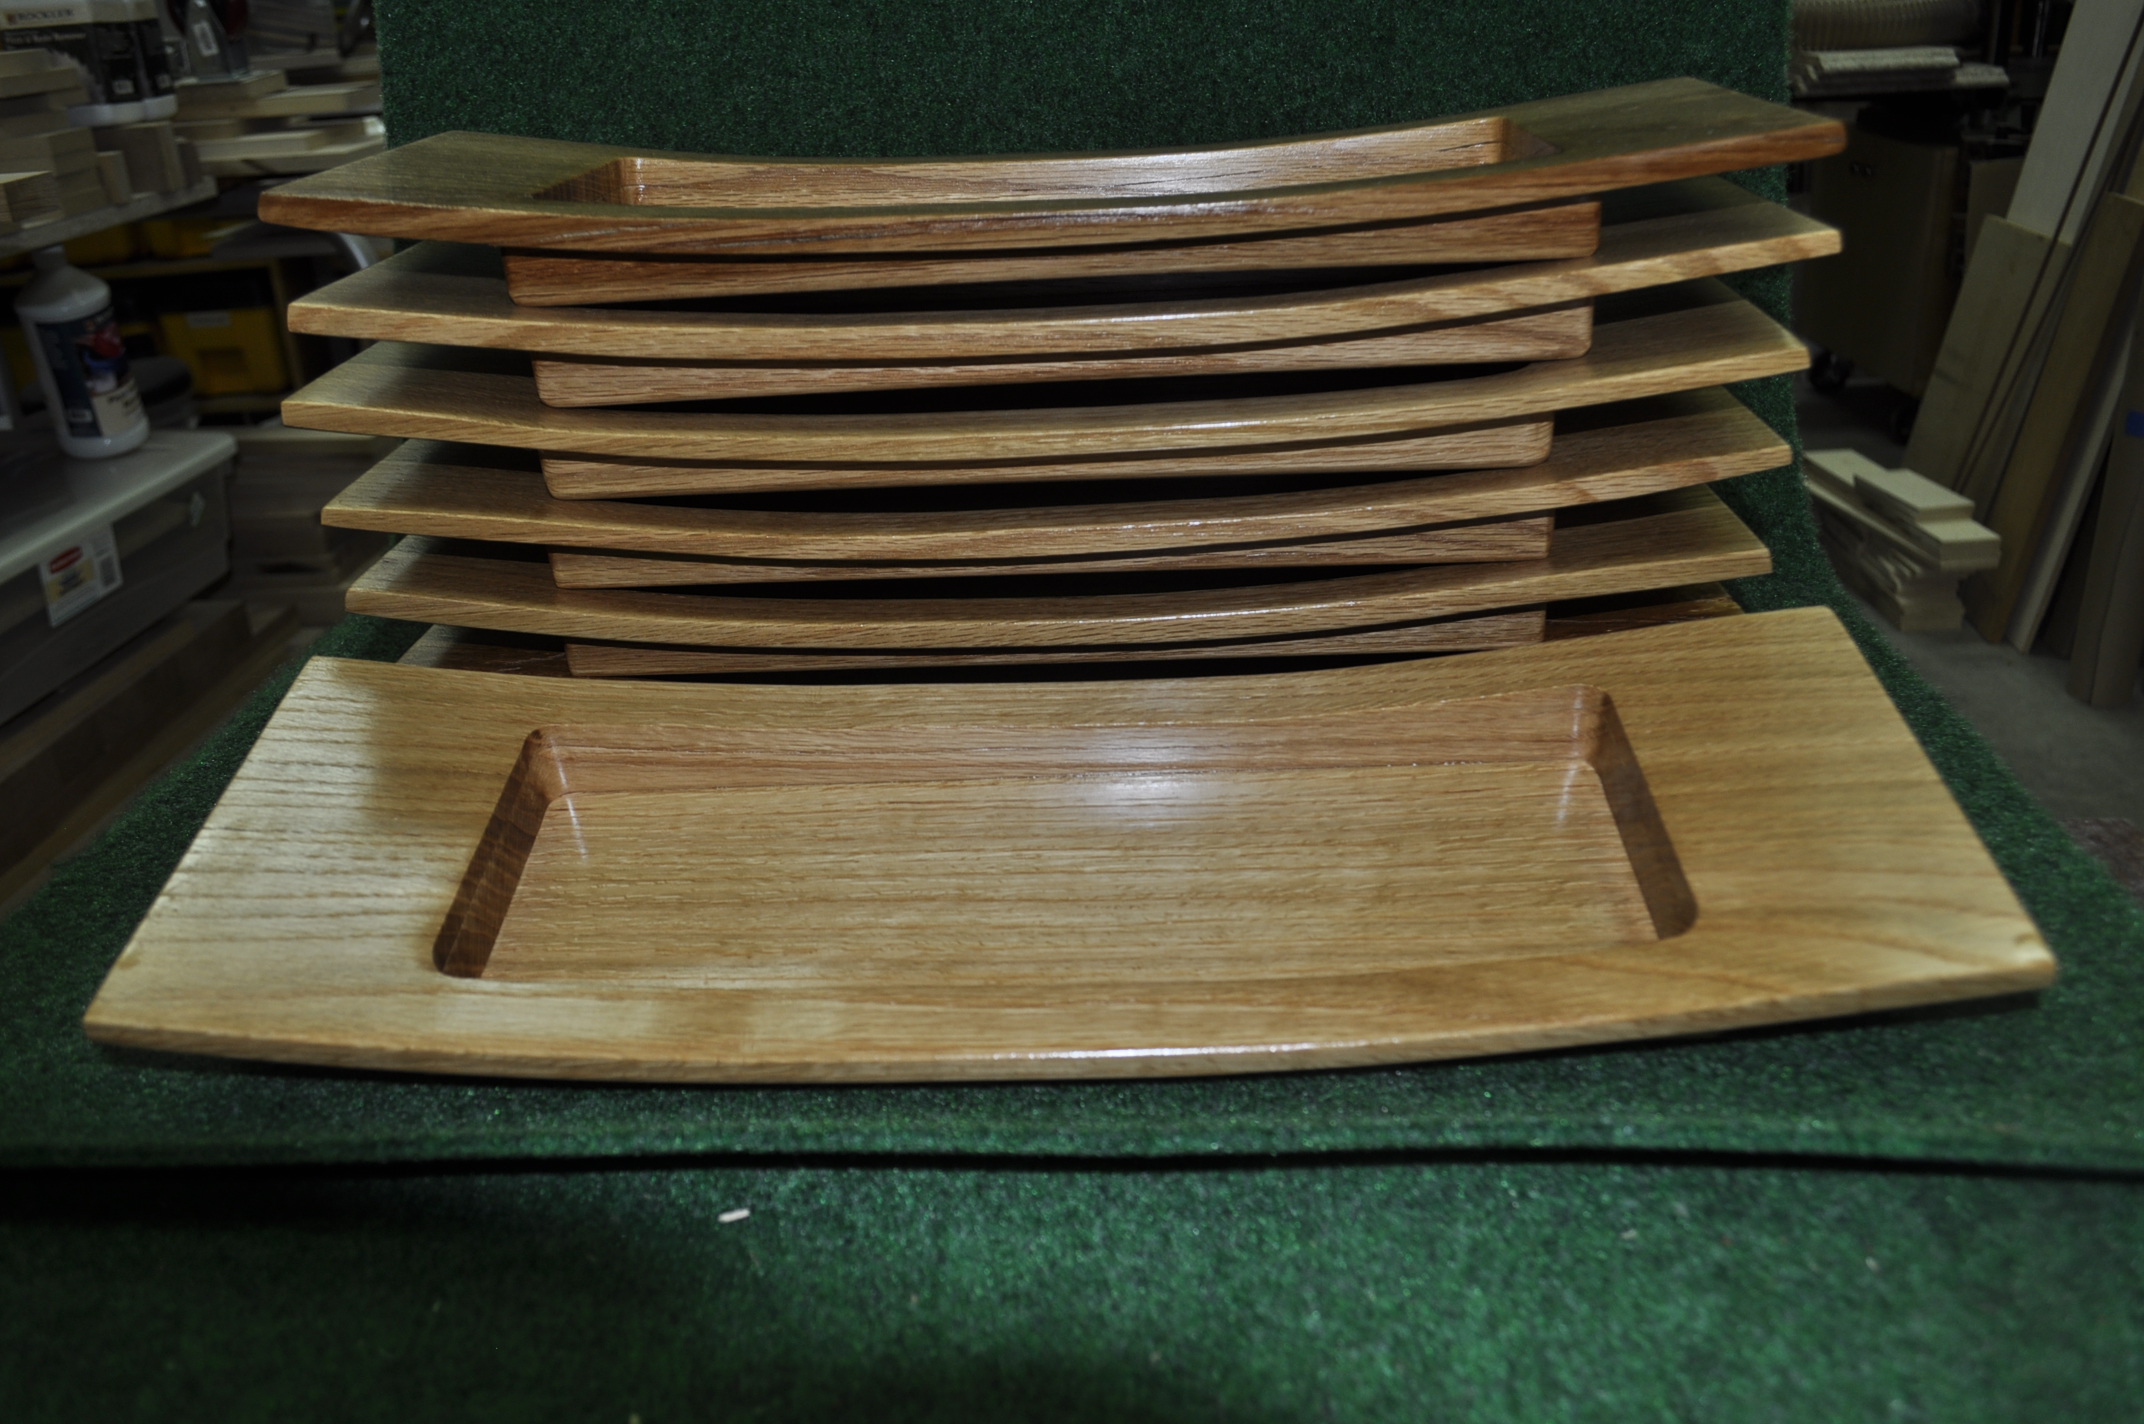
This curved centerpiece was featured in the Woodsmith Magazine in December of 2014. This particular issue of the magazine featured classic techniques for working with curved parts. My wife wanted me to make them for Christmas presents but there was not enough time and I did not have the wood. The curved centerpiece is made out of a solid 12/4’s quarter’s sawn white oak board. I worked with Chris Vickers of Somerton Ridge Hardwoods in Suffolk, VA to cut the log in his saw mill in 2015. The wood needed to dry for a year before going to the kiln to remove the final moisture. We purchased the Oak lumber sometime in the summer of 2016 with plans to make Christmas presents out of the Oak. Not sure what got in the way of not making them for Christmas in 2016 or 2017. In 2018 I was really sick with Sepsis and nothing happened. In 2019 I finally got around to cutting the lumber into the correct lengths and getting it surfaced planed. You cannot imagine how heavy these 7” or 8” wide planks being 3” plus thick and 8’ or 9’ long. They were all I could do to move them and they taxed the table saw because of their thickness and hardness. In 2020 the pandemic hit and I had lots of quality time on my hands to work in the shop and made the first prototype in the summer of 2020. If you look carefully at the center piece you might be able to see that I made it out 3 pieces and then glued them back together. The first cut on the band saw was to cut off about 3/8” on one side and then run these two parts back through the surface planner to get a flat surface. The 3/8” piece became the bottom piece. The second part of the project was to make a template to rout out the center part of the tray. I used this template to mark the area to be cut out and then a saber saw to do a rough cut of the center section. Using a flush trim router bit I was able to use the template to “clean” out the rough edges of the center section left by the saber saw. Lots of time and sawdust! The third part of the project was to make a template of the curved section and place it on the large section of wood with the center section removed and then to use the band saw to cut the curve on both sides using the band saw. This was a very slow and tedious job but it left me with the necessary parts to make the tray. I then glued the bottom piece back to the middle section and did some trim work on this to get the shape you see on the bottom of the tray. Finally I glued the top section to this new section for the final project and then spent hours sanding the rough surface. This was the most labor intensive project that I have ever attempted! I still have 6 more units awaiting sanding and gluing. Wooden Cross
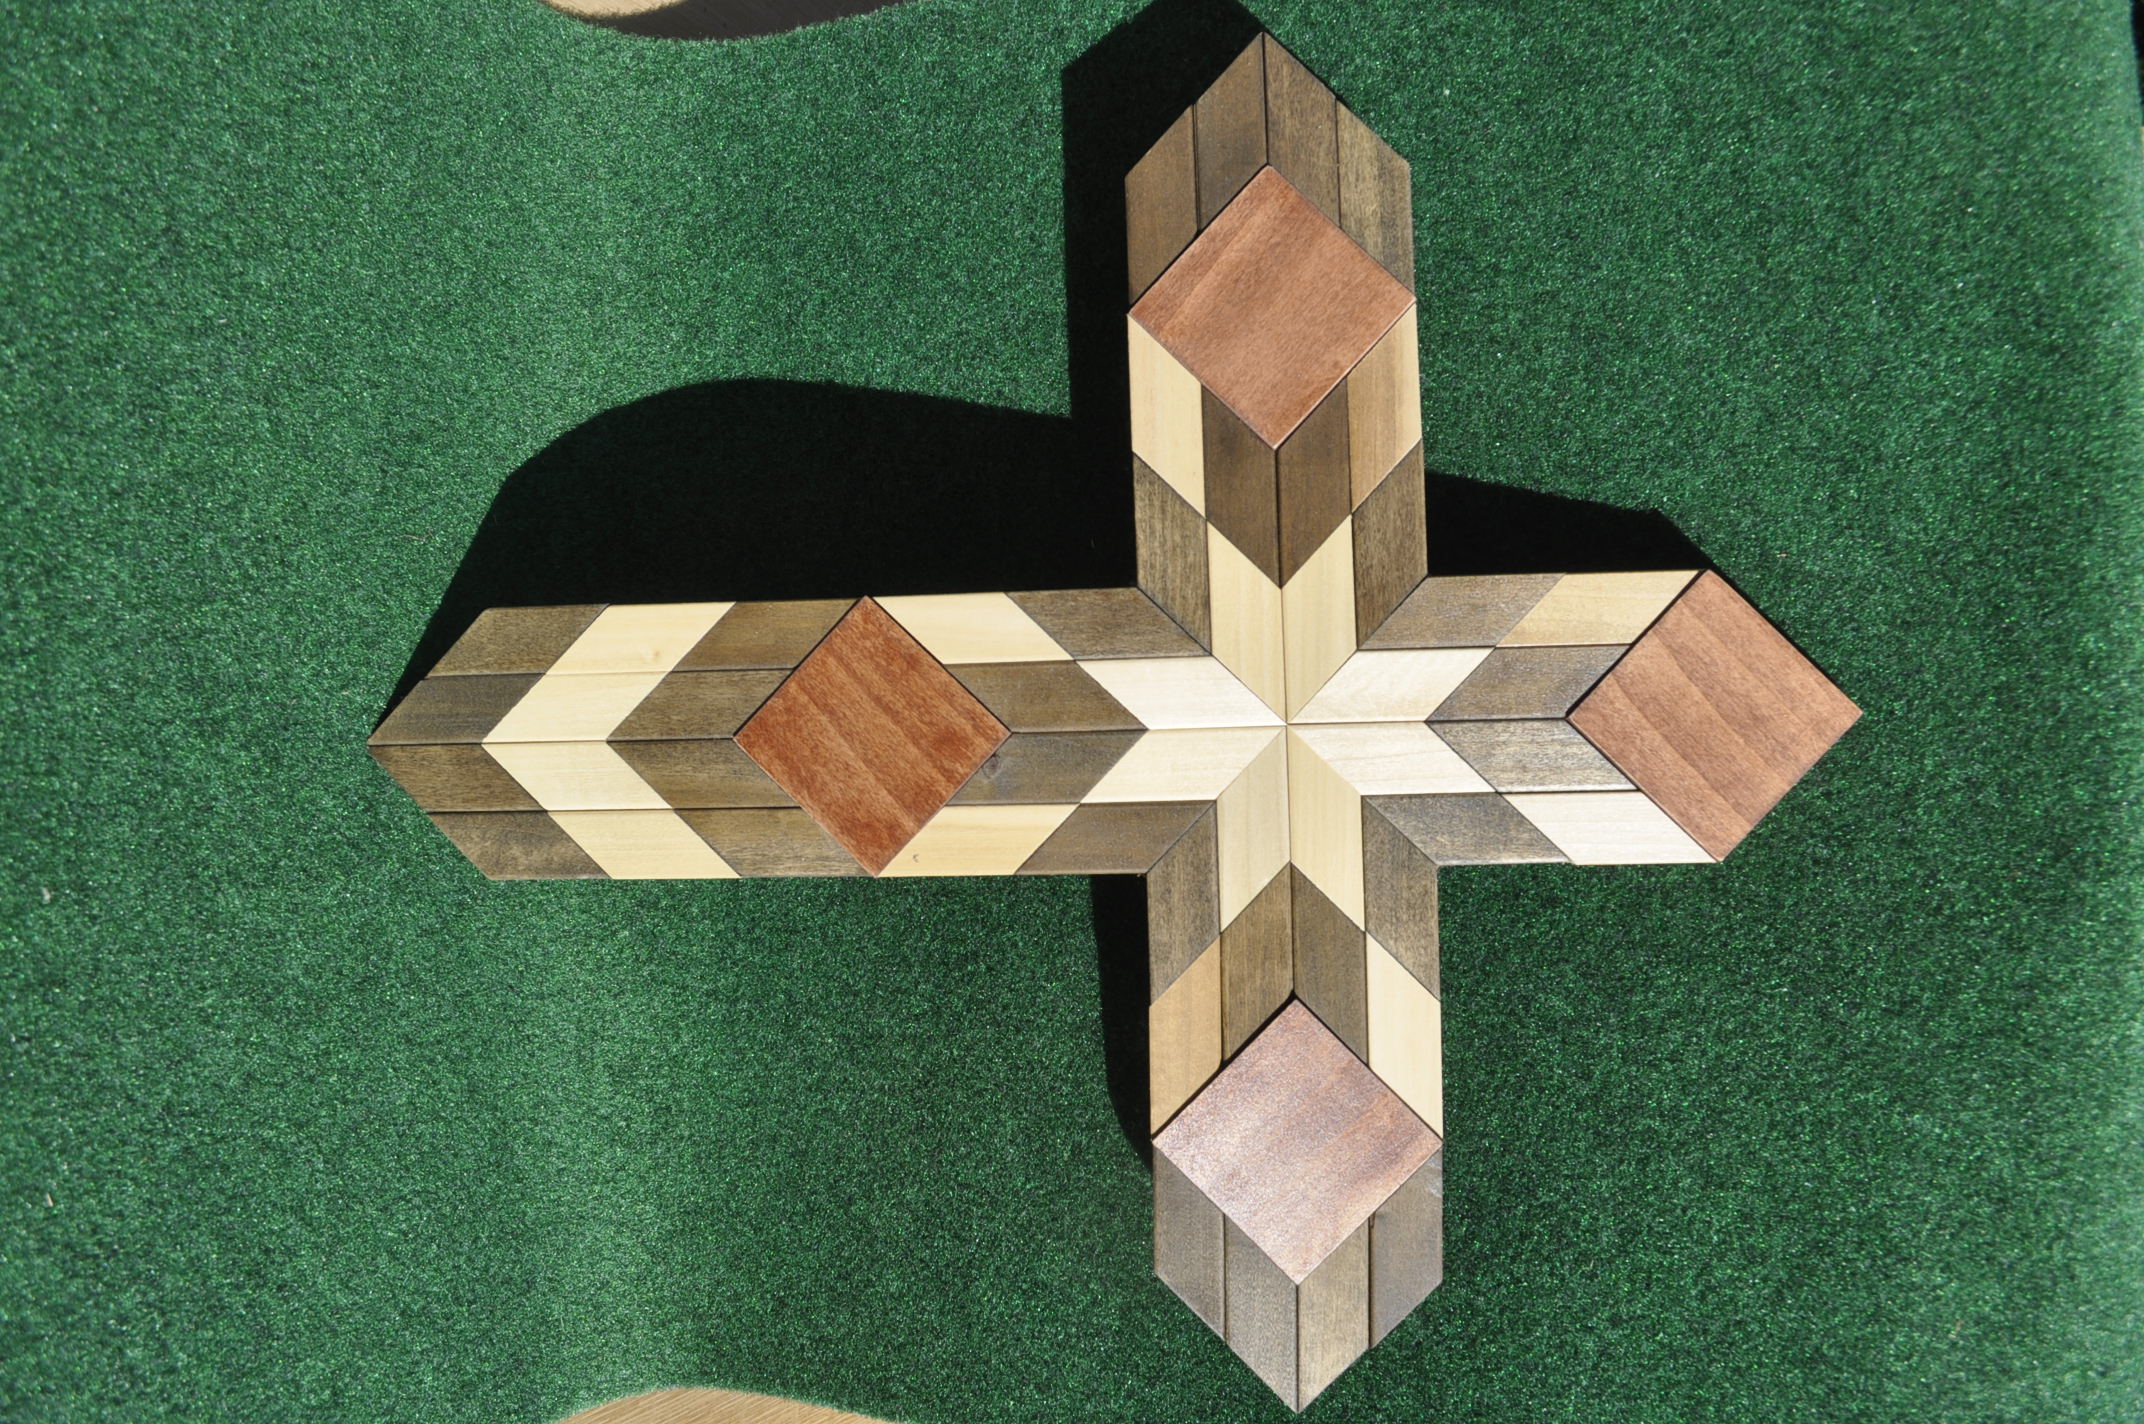
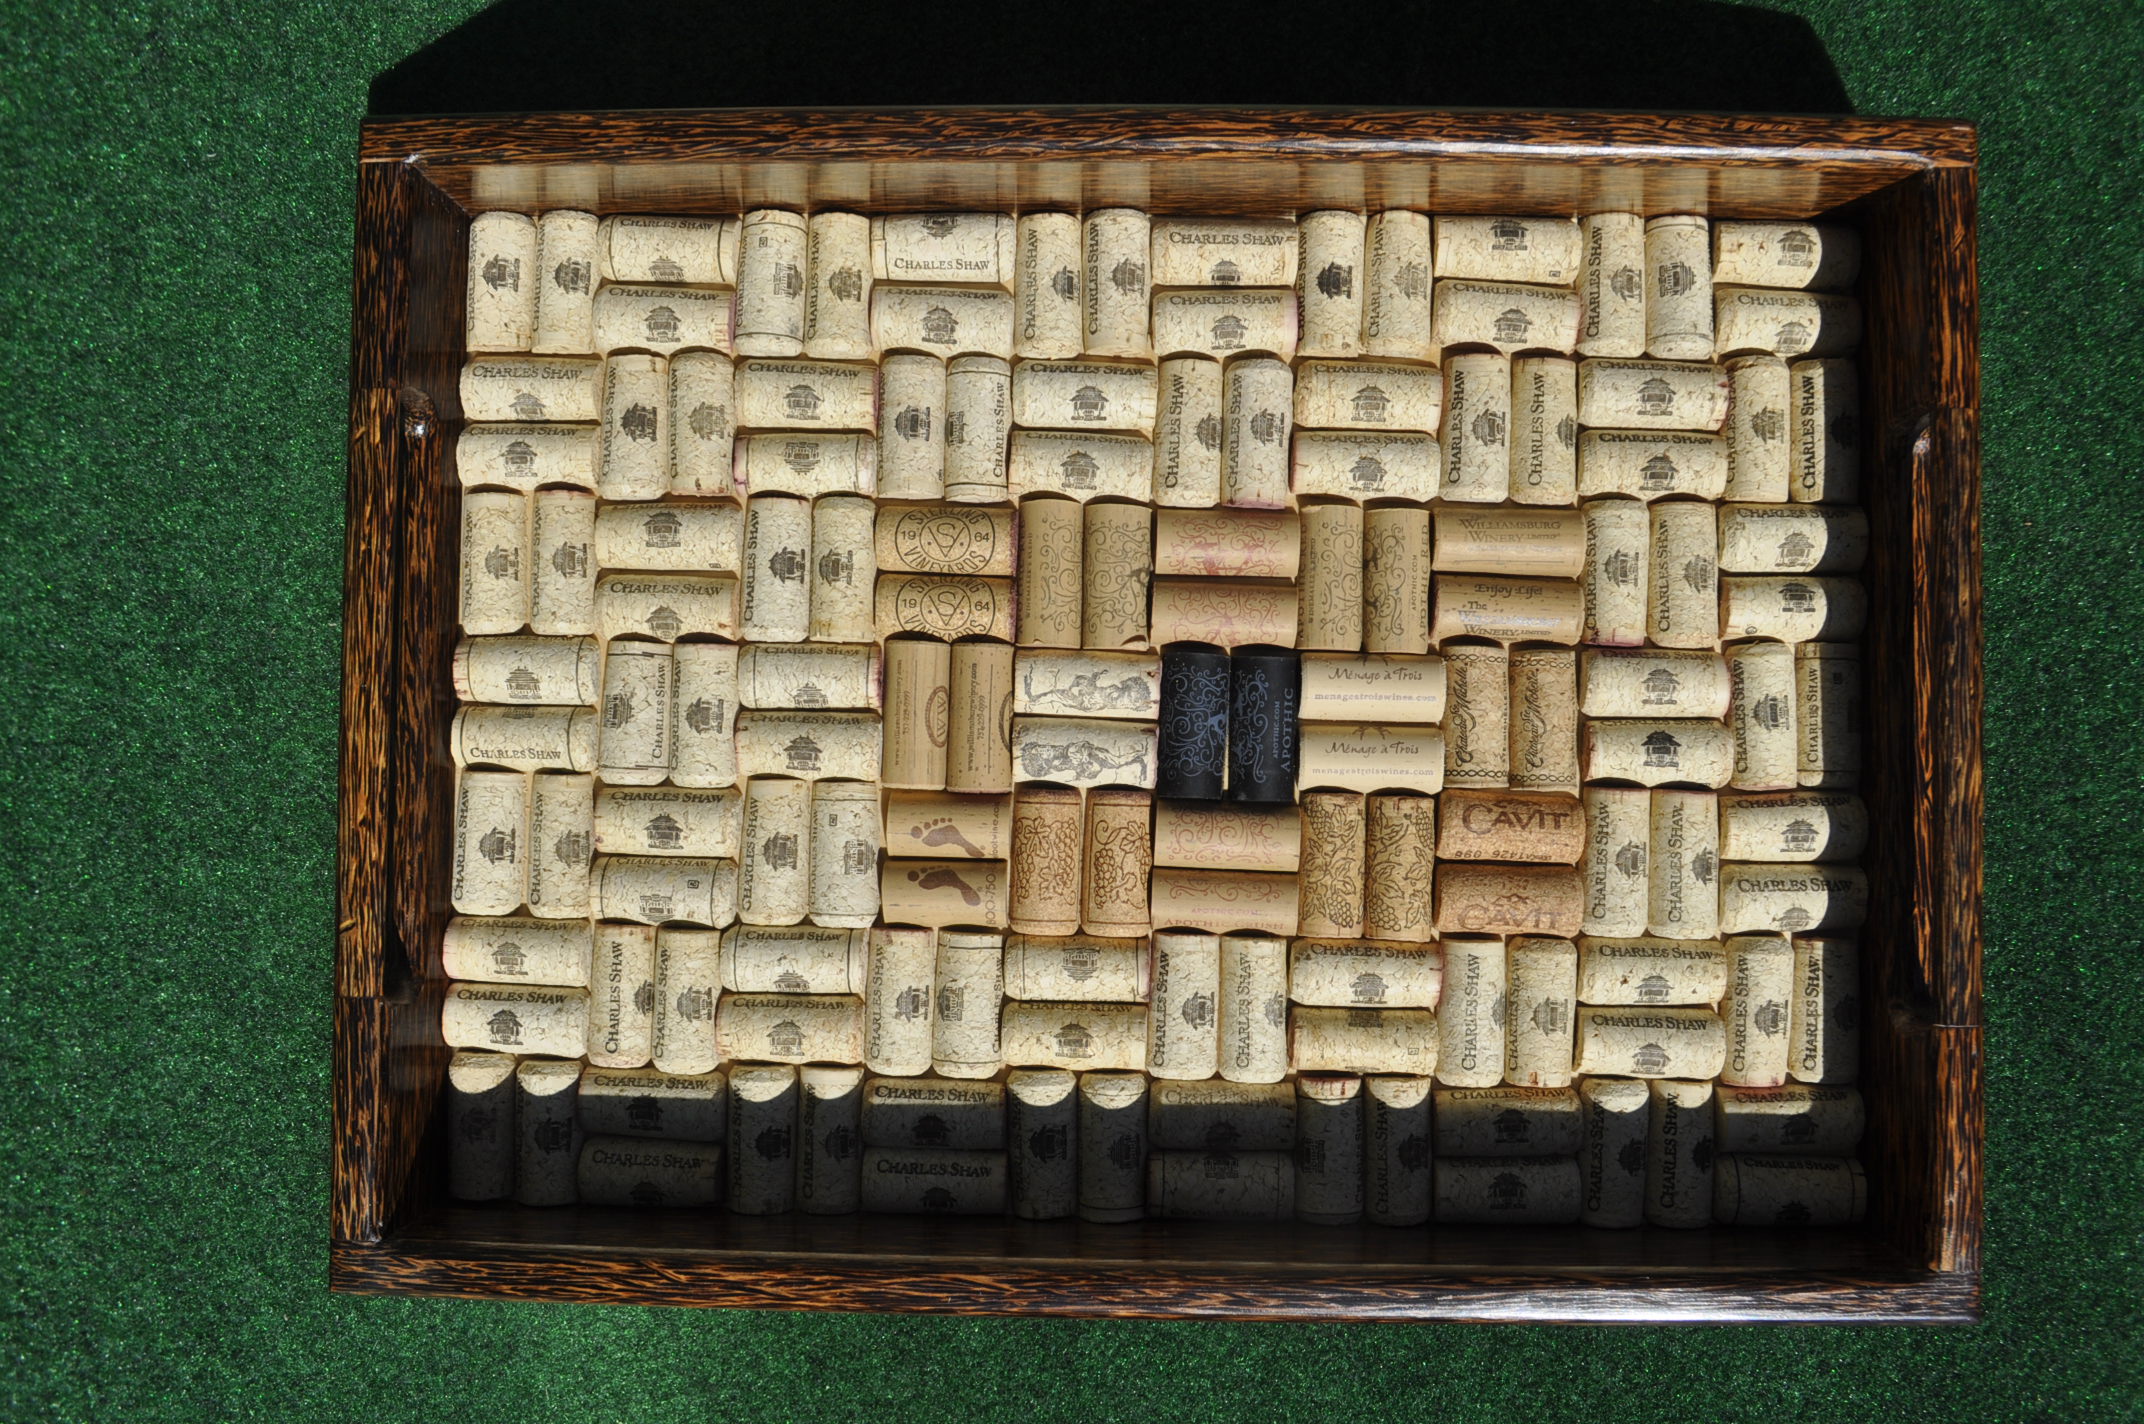
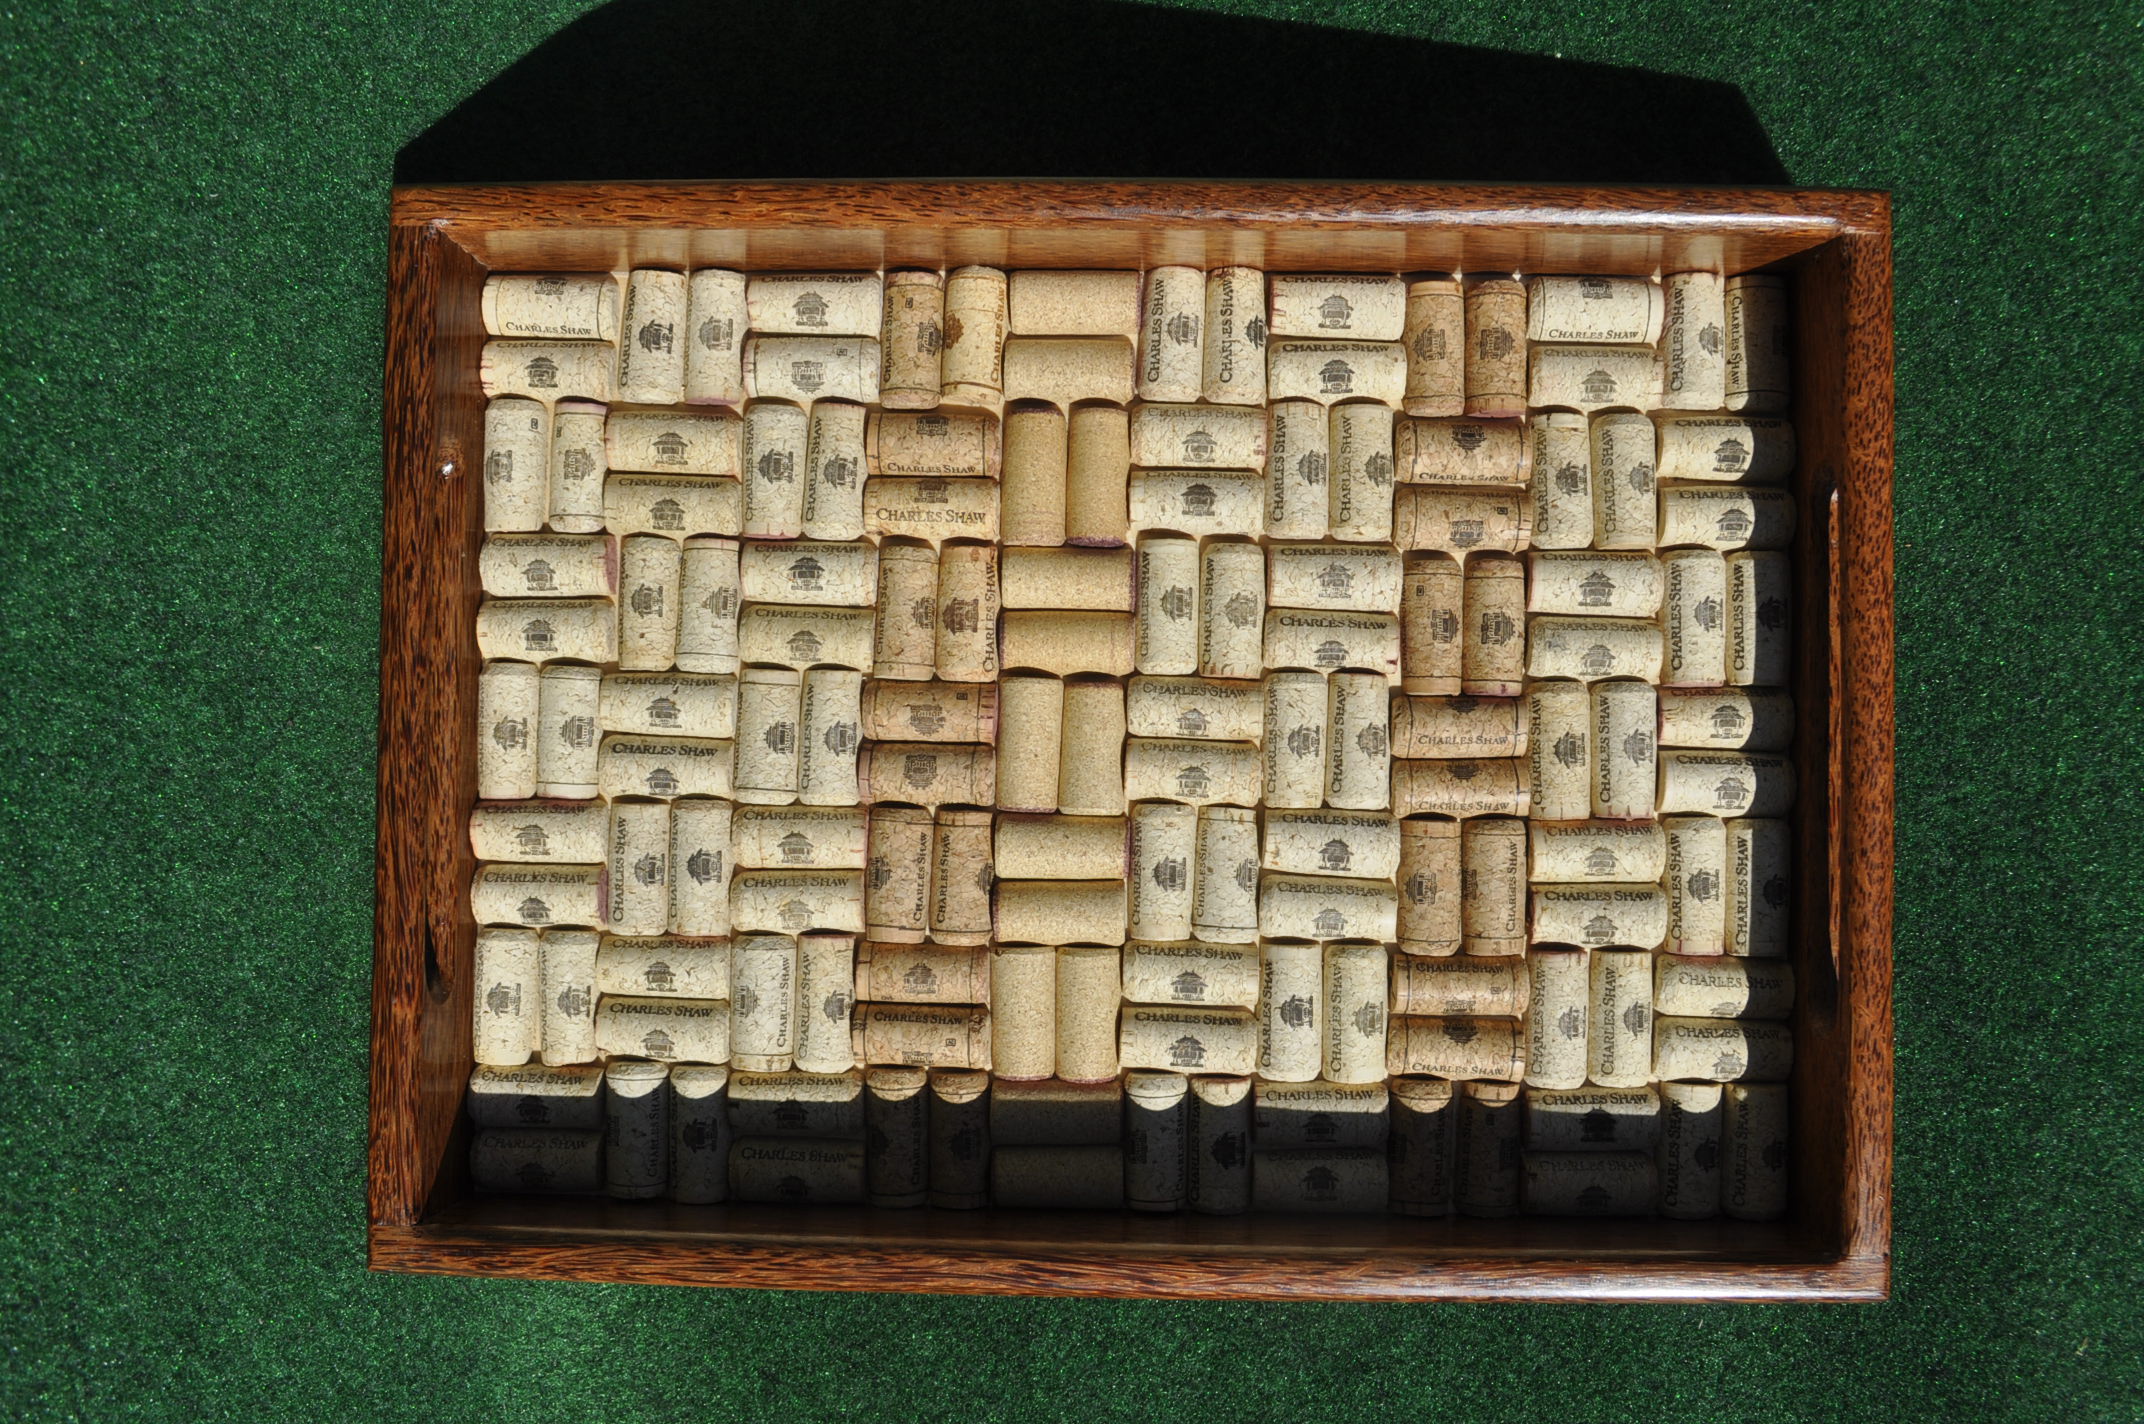
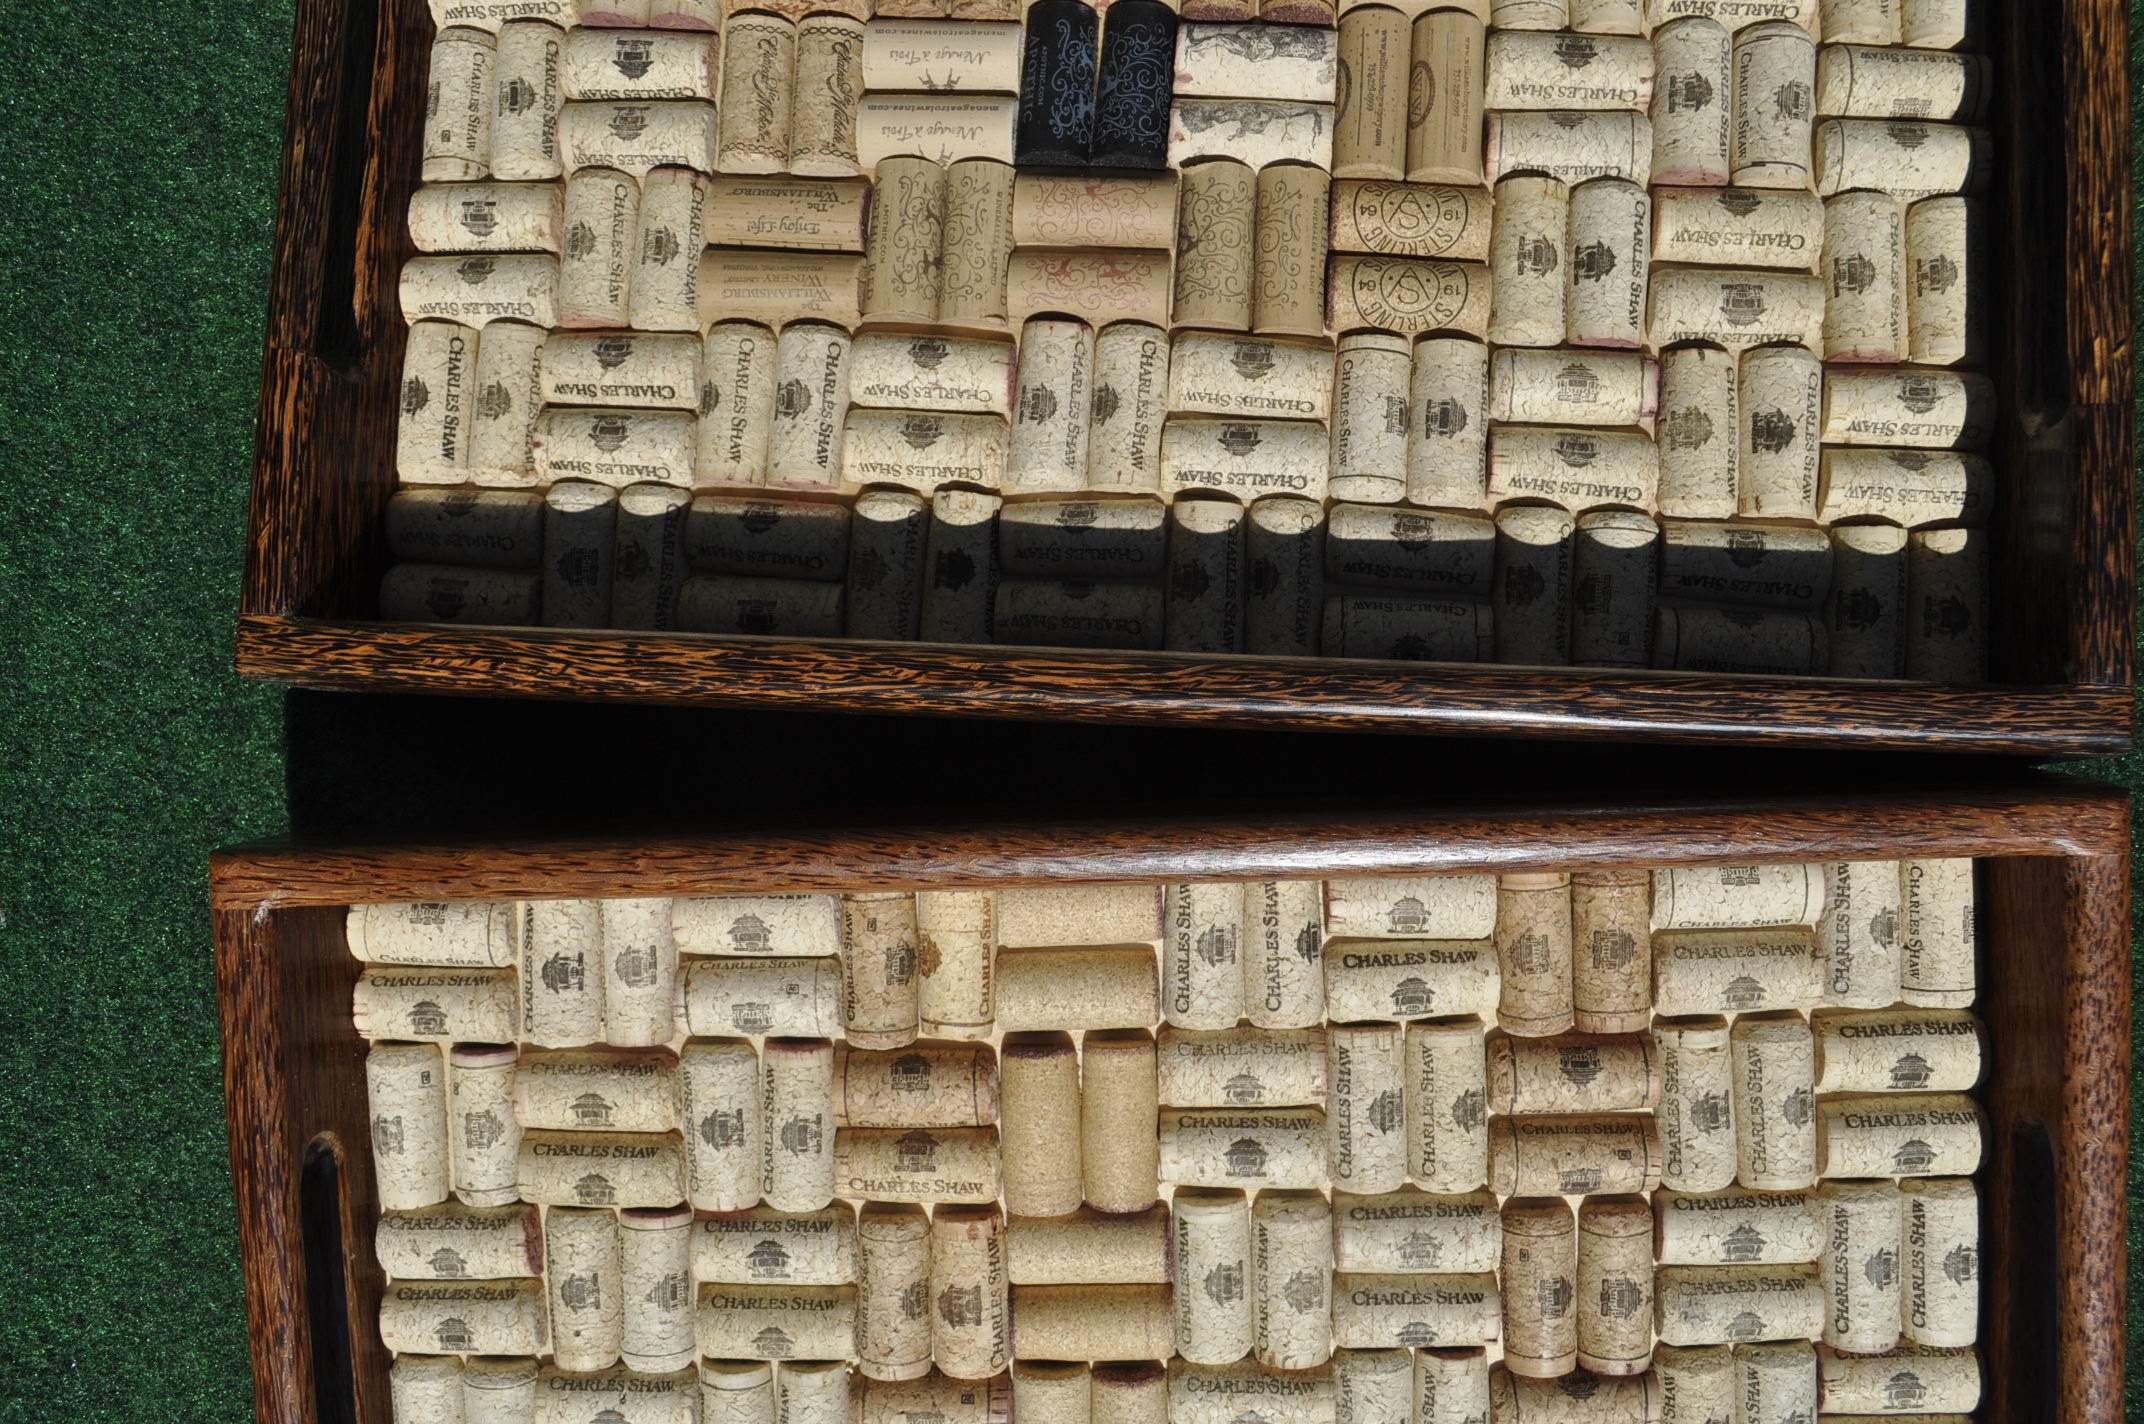
At first glance this wooden cross looks very complicated but it is really simple. The back of the cross is just a piece of plywood that I used to secure the small parts. While it looks like a lot of parts, there are only two sizes of parts that I had to work with. The four squares on the cross are 2 ¾” square and placed on the cross in a 45 degree orientation. All of the other parts are the same, 2 ¾” long by 1” wide with a 45 degree cut on both ends. The small parts were easy to mass produce. The most tedious part of the project was the gluing of the small parts to the plywood backing. It was very hard to get them aligned up properly as they always wanted to move because of the glue surface. Palm Wood Serving Trays With Wine Cork Bottom Black Palm Wine Cork Serving Tray Red Palm Wine Cork Serving Tray In the November 2020 edition of the TWWWG newsletter I did an article on Red and Black Palm “wood”. While the palm wood grows on trees is neither a hardwood or softwood but a monocot or grass. I used finger joints on the ends to give the serving tray a look of special look. The finger joints were easy to make on the table saw but I found the “wood” to be very splintery and I had to watch out for splinters in my fingers. Working with the palm wood was different from normal hardwoods or softwoods. When cutting the finger joints on the table saw my sweat shirt that I was wearing looked like a porcupine sprayed it with hundreds of tiny splinters. When routing the curved edges of the serving tray it sounded like WWW III as the "wood" came off in long splinters and I thought it was going to destroy the wood. After turning off the router I found that the finish on the "wood" was very smooth but full of small splinters. Black Palm (Left) - Red Palm (Right) The palm wood sanded very smooth and almost felt like you were rubbing your hand across a piece of glass. I used General Finishes semi-gloss Arm-R-Seal for the finish. The finish came out beautifully and at first glanced the wood looked like a highly polished piece of plastic that was very smooth. The bottom of the serving tray is covered in wine corks that I split down the middle using my patented (Patient #TWWWG2021GLS) bandsaw wine cork jig. I was amazed at how many corks it takes to cover the bottom of this serving tray. The interior of the serving tray is roughly 18" x 13" and it takes 140 corks to cover the bottom. I will need to get back to drinking more wine during this pandemic! The next project comes to us from Larry Cameron. Cherry Shot Glass Cabinet
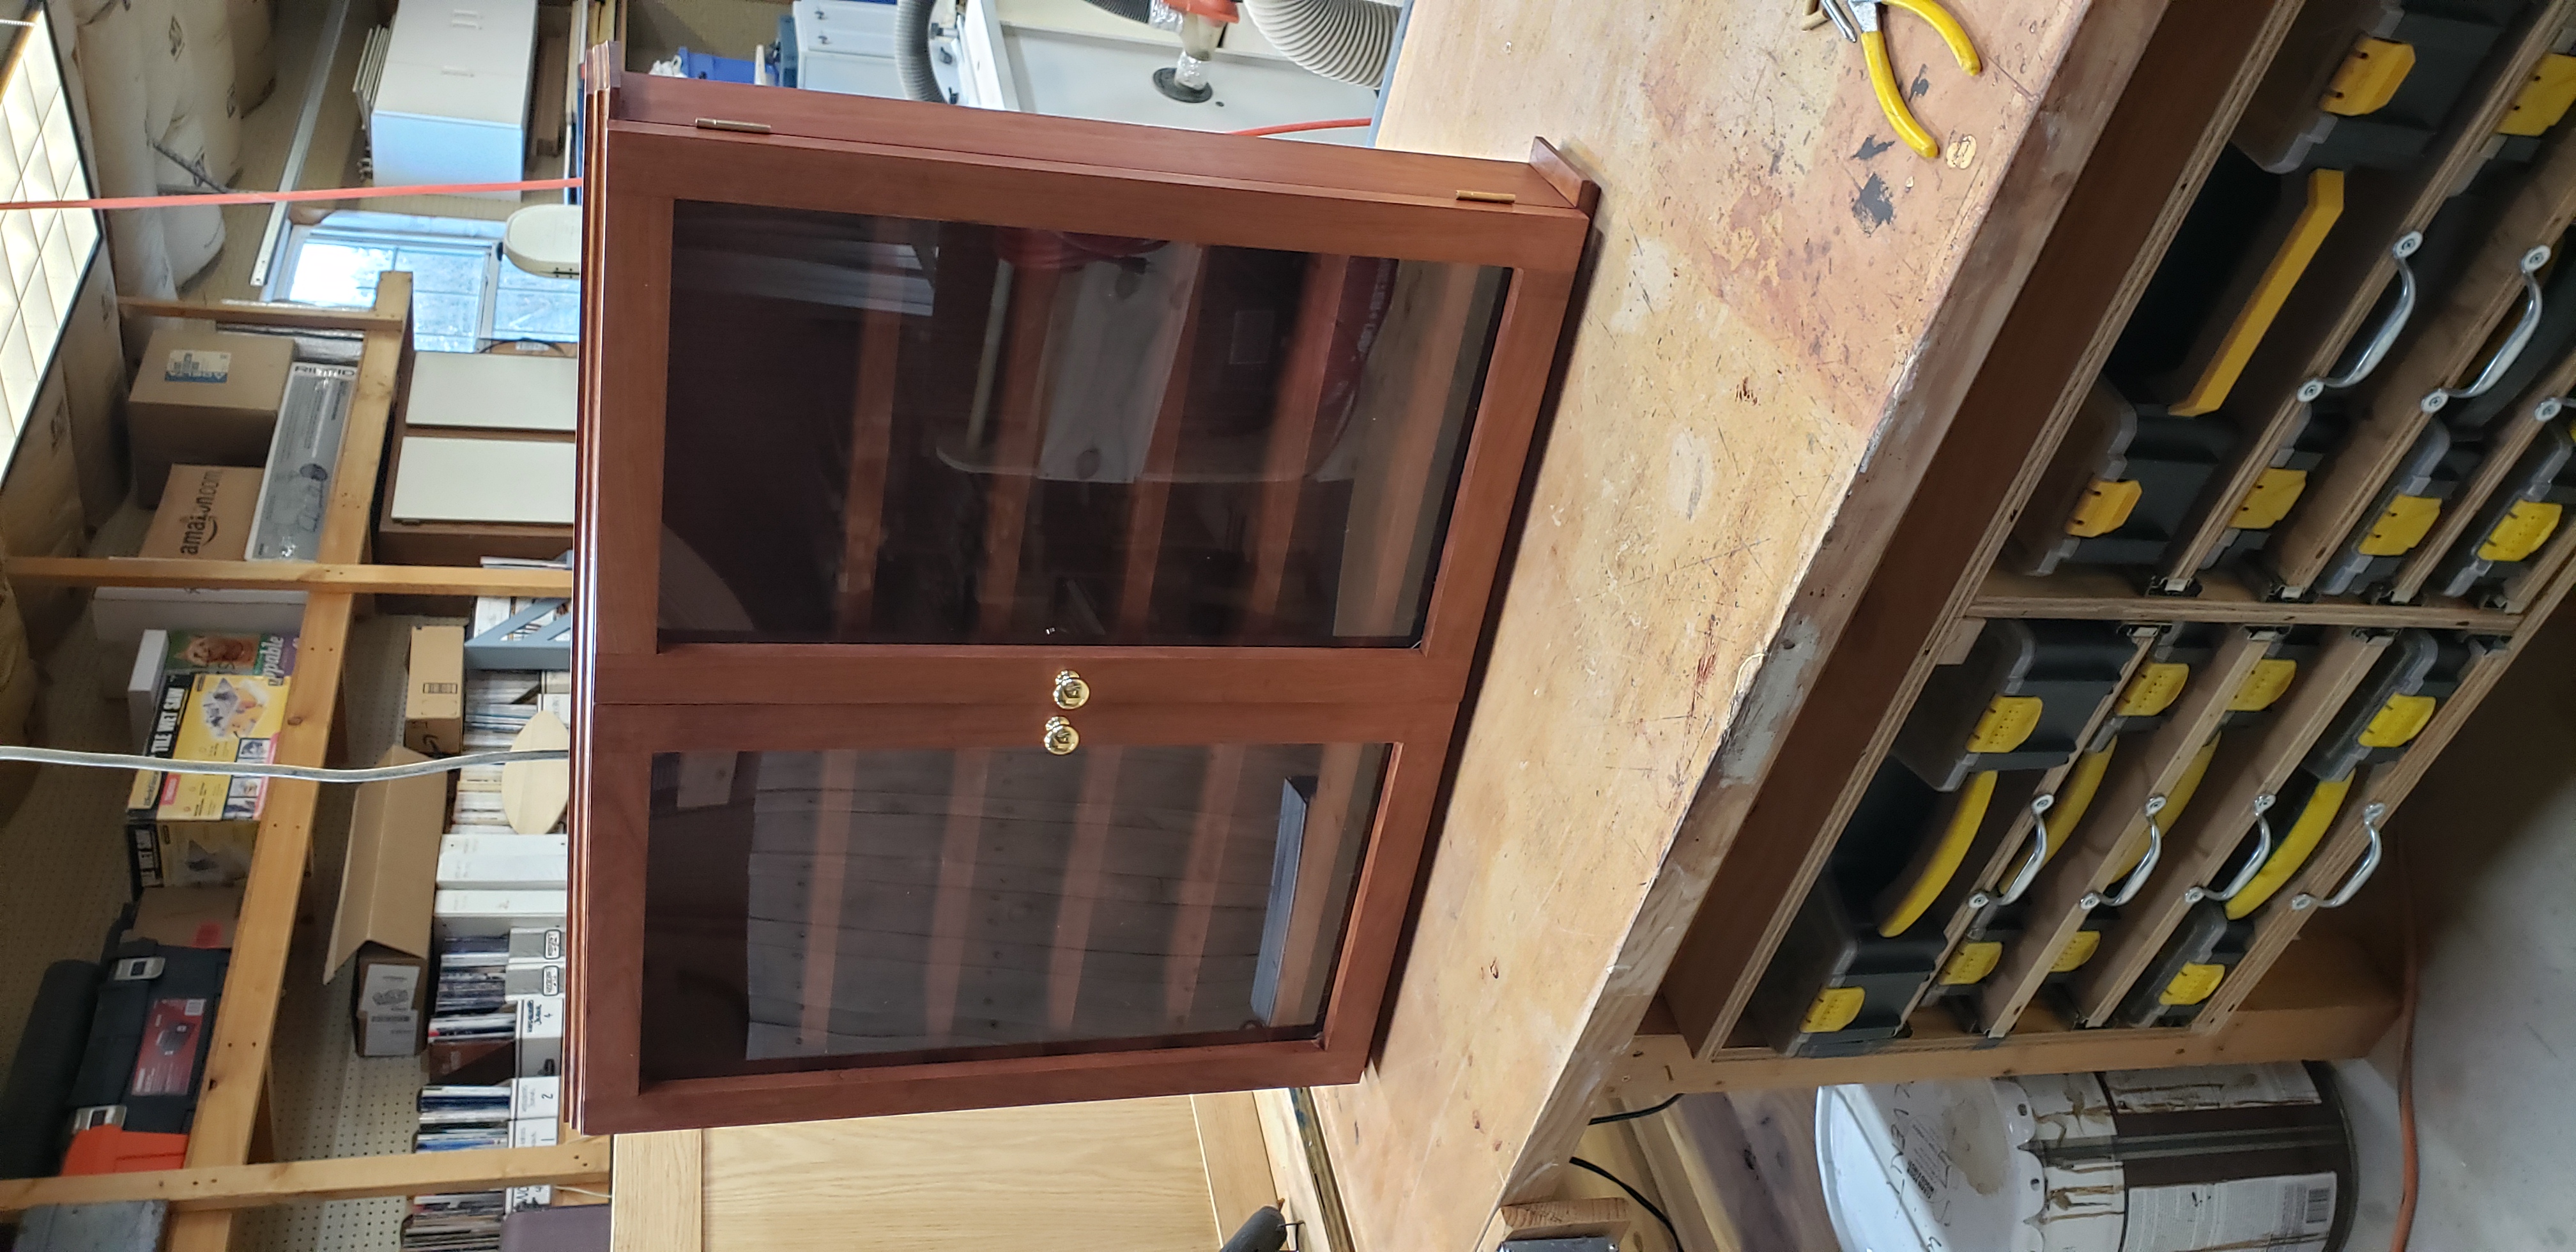
Larry has a large collection of shot glasses he has collected during his travels and he wanted a display case to house them. Because of his love for Cherry wood he chose to make the cabinet out of Cherry. Our last project comes from Greg Guertin Black Walnut Mirror
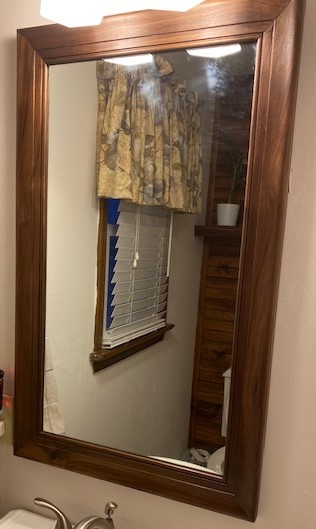
This is a picture I took for a customers master bathroom. It was built from 1” thick Black Walnut. The profile was cut on my router table with a Freud casing router bit 99-465. After all, four pieces were cut to size the ends were cut to accept a Domino. For those who are not familiar with the Domino system a Domino it is Festool’s version of a of a biscuit. The sides and the top and bottom were cut with a groove to accept ¼” thick mirror. Next rabbets to ¼” thick plywood on the backs of all four pieces. These rabbets are ¼” deep x ¾” wide. Next a dry assembly with the mirror glass was done to verify everything fit properly and a piece of ¼” plywood was cut to fit in the rabbet on the back. Frog tape was applied to the surfaces that see glue and everything was dry assembled with the plywood sheet installed to aid in holding everything together while the entire mirror was sanded and finished. After sanding a few coats of shellac were laid down followed by a few coats of lacquer. After a few days of curing final assembly was done using Old Brown Glue. Frog tape was carefully placed on both sides of the glue joints to capture any squeeze out.. After allowing the glue ample time to cure an aluminum Z Clip (Panel Clip) was installed on the back and the half went to client when mirror was delivered. Everyone was happy and I got paid and I became happy too. That’s all for now folks.
|
||||
|
January Safety Notes Generally we start off the January meeting with dues paying and going over safety in our shop. Well, COVID-19 changed all of the rules in 2020 and probably for a good while in 2021 but safety is still very important to the woodworker right now even during the pandemic. If you want to look over the safety information for 2021, go back to the January 2020 newsletter and review the info. It might save your sight, hearing or lungs in 2021. That being said I wanted to add a couple of items to shop safety for 2021. Hearing Protection: Hearing protection was well covered in the January 2020 newsletter but I have uncovered some new hearing protection to add to the article. I kept seeing ads for ISOtunes hearing protection so during the pandemic I bought a Bluetooth headphone package called ISOtunes Link. Cost of the headphones was about $70.00. The headphone protection provides up to 24 dB of noise protection and they let me listen to my music via Bluetooth. Before purchasing the Link unit I used to use the 3M ear muff with AM/FM radio built in. These ear muffs provide about 24 dB of NPR but they tend to be heavy after a while and my ears get very sweaty. I utilize the ISOtunes Link headphones with a product from Scandisk called Clip Sport. The Sport unit is very compact and was intended for use with people working out that did not want to be burdened with large bulky units like a cell phone. The Sport unit has 16 Gb of storage which means that I now have 83 music CD’s on it with 3 Mb of storage left over. The Sport unit was purchased on eBay as a refurbished unit for about $25.00. ISOtunes LINK SanDisk Clip Sport Air – The final thing that we need to look at in terms of safety in our shop during the pandemic is the air we breathe. It’s not the saw dust we see on the floor that is harming us but the invisible saw dust and possibly the COVID-19 virus floating around that shop. During the pandemic most of us have become accustomed to wearing a mask when out in the public but I was curious about how these inexpensive surgical masks protect against COVID-19 and the small airborne dust particles in our shop. N95 masks will capture 95% of the airborne particles passing through it. This means the N95 mask will capture particles as small as 0.007 microns – 10 times smaller than the COVID-19 virus. The surgical masks don’t work as well as the N95 masks but they are cheaper and more readily available. From the info I was able to get off of the web they are anywhere from 60% to 80% as effective when compared with the N95 masks. It all depends upon the fit of the mask. Good respirators are still your best bet in the workshop.
|
||||

