Copyright 2022
Tidewater Woodworking President: Fran Foster, Vice President: Greg Guertin, Treasurer: Chris Zuchristian, Secretary: Larry Larue
  |
||||
| Web Links | At the Meeting | Last Meeting Notes | Tip of the Month | Editors Notes |
|---|---|---|---|---|
What's In The Newsletter?
|
||||
Presidents Report ...Our guild is continuing to increase in size. We now have around 50 members and 122 folks on our email list. Considering how membership and participation in most organizations dropped during the pandemic, our guild stayed connected via Zoom initially and then started meeting both virtually and in person. To say that everyone who has returned is excited is an understatement! The personal interactions were sorely missed and many new people interested in joining started attending our meetings. It seems like the pandemic resulted in many people picking up woodworking as a hobby and were looking for a way to connect with other woodworkers. If you have not attended one of our meetings, we invite you to check us out. We meet on the 4th Monday every month at Woodcraft. The dues are very reasonable at $20 per year and if you join after June, it drops down to only $10. The discounts you can receive by being a member at many locations including Woodcraft will more than pay for the dues, but the real payback is the wealth of information you can gain by talking with the members or observing the interesting presentations. We look forward to seeing you soon. This email address is being protected from spambots. You need JavaScript enabled to view it. Fran Foster President TWWWG |
||||
What Really Happened To Iconic Tool Brands Porter Cable, Delta & Craftsman?While looking for some woodworking information on the web I came across a recent article on You Tube by Stumpy Nubs titled “What really happened to iconic tool brands Porter Cable, Delta & Craftsman?”. If you like history on some of the tools that you own I would suggest listening to this 16:50 minute video. It traces the beginnings of these tool brands, what made them famous and what changed them after big corporation gobbled them up. Very interesting listening. If you want to listen to this video just click the link What Really Happened To Iconic Tool Brands Porter Cable, Delta & Craftsman? Gary |
||||
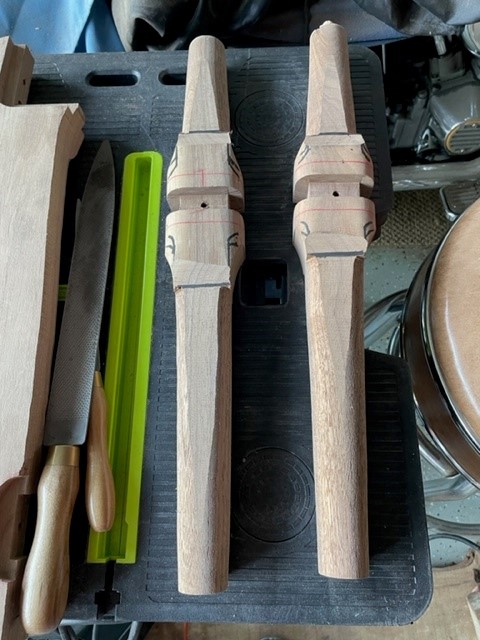
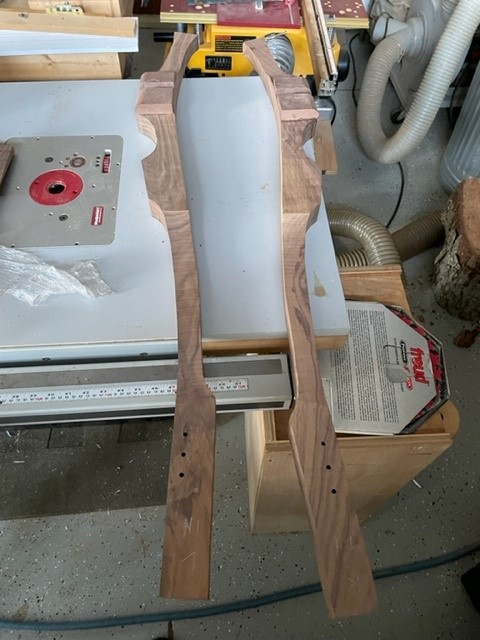
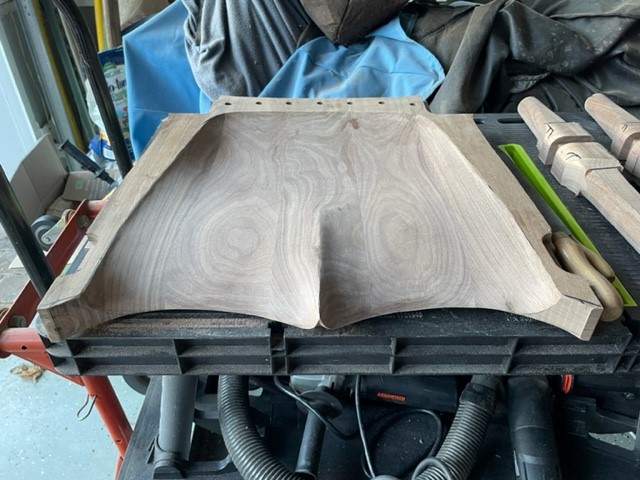
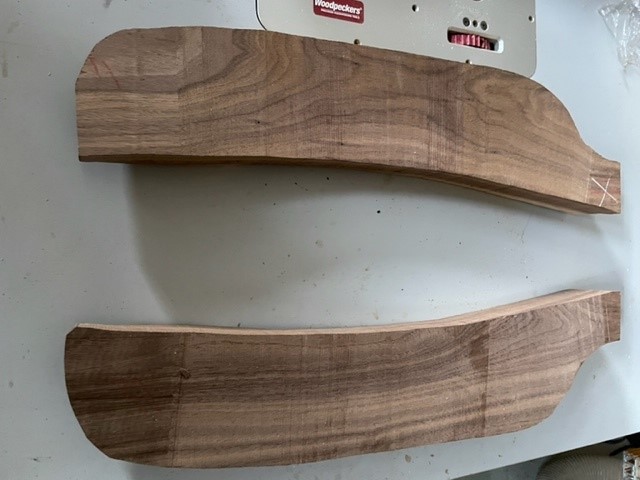
Building a Sam Maloof Inspired Rocking Chair By Scott Paris: Part IIWell progress is being made albeit slower than I would like. As a lot of the work has been shaping. I have been doing it out side of my garage/shop to minimize dust etc., and it has been plenty hot, even in the shade. I have the seat about 90% done as far as the shaping is concerned. There still needs to be a lot of sanding, but that will come later. The pictures below shows the seat, legs and arms. Also cut out are the legs which you can see below. However, I have run into a small problem. Since I cut out the legs and fitted them to the seat, the recent humidity has swollen the joints to the point where the legs no longer fit. So what was once a nice snug fit is now too tight of a fit. So my plan is to move the parts to a lower humidity area so they will shrink enough to fit back together. A Look At The Front Legs (Left) & Rear Legs (Right)
A View Of The Unfinished Seat As I cannot attach the legs right now, I will be working on the arms which you can see I have cut out below. Like the seat, some of the sculpting can be done on the individual parts without being attached to the chair. So I will be working on these arms getting as much sculpting done as I can before attaching them to the chair. I still can connect the arms to the front legs to help with that transition some. We’ll see how that goes.
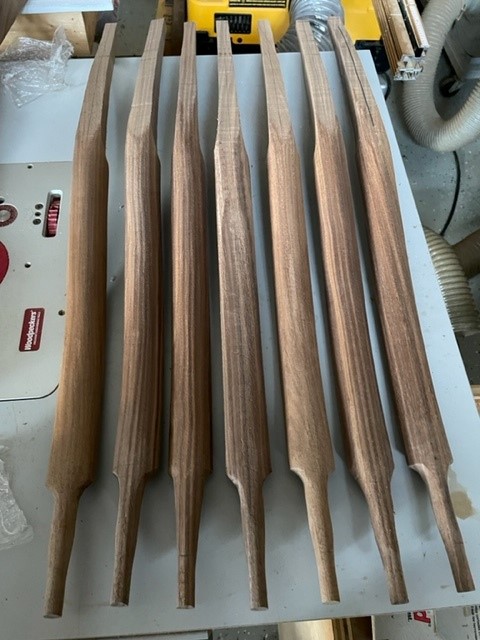
A View Of The Unfinished Arms I have also finished the basic shaping of the spindles. There will be some more refinement once I am ready to install these, but more on that later. You may be able to notice that one end has been tenoned. The ends have different size tenons, one a 3/8” and the other is a ½’. I used a tenoning cutter for this. It is like a giant old fashion pencil sharpener.
A Look At The Spindles At this point I think it this might be a good time to talk about what tools I am or have been using to build the rocker. Most of the heavy work was done with your standard power tools used to dimension lumber. If you start with rough sawn lumber, then a jointer, planer, and table saw. The bandsaw is used primarily to cut out the parts from the patterns. When cutting the 3 degree bevels on the seat pieces, you can use either the table saw or jointer. I used a jointer as it provides a finished surface for gluing. Another power tool used is a router. A router is used to make the joinery for the legs and seat. In addition, I also used the router to give me a ¾” round over on the sides and rear of the seat bottom. However, the tools noted above for the most part just get you the parts cut and ready for assembly. Most of the work and time will be spent doing the sculpting of the rocker. Here you just need to use whatever tool, power or hand tool that will get the job done. For the spindles, I basically used 3 tools, a spoke shave, rasp, and scraper. The front of the spindle has a nice round convexed surface while the back is has a much more rounded shape. I started with the spoke shave as I can get to the basic shape I am after quicker. The shape is then further refined using a rasp. I use an Auriou 12” 10 grain cabinet rasp. I then further refine the shape and clean the surface up with a scraper. With some experimenting, I found that a thinner more flexible scraper worked best given the curvature I was working with. For the seat, I have used a combination of some power tools and hand tools. As mentioned in the previous article, I used a bandsaw to cut some of the seat boards prior to glue up. However, there is still a lot of material that still needs to be taken out and shaping to be done. I used my Arbortech carver for a lot of the heavy work, particularly in getting the seat sections flowing together. Power sanding with 40 grit paper also does a good job at shaping with less material being removed than with the carver. As I have a lot invested in this rocker, I was a bit cautions using the Arbortech as you can go too far real fast. I felt much more control power sanding with the 40 grit. As for the front where the thigh relief is, a lot of this was also done with the cabinet rasp to get the shape right and it is easier to work tighter areas. For the pommel, particularly the underside area, I used an Auriou modeler’s 13 grain rasp. It is small and works well to create that lift under the pommel. I also experimented with various other small rasps and power carving rasps that I had on hand. Round scrapers were also used to help refine the shape. So this is where we are at for now. I have about 4 more months to go. Hope the seat and leg joints shrink back to the point I can reassemble them soon. Scott |
||||
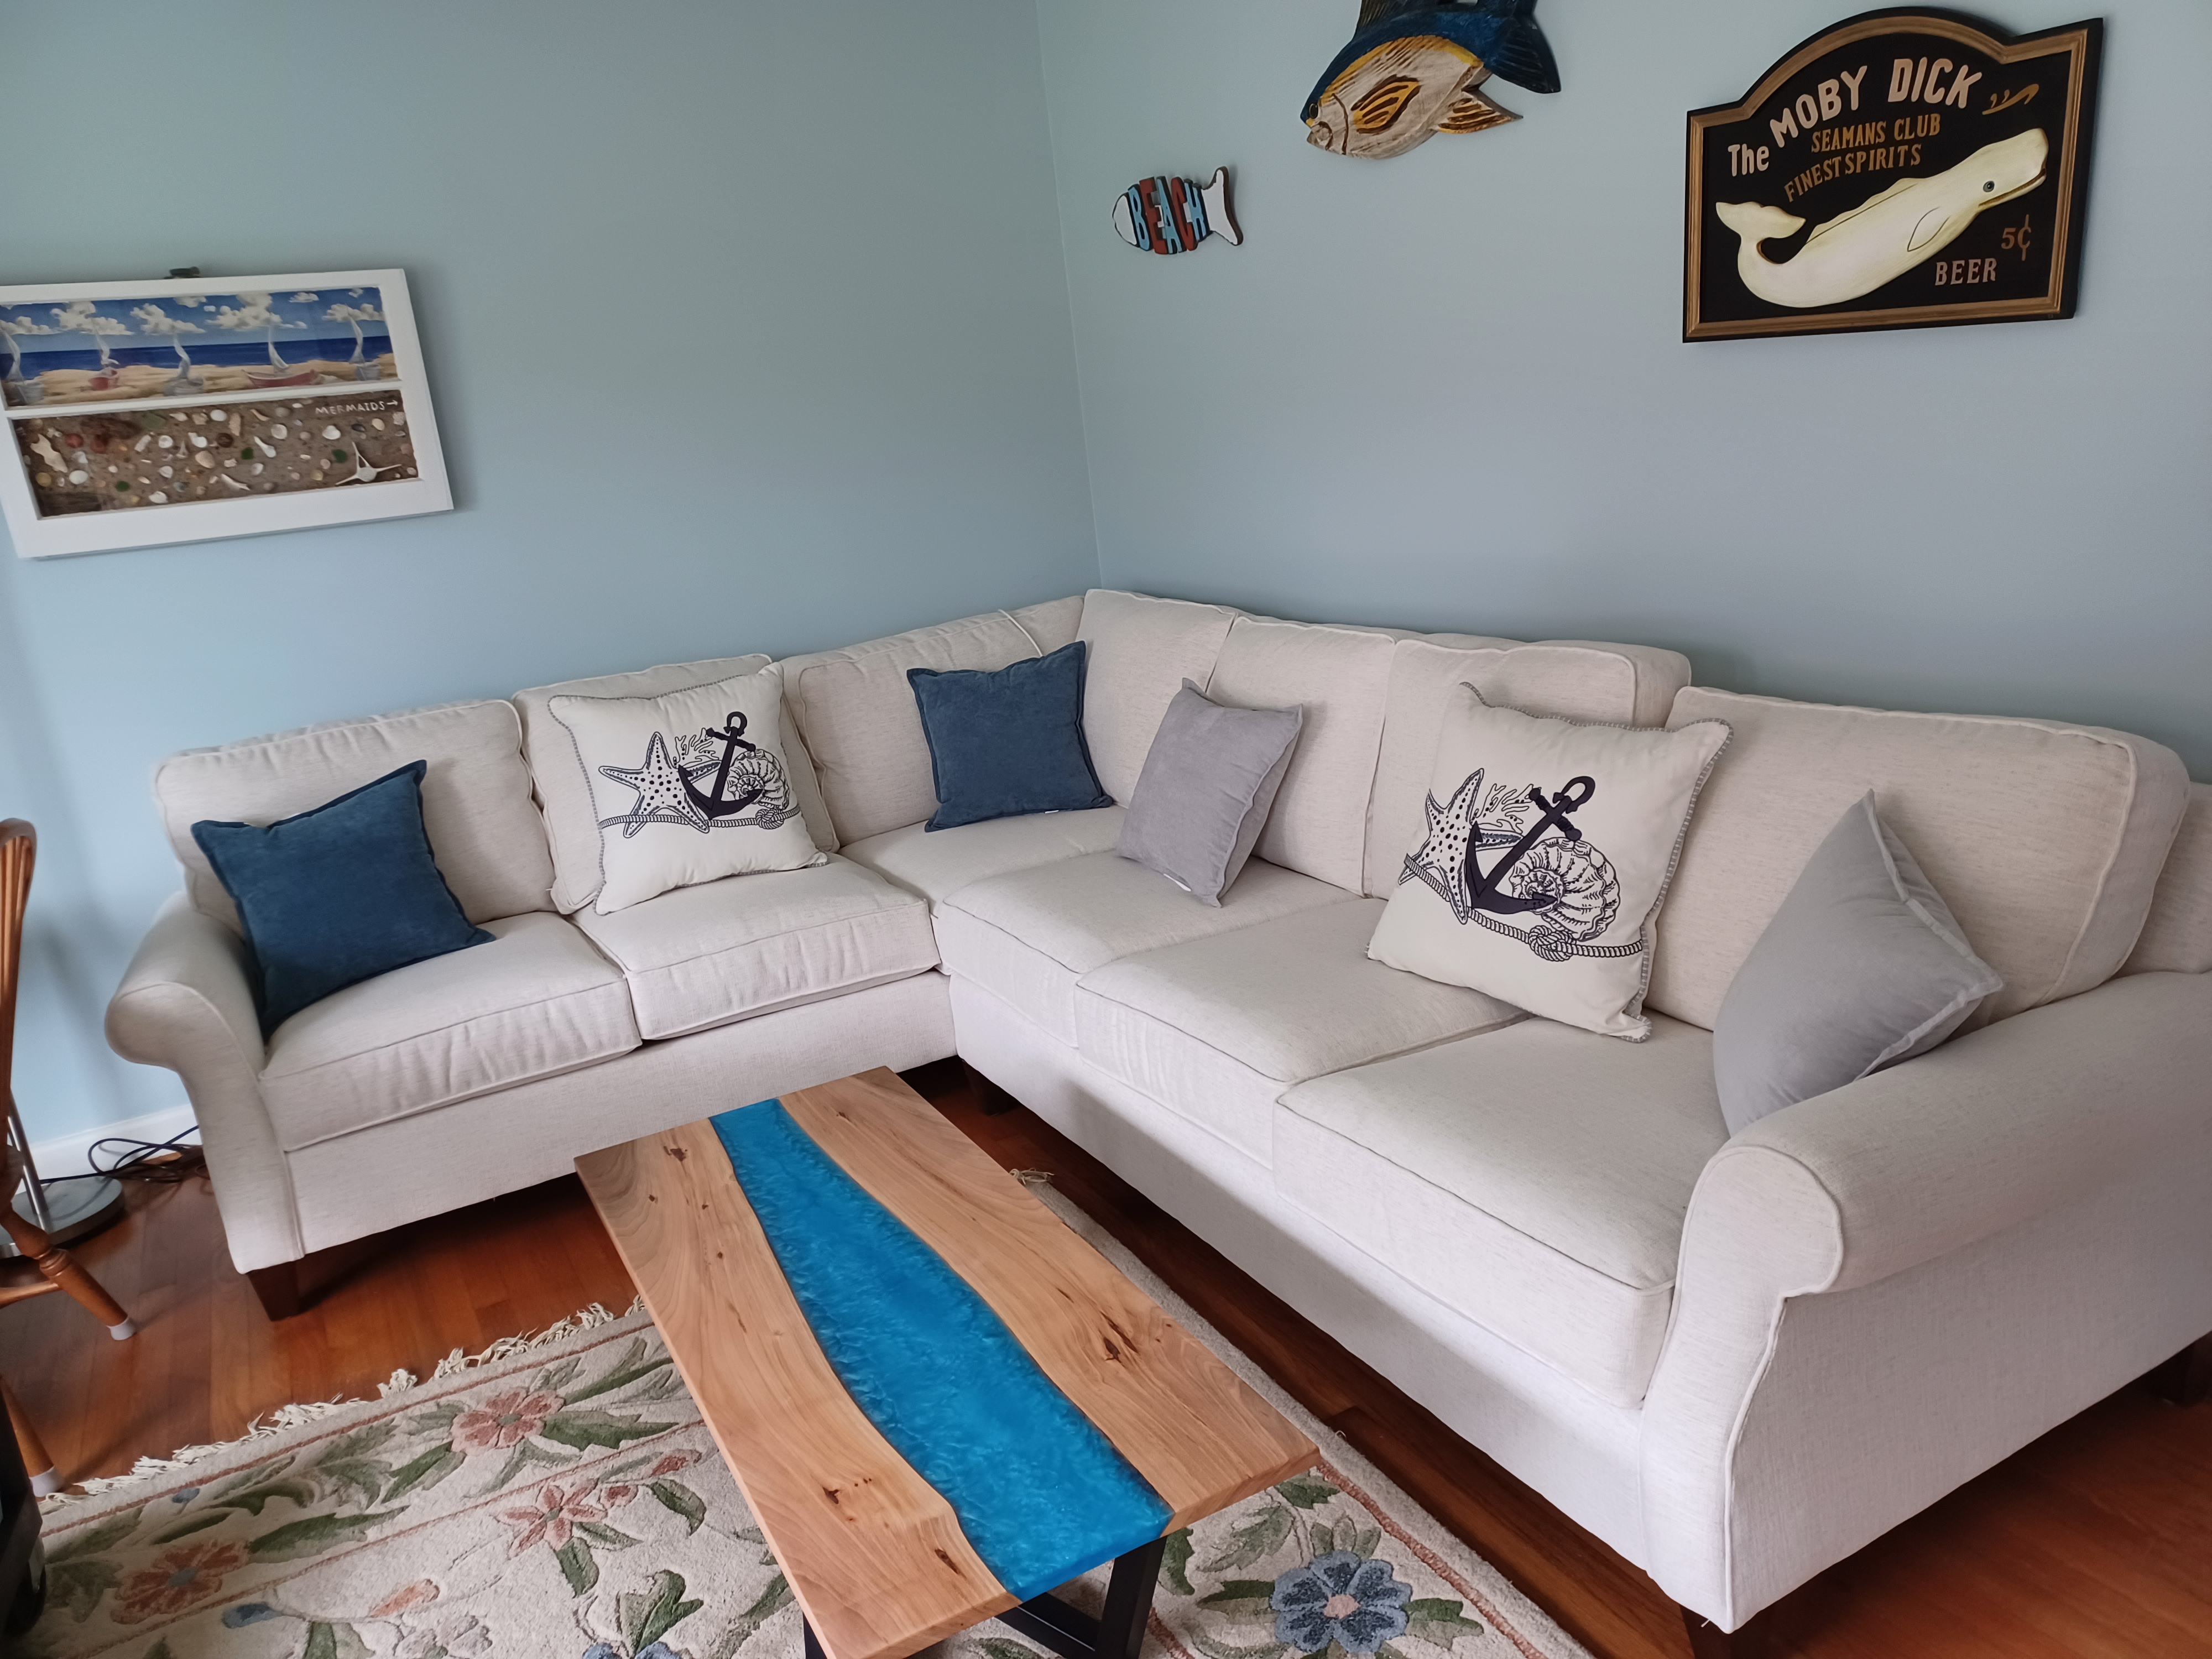
Guild ProjectsOur first project comes from Robert Smith and his River Table.
Robert Smith's River Table
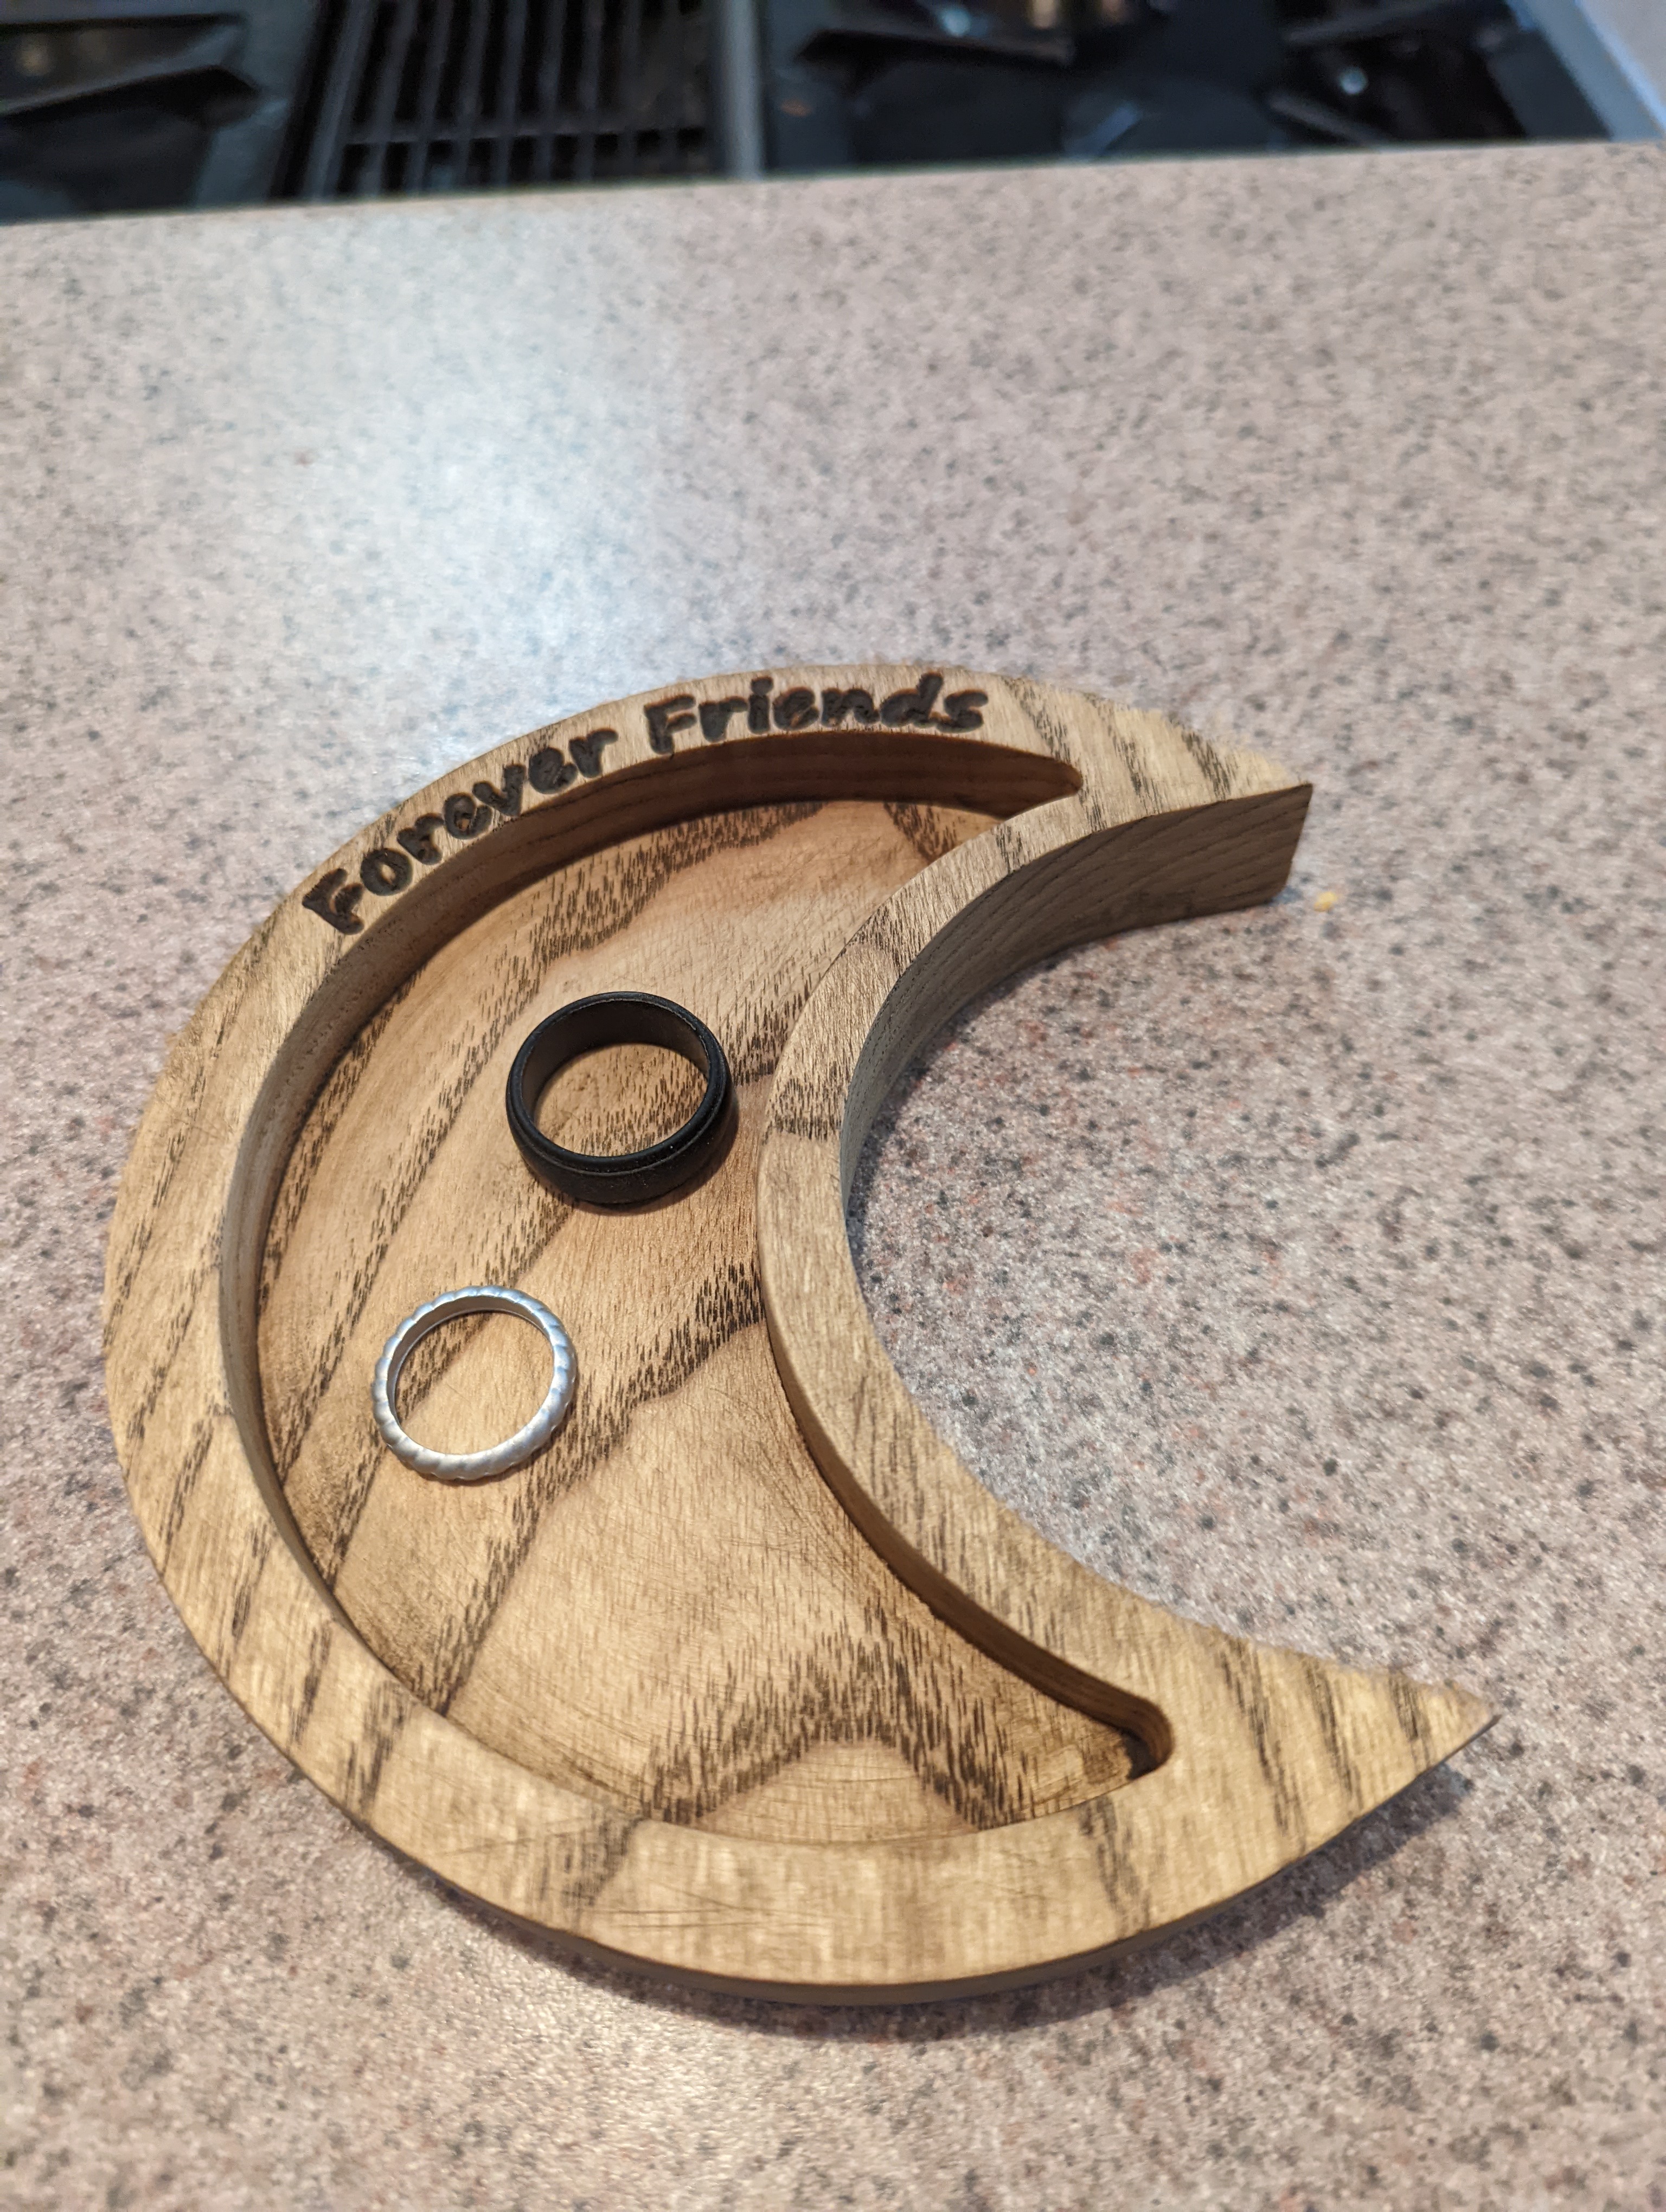
Our second project comes from Chris Zuchristian.
Chris made three of these jewelry trays on his CNC machine for his wife who gave them away as gifts. His wife used Behr antique wax to finish them. |
||||
Somerton Ridge Hardwoods UpdateAs I was researching the cost of some lumber I came upon this post from Chris Vickers of Somerton Ridge Hardwoods on his Face Book page. It seems like he is also the victim of the "I can't find people who want to work for a living" syndrome. I see this in the delivery of our morning newspaper, the lawn service, trash pickup, etc. I’ve had to make some tough decisions, which I assure you has not come easy. Due to demand that I cannot meet without additional days in the week and hours in the day, I will be suspending all lumber sales. I have put together lumber to be sold as a pack and some options with a minimum amount, all discounted prices. Options with minimums will be pulled from the top of the stack, no tossing or looking for the exact board needed. Hopefully he will be able to find helpers in the future and continue to serve the wood working community. Gary |
||||
Vendor DiscountsGreg has been actively looking for vendors that will provide a discount to guild members for various supplies. A basic listing of the vendor will be published in each months newsletter. To keep this from getting too complicated for this newsletter the list will only contain the most basic information on the vendors. To get to the real meat of the vendor discounts you will have to go to the TWWWG web site www.twwwg.com and click on the tab marked "Member Information". Scroll to the bottom of the page and click on the Previous icon. Once on the second page click on the previous link one more time. This should take you to the article called TWWWG Vendor Discounts.
|
||||
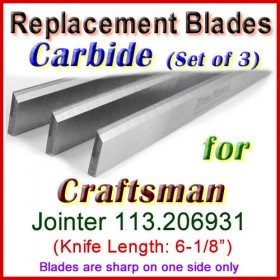
Jointer Upgrade InfoIn the June edition of the Tide Water Wood Workers Guild newsletter Chris Haycox wrote an article called Helical Cutter Head Review for his jointer. I was due to replace the cutter heads on my jointer and wanted to do the same thing, replace the HSS knives with a spiral cutter head but my jointer was too old and this could not be accomplished. While corresponding with www.mywoodcutters.com about this issue they directed me to the HSS cutter head blades for my ‘70’s vintage jointer but they also informed me that these HSS blades were also available in a carbide version. The HSS replacement blades listed at $30 while the carbide tipped blades listed at $105. If you have never had the fun and enjoyment of replacing the cutter head blades in your jointer then you might see why I sprang for the more expensive carbide tipped blades than the HSS blades. For a difference of $75 the carbide tipped blades should last around 10 times longer than the HSS blades. I am glad I made the change and maybe in a few years I will let you know if the blades hold up to their hype. My first test with Maple proved that it was initially a good decision.
Gary |
||||

